Are you considering launching an e-commerce store? Now might be the right time.
While global events caused a surge in online shopping, e-commerce was already booming as more and more consumers shift their spending to digital channels.
In fact, global e-commerce sales are expected to reach $6.3 billion in 2023.
Talk about a growth opportunity!
This is not a trend that’s going away anytime soon, so if you’re looking to start a business in the near future, an e-commerce store is a great option.
In this post, I’ll explain how to have a successful e-commerce store, discuss different types of e-commerce stores and platforms, setting up a Shopify store, and other relevant information on the state of e-commerce in 2024.
Whether you’re just starting out or are looking to expand your business, read on for everything you need to know about creating a successful e-commerce store!
What Is an E-commerce Store?
An e-commerce store is a business that sells products and services on the internet.
This can include anything from physical goods to digital downloads, and there are a number of platforms you can use to set up your store, like Shopify or Magento.
E-commerce stores can exist in several different formats, such as in online marketplaces like Amazon or eBay or as standalone websites.
In the past, many businesses either sold products online or in person.
As the online world has become increasingly user-friendly, more and more brands are creating e-commerce stores alongside their brick-and-mortar stores to broaden their customer base and increase their profits. In 2021 alone, over two billion people purchased goods or services online.
Benefits of Having an E-commerce Store
E-commerce stores are a great way to diversify your customer channels and reach more people.
Selling online is also a great way to increase profits, as you can reach a larger audience than through traditional retail methods.
According to the stats, there are 268 million digital buyers in the United States, and this number is forecast to increase to 285 million in the near future. There’s no doubt about it: if you want to get in front of vast numbers of customers, you need to be online.
In addition to reaching more people, e-commerce businesses offer many other benefits, including:
- 24/7/365 availability: Customers can look at goods at any time, no matter their time zone.
- No geographical limitations: Customers can shop from anywhere in the world.
- Variety of products: E-commerce stores often offer a much larger selection of products than traditional retail stores.
- Customized shopping experience: Customers can shop according to their own needs and preferences.
- Direct-to-consumer sales channels: With e-commerce, you don’t need to go through any middlemen, reducing prices for you and your customers.
- Faster response to market demands: Since e-commerce storefronts are digital, e-commerce owners can update their stores much more quickly in response to customer needs and demands.
What does this all mean for you? If you want to know how to have a successful e-commerce store, you’re in luck! Whether you’re selling purely online or you’ve got a brick-and-mortar store, e-commerce has numerous benefits, including:
- a wider audience
- lower costs
- open 24/7
With an e-commerce store, there are several different platforms to choose from, each with its benefits and limitations.
Let’s dive into those below.
E-commerce Store Platforms
The first step in creating an e-commerce store is choosing a platform.
There are a few different types of e-commerce platforms: hosted, self-hosted, and hybrid.
- Hosted platforms: Hosted platforms are the most popular type of platform. They’re owned by a company, and you have access to their tools and templates to create your store. These stores are usually easy to set up and come with built-in features like payment processing and shipping. The downside is you’re limited to the features offered by the platform, and you can’t customize your store as much as you’d like. Popular hosted platforms include Shopify and BigCommerce.
- Self-hosted platforms: Self-hosted platforms are platforms you host on your server. These give you more flexibility to customize your store, but can be more complicated to set up and require more technical knowledge. Popular self-hosted platforms include WooCommerce (for WordPress) and Adobe Commerce (Powered by Magento).
- Hybrid platforms: Hybrid platforms are a mix of hosted and self-hosted platforms. They give you some of the flexibility of self-hosted platforms but with the ease of use of hosted platforms. The enterprise commerce product Shopify Plus is an example of a hybrid platform.
Which platform should you choose? The answer to this question depends on your needs and technical knowledge.
If you want a lot of flexibility to customize your store, then a self-hosted platform is a good choice.
If you don’t have a lot of technical knowledge or don’t want to deal with the hassle of setting up and maintaining a store, then a hosted platform is a better choice.
Types of E-commerce Stores
Once you’ve determined which hosting option suits your needs best, it’s time to figure out which type of e-commerce store you want to create.
1. Individual Brand E-commerce Stores
There are 2.5 million online individual retailers in the US alone.
An individual brand e-commerce store is a great option if you want to create a unique shopping experience for your customers.
This type of store allows you to control the look, feel, and functionality of your shop, which gives you more flexibility to create the exact customer experience you want.
You also have complete ownership of all the data collected on your site, including customer information, which can give you a competitive advantage over larger e-commerce stores.
However, setting up and managing an individual brand e-commerce store can be more difficult than using a hosted platform like Shopify. You’ll need to develop or purchase your shopping cart software, set up payment processing, and manage your hosting and security.
Individual brand e-commerce stores are a good option if you want to maintain your brand’s unique identity and have more flexibility to create the exact customer experience you want.
If you’re just looking to get started quickly, and don’t want to deal with the technical aspects of setting up an e-commerce store, you may want to consider a marketplace or online retail option.
2. Online Retailers
Online retailers are websites that sell products directly to consumers. The most well-known online retailer is Amazon, which sells a wide variety of items. It’s also among the most popular, with 3,700 new businesses signing up every day. Globally, there are approximately two million small and medium-sized third-party sellers on Amazon.
Online retailers allow you to sell your products in their existing stores, and in return, they take a commission on each sale.
This type of e-commerce platform is good for businesses that want to start selling products quickly and easily without having to set up their store.
It can also be a great option if you want to reach a large audience and don’t have the time or resources to create your e-commerce store.
However, you often need to negotiate wholesale pricing and commit to the ongoing production of your products.
If your business isn’t ready to scale up, this might not be the best option for you.
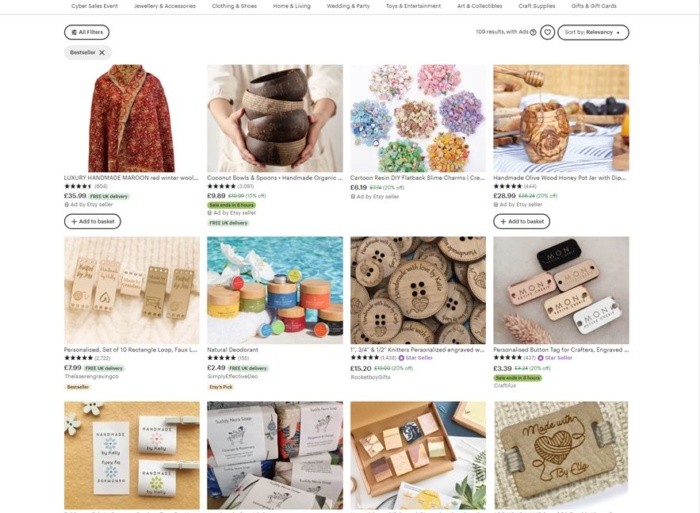
3. Marketplaces
If you want to start selling products but don’t want to set up your store, then consider using a third-party marketplace.
These platforms allow you to sell products without having to worry about setting up and maintaining your shop.
Some of the most popular marketplaces include Amazon, eBay, which has 138 million active buyers, and Etsy with approximately 7.5 million sellers.
The downside of online marketplaces is you won’t have a direct relationship with your customers, which means you won’t be able to fully control the customer experience.
Additionally, the marketplace owns any customer data. This can lead to lost opportunities for building repeat business or using data to drive advertising campaigns.
That said, you can use marketplaces as a supplement to an existing e-commerce store. For example, you may want to sell your product through your website but also offer it on Amazon or eBay.
Using multiple sales channels can help you reach more customers and increase your overall sales.
How to Set Up an E-commerce Store: Your 5-Minute Cheat Sheet
Here’s how you can create an e-commerce website using Shopify.
Why am I focusing on Shopify? If you’re looking for a website builder that is specific to e-commerce, Shopify is king. Millions of people are using these kinds of stores, like Tesla, Pepsi, and Sephora.
Whether you plan on launching a new e-commerce business from scratch or scaling it, Shopify has everything you could need. Plus, it gives you the option to do a three-day free trial!
Users can take advantage of industry-specific templates, custom domains, the drag-and-drop store builder, unlimited products, built-in payment processing, and 24/7 support. These features all show why it’s one of the best.
Then follow these steps:
- After signing up, you have to set up your online store. You can customize it by choosing a theme or layout that works best for you.
- Next, start listing products on your website. This is also where you should pay attention to the product copy (hello SEO!).
- Upload HD-quality photos with your products on a white background. Make sure your images have the same dimensions—it just makes everything look neater.
- Choose your payment gateway, which is a feature that allows your customers to pay via your website. You have to consider the transaction fees, card types, and offsite checkout to know the amount of money you’ll get after subtracting all applicable charges.
- Give your order system a test drive to ensure everything is on track.
That’s it! Your new Shopify store is now ready to rake in the moolah.
Steps to Set up a Shopify E-commerce Store
Without further ado, let’s start with the detailed tutorial! Feel free to jump ahead if you’ve already taken care of the early steps:
- Create Your Shopify Account
- Set up Your Shopify Online Store
- Choose a Theme or a Layout For Your Store
- Customize Your Store Settings
- List Products on Your E-commerce Website
- Manage Your Tax Settings
- Prep To Make Your Shopify Store Live
- Get a Domain Name
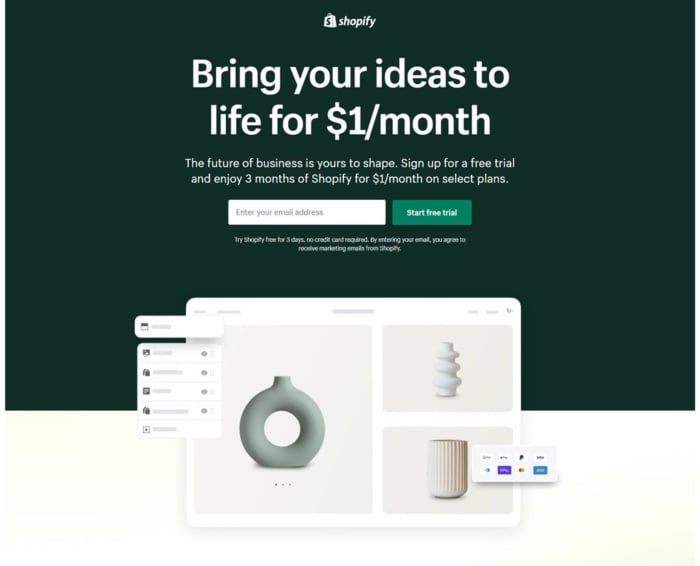
Step 1: Create Your Shopify Account
Head over to Shopify.com, and use the sign-up form to create your account. You can start your three-day free trial after filling in all the necessary details.
You should try to choose a unique store name. However, this shouldn’t be at the cost of simplicity or relevance. If you enter an already chosen store name, Shopify will ask you to put something else.
Once you get the website name sorted, you’ll have to fill in a few other details, such as your name, address, country, and contact number.
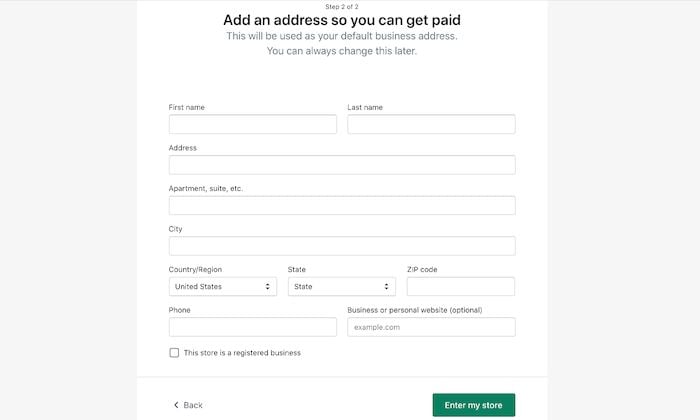
After this initial screening, you have to answer whether you own products, and if you do, what you aim to sell.
In case you’re just trying out Shopify, you can select options like “I’m just playing around” in the “Do you have products?” dropdown menu, or “I’m still brainstorming” ideas in the “What will you sell?” section.
Once you’re finished, click “I’m done”.
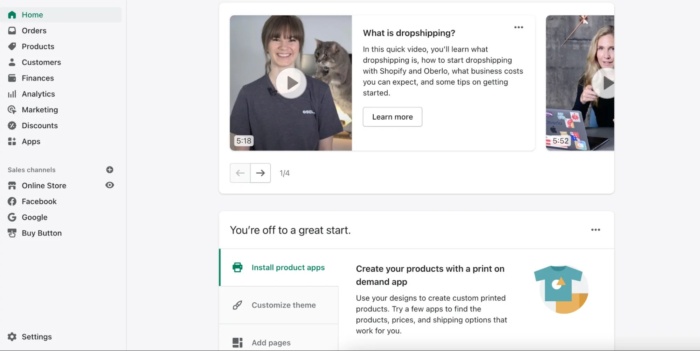
Step 2: Set up Your Shopify Online Store
Once you’ve made your account on Shopify, you‘ll be directed automatically to your store admin screen or dashboard. Your home admin screen will tell you everything you should know to get your site up and running.
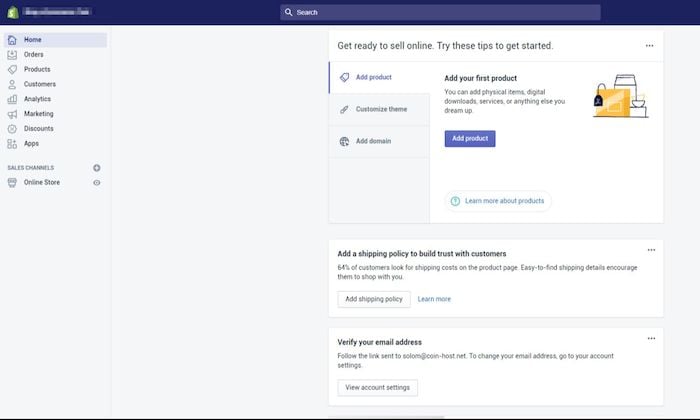
At this point, you can start customizing your store, uploading products, and setting up payments and shipping.
You’ll also find several other options on the side menu bar, but for now, it’s best to stick to the basics.
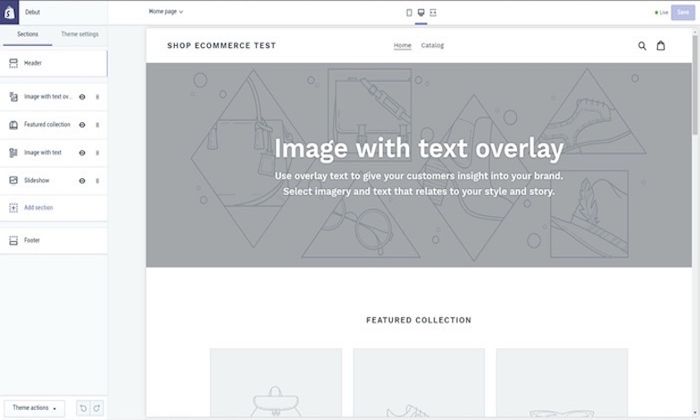
Step 3: Choose a Theme or a Layout For Your Store
Shopify gives you direct access to a plethora of themes thanks to its official theme store.
Each one is guaranteed to have full support from the designers, so you can rest easy knowing your store is in good hands.
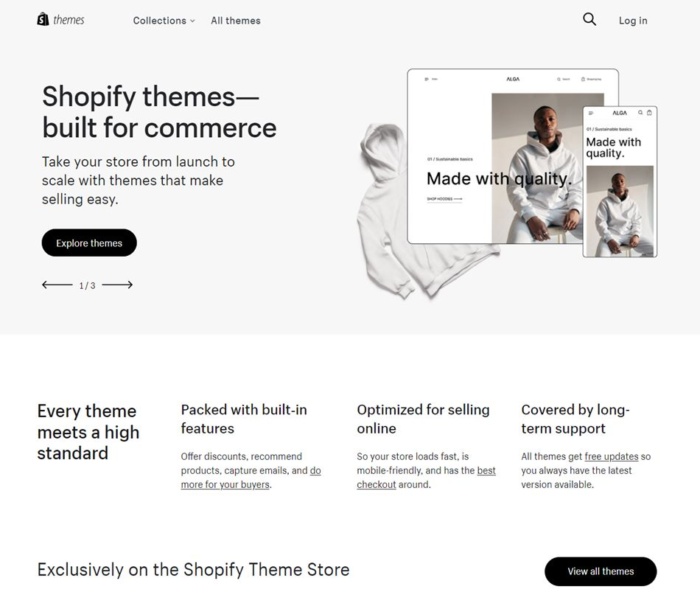
The idea behind choosing a theme is to create a more on-brand website. This will keep your visitors on your website longer and encourage them to explore your products.
Each of these has a comprehensive list of modifications. You don’t need any prior coding knowledge.
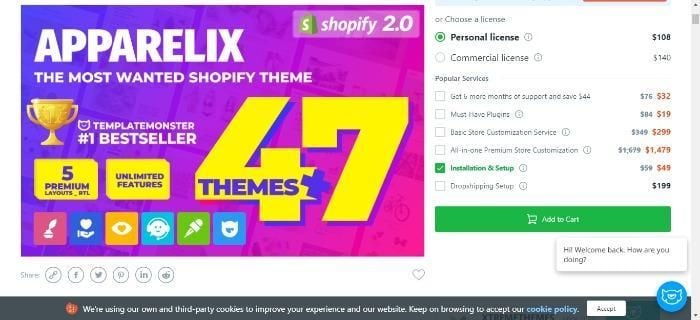
If the free themes don’t appeal to you, you can always choose the premium versions that come with more features and customization options. Honestly, these also look much better when compared to a free one—provided you choose the right option.
Another reason why I like Shopify so much is that it’s incredibly user-friendly. Even if you decide to make notable changes to a theme, the limitations are few.
You don’t have to worry about not having any coding experience. Shopify has an international team of design agencies—called Shopify Experts—that can fully customize your e-commerce website. Keep in mind that you’ll have to pay for these expert services.

Here are a few quick tips to help you find the right Shopify theme:
#1: Go Through the Whole Theme Store
Once you visit the URL, be prepared to be shocked.
You get over 100 theme variations—out of which there are quite a few amazing free ones, too—that you can use for your Shopify store. Other than this, you can also find Shopify themes on other marketplaces like TemplateMonster.
Try to choose a theme that matches your brand and, of course, meets your personal preference.
You also have the option to filter the themes by paid or free, features, and industry. If you want to be even more selective, you can add filters for price, popularity, and most recent.
#2: Check Out the Theme’s Reviews
After you settle on a theme you like, go to its live demo. You’ll find more information about the theme, like whether it’s mobile-friendly or responsive, page speed insights, GT metric scores, and customer reviews.
Scroll down to read reviews written by people who previously used the theme to find out more about their experiences.
#3: Preview the Theme
Shopify gives you the option to see your selected theme live. Click View Demo located below the green Preview Theme in your Store button.
The preview feature is a great option for themes that have a range of styles. In its absence, you would find yourself repeating the whole selection process again and again until you’d find the right match. Yikes.
#4: Get the Shopify Theme
If you like the demo version of a specific theme, all that’s left for you to do is click the green button to get it.
When Shopify asks you to give your confirmation about installing the theme, click Publish as my Shop’s Theme. If you’re uncertain about your chosen theme, you can always change it later.
Shopify will alert you once your theme finishes installing and then give you the option to go to your Theme Manager.
This manager contains all your published themes (the one you’ve installed or activated most recently), along with unpublished themes (previously installed themes).
Step 4: Customize Your Store Settings
Shopify themes are like your personal fairy godmother. They completely transform the way your e-commerce website looks, giving it a unique appearance even when thousands of other users download the very same theme.
How is this possible? You can make simple changes by editing your settings.
Select Themes from the left navigation menu. You’ll see your live theme in a box at the very top.
This box contains two buttons located in the top right corner of the box. The first one with three dots allows you to make basic settings changes.
One of them allows you to duplicate your theme. I advise you to do this as a backup. If you don’t like the changes you make, you can always delete them and start working again from the duplicate.
The second button is Customize Theme. Clicking it will direct you to a page that controls all the basic functionality of your store. This is where you can make big changes and test out all features to understand what your website is truly capable of.
Other options let you reposition elements on pages, including showing product images on the left, right, or center of the page. You can also choose whether you’d like to display social media icons, such as like, tweet, pin, or +1.
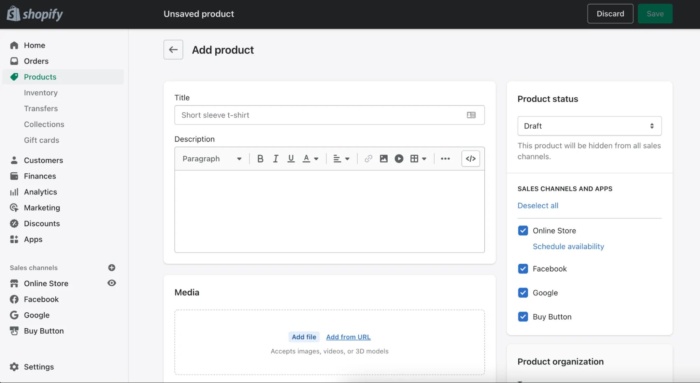
Step 5: List Products on Your E-commerce Website
Click Products on the left side menu on your admin screen.
You’ll see a blue Add Product button in the middle of the page. Click it, and this will allow you to add as much detail as you want about your products.
Pay attention to products that could do with some SEO optimization, including their name, description, and URL. Try to add as many details as you can to give your customer a clear idea about your products.
This is also the screen where you upload HD-quality photos of your products—preferably on a white background. Once your images are uploaded, you can rearrange them however you like, so there’s no hassle of having to upload them in a specific order.
I really cannot emphasize enough the power of product images.
Product images are instrumental in making a sale. This is why you should make a point to add only the best pictures that highlight special or unique features in the close-up photos of the items.
Another tip would be to ensure all images have the same dimensions, which will give your website a tidy appearance. However, if you want to make your pages look similar to a Pinterest board, you can do that too.
Finally, click Save Product located at the top and bottom right corners to save all your changes.
That’s not all, though. When adding photos, you should build collections to entice your visitor by giving several similar options on the same page, boosting your chances of making a sale.
Option A: Set Up Collections of Groups of Products
A collection of a group of products includes items that have a few features in common. Here are a few collection ideas you can consider:
- items on sale
- items in specific colors and sizes
- items differentiated based on gender and age, like men, women, or children
- items belonging to the same product category, like fans, chargers, jewelry, and so on
The interesting thing here is that a single item can appear in any number of collections.
For example, a size medium white shirt will be listed under at least three collections: White Color, Women/Men, and Size Medium. You can list your collection names on the homepage in the navigation bar.
Your customers will thank you as they won’t have to go through your whole catalog just to find a specific item.
Option B: Manual and Automatic Collections
When you add a new collection, you can choose how to add the products. Currently, there are two ways of doing this:
- Manually: You individually add and remove products to the collection.
- Automatically: You set up specific selection conditions that will automatically add products that meet the criteria.
While you’re at it, choose a payment gateway, too. This is a feature that enables your customers to pay for products directly through your website.
Not all payment gateways are created equal, though. Make sure you go through the transaction fees, card types, and offsite checkout to select an option that you find most appropriate.
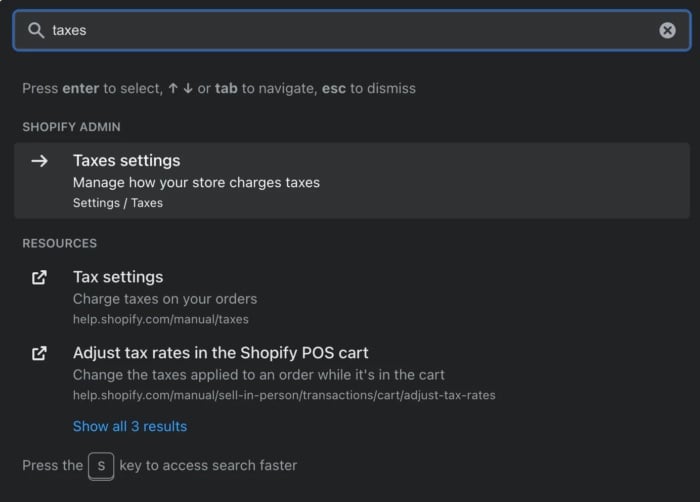
Step 6: Manage Your Tax Settings
Select the checkboxes against Charge taxes and Requires shipping wherever applicable. You’ll find these options under the Variants section of the Products page after you click the name of a given product.
Step 7: Prep To Make Your Shopify Store Live
Before your site goes live, you need to add a few more details about your company and how you will deliver the items.
Go to Settings to fill out this information. I’d recommend using the Google Analytics feature to keep track of your store visitors, too.
Do a Test Transaction
This is the ultimate test to see whether your store is on track and get an idea of what your customers experience when they order from your Shopify store.
You can use Shopify’s Bogus Gateway for this.
- Select Settings from your store Admin, followed by Payments.
- If you have the credit card payment gateway enabled, deactivate it. Click Edit, and then confirm your deactivation after selecting Deactivate.
- Under the Accept credit cards section, choose to Select a Credit Card Gateway. This will open a dropdown menu.
- Scroll down to Other, then select Bogus Gateway.
- Choose Activate—or Reactivate if you’ve used Bogus Gateway before.
- Return to your store, and place an order as a customer typically would. At checkout, enter the bogus credit card details instead of genuine numbers.
If you prefer placing a genuine transaction, you can do that, too. Just remember to cancel the order immediately to refund yourself and avoid paying transaction fees.
Step 8: Get a Domain Name
You need a domain name to make your site live. I‘ll tell you two ways you can do this:
- First, you can buy a domain from Shopify, which will be added to your store automatically. This is time-saving and great for people who don’t know much about web hosts. Costs vary depending on the extension you’re using:
- .com costs $11.95
- Net domains costs $13.95
- Org. domains costs 15.95
Second, you can buy a domain from a third party like GoDaddy. Prices vary, and some have a two-year tie in. Remember, you’ll have to redirect the DNS records yourself in this case. If you don’t want to do that, it’s better to buy a domain from Shopify itself.
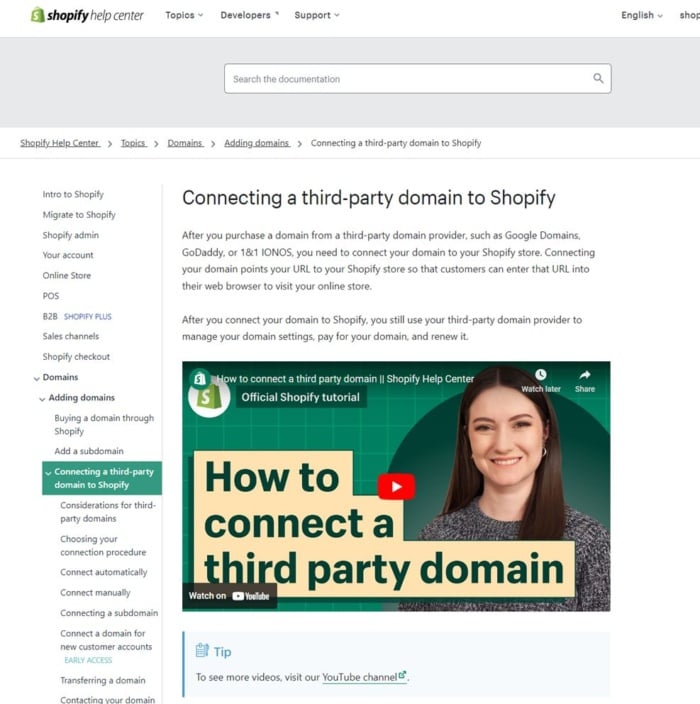
If you do want to put your Shopify store live on a third-party domain, follow the below steps:
Step 1: Add the new domain to Shopify.
Step 2: Connect your domain by following these directions from Shopify:
- From your Shopify admin, go to Settings > Domains.
- Click Connect existing domain.
- Enter your domain, such as johns-apparel.info, and then click Next.
- To confirm that your domain is connected to your Shopify store, click Verify connection.
If you need more help, Shopify has a guide on its website.
#1 On the left navigation menu in the Admin page, go to Settings and then Domains. Add your domain name after clicking the Add an existing domain button.
#2 Update your DNS records.
Log into your domain registrar (example: GoDaddy) to make the following changes:
Replace the @ or main A record with the following IP address: 23.227.38.32
Add or replace the www CNAME with yourstorename.myshopify.com.
#3 Remove any storefront passwords.
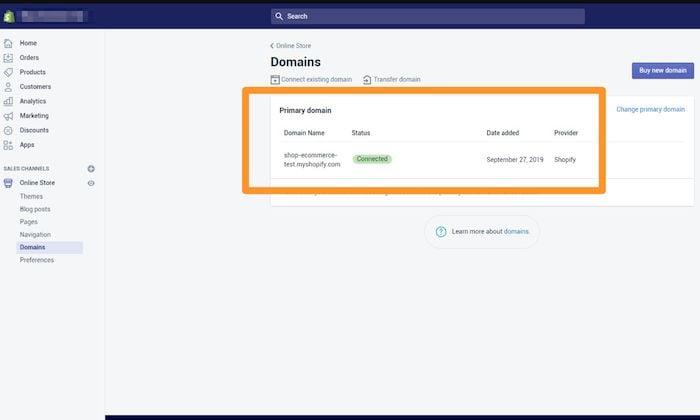
#4 Set your Shopify store as the primary.
Go to your online store, and click Domains. Choose your main domain by using the dropdown button. Also, check the Redirect all traffic to this domain. This will direct all your traffic from other domains to your primary domain.
#5 Add other domains.
Repeat the first two steps with any other domain you use. All traffic from these domains will be redirected to the primary domain, which you set in step four.
Step 8: Start selling!
Congratulations! Your new Shopify e-commerce store is now up and running. You’re now completely ready to get a taste of being an e-commerce seller.
The good thing about Shopify is you can customize your store to your liking as many times as needed to keep everything convenient and functional for you.
To get the best results, keep experimenting as you go in order to fine-tune your site, pay attention to technical SEO, optimize your SEO for e-commerce, and be careful to avoid common SEO problems.
FAQs
Popular options include Shopify, Bigcommerce, and WIX, which have their own set of features. When considering which platform is right for you, it’s vital to consider factors such as ease of use, payment gateways, and scalability.
Platforms vary in features, pricing, and overall user experience. To ensure you’re getting the most bang for your buck, it’s imperative to understand features are available, along with any associated costs.
In an extensive review, WooCommerce and Shopify came out on top for SEO.
A visually appealing website with organized product categories helps customers find what they need quickly and effortlessly. Simple navigation tools such as search bars and category menus should also be included in the site’s design.
Additionally, adding a blog page with helpful tips or fun content can help build customer relationships while positioning the company as an expert in its field.
Begin by creating a consistent design throughout the site. This means all pages should reflect the same look and feel in terms of colors, fonts, logos, and images so customers can easily recognize your brand identity. Secondly, ensure you organize all navigation menus intuitively, allowing visitors to find what they need quickly and easily.
It’s also worth adding breadcrumbs on each page to show customers where they are within your website structure and how they got there.
Conclusion
E-commerce is one of the most popular ways to shop, and it’s no surprise why.
With the ease of online shopping and the variety of products available, it’s a great option for shoppers looking for convenience and selection.
If you’re interested in starting an e-commerce store, be sure to do your research first. There are many different types of e-commerce platforms and stores, so it’s important to find the one that’s best for you – and make sure to optimize your e-commerce store for conversions.
After some careful planning, and optimizing your site to meet your customer’s needs, you’ll be well on your way to making your first online sale.
Which e-commerce website builder do you prefer? Is it Shopify or others like Wix, WooCommerce, or something else? Let me know in the comments below.

See How My Agency Can Drive More Traffic to Your Website
- SEO - unlock more SEO traffic. See real results.
- Content Marketing - our team creates epic content that will get shared, get links, and attract traffic.
- Paid Media - effective paid strategies with clear ROI.
Are You Using Google Ads? Try Our FREE Ads Grader!
Stop wasting money and unlock the hidden potential of your advertising.
- Discover the power of intentional advertising.
- Reach your ideal target audience.
- Maximize ad spend efficiency.