
Your Shopify store can attract customers without constant ad spend — all you need is to do a bit of research and create a blog.
How does this work and how do you add a blog to your Shopify website? Learn all about it in this step-by-step guide.
What is Shopify?
Shopify is one of the most popular ecommerce platforms that makes it possible to create an ecommerce store, host it, and conduct all the business processes from marketing to sales.
This platform covers most areas of business and it’s only natural most ecommerce entrepreneurs start their journey with Shopify. One area of particular interest is sales channels, namely, the blog.
Why start a blog on Shopify?
Most businesses will start selling by running paid search ads or trying to succeed with a Google Shopping campaign. Once you start getting a stable stream of clients through paid channels, it’s a good idea to focus on running a blog.
Creating a blog can cost you very little money or be completely free. If you create great content and Google picks it up and ranks it in the top 10, you’ll be receiving traffic for free for years and years.
Even if a blog post only brings in a hundred monthly visitors, multiply that by a few dozen blog posts, and you’ll start getting sales from this channel without having paid a dime for it.
How to Start a Blog on Shopify | Ultimate Guide for Beginners
Instead of reading, you can watch this video version of our article.

How to add a blog to Shopify?
Shopify has a blog built-in by default, and working with it is pretty easy. But publishing the first blog post may be counterintuitive for a beginner or a person who only blogged on WordPress before.
Here’s how you do it.
How to create a new blog post on Shopify
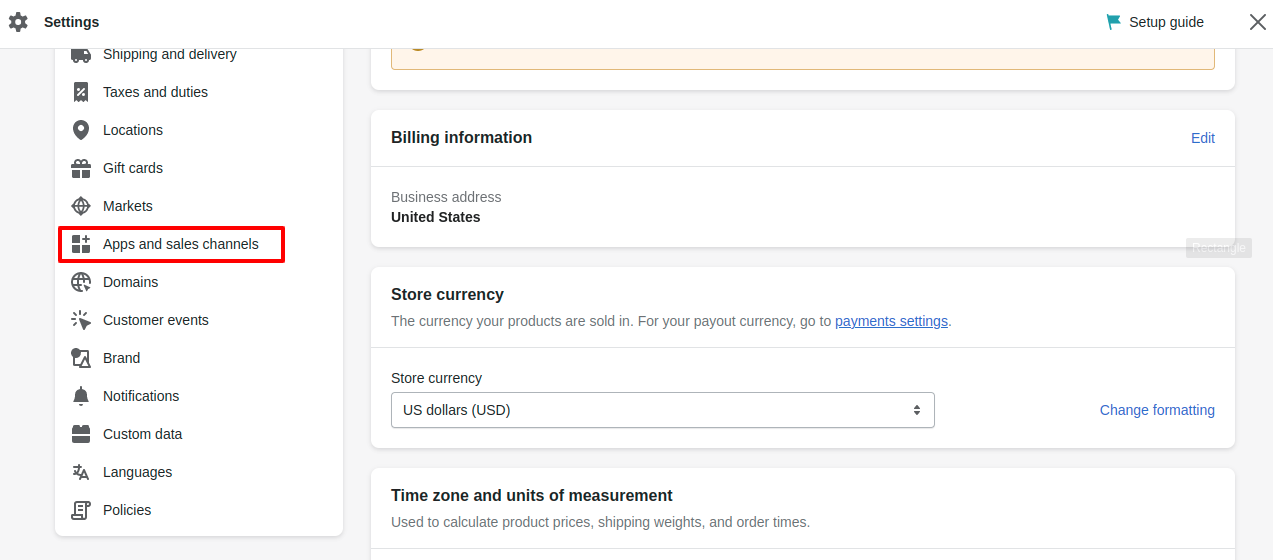
Log in to your Shopify account, select the store you want to publish a blog on and go to settings.
In the settings panel, scroll down to Apps and sales channels menu.
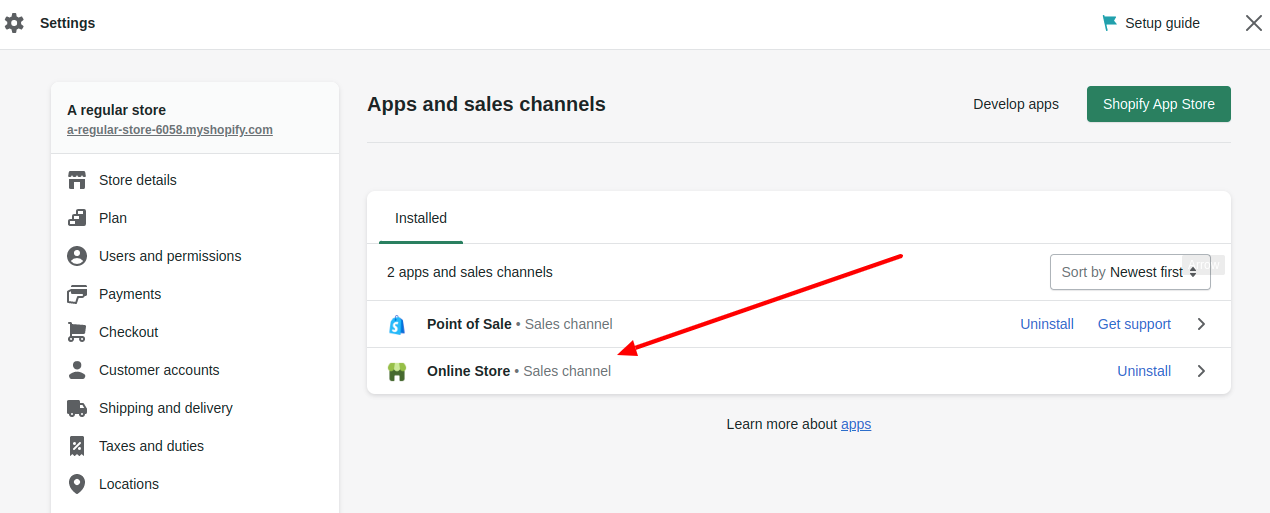
There will be two apps preinstalled, the PoS app and online store. Choose the latter.
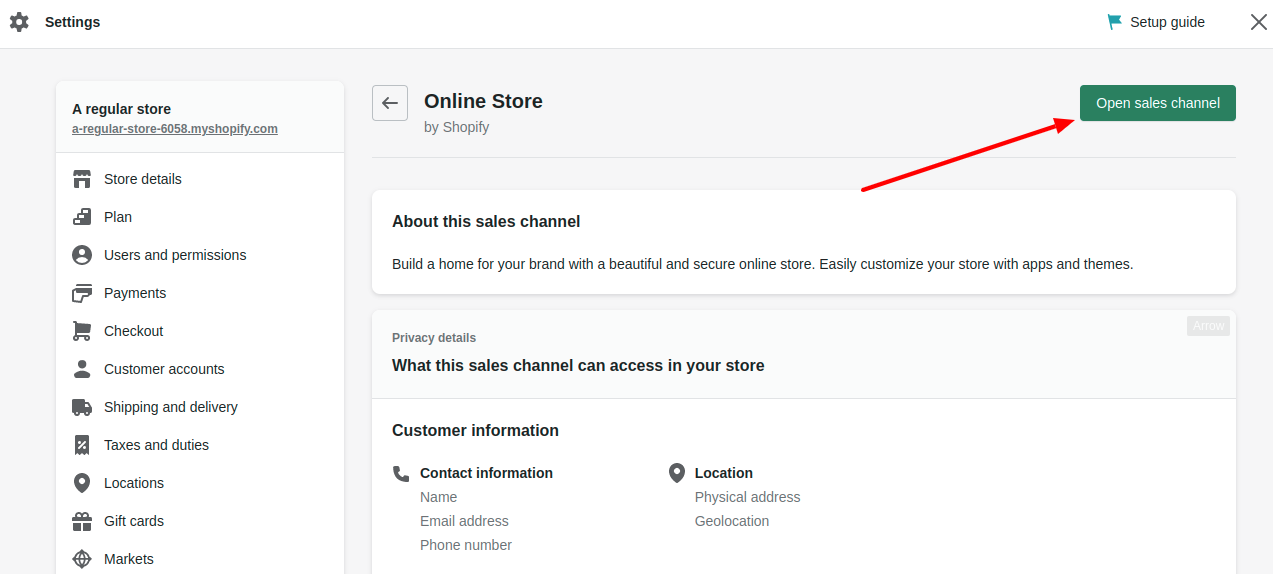
Then, you need to enter the sales channels submenu. Do that by pressing the “Open sales channel” button in the top right corner.
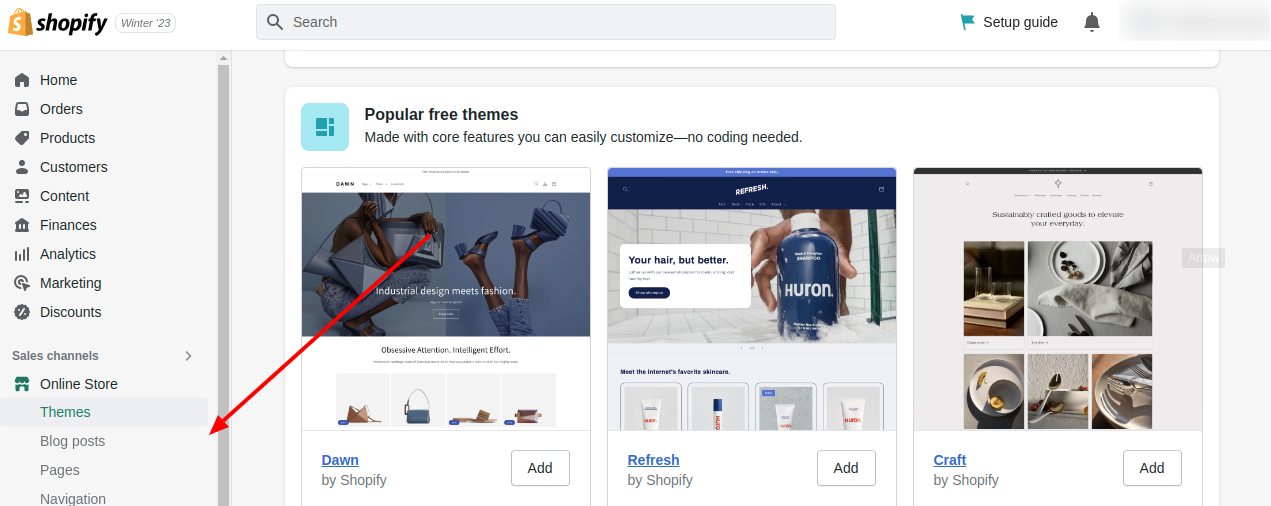
A submenu will appear below the general list of settings menus. Scroll down to it and choose the “Blog posts” folder.
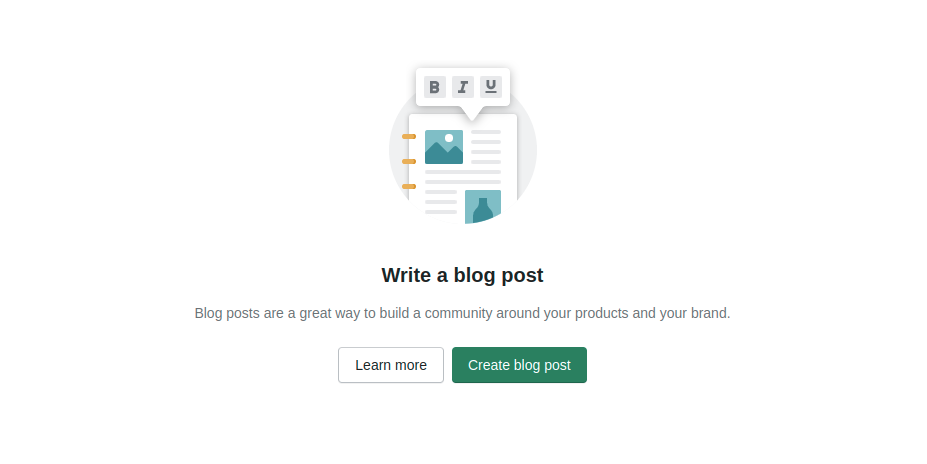
Now you’ll finally be able to write your first blog post. Click on the “Create blog post” button and proceed.
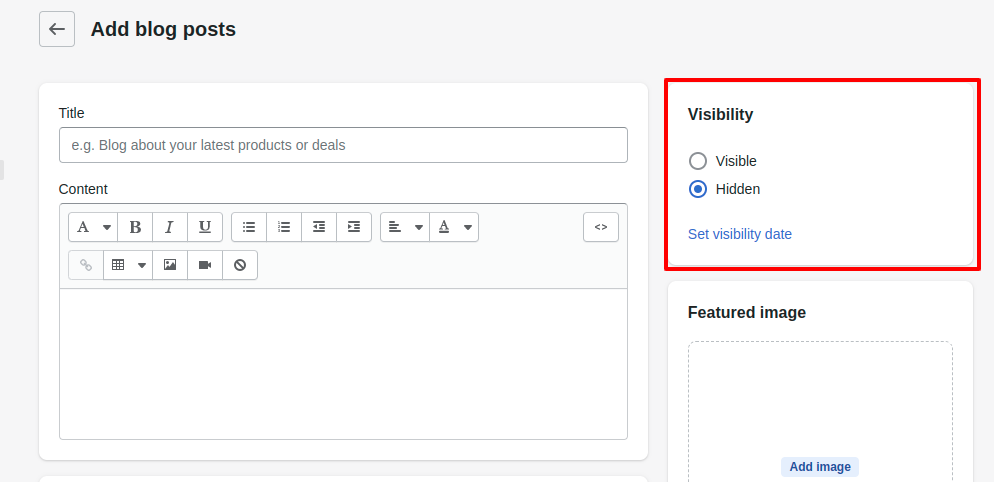
Here, you can start drafting your blog post in the text editor or paste it from a Word doc. Text styles are pasted correctly, but you can’t copy and paste images in this editor. You’ll have to upload each image manually.
All blog posts’ visibility is set to “hidden” by default. You can switch it to “visible” to be published as soon as you finish work and click save. Alternatively, click on “Set visibility date” and schedule a post to go live at a certain time.
But don’t publish it right after you’re done editing the post and uploading images. There’s a bit of preparatory work left.
First, you can fill out the excerpt blog, a summary of the post that’s going to be visible on the main blog page or category pages. Make it brief and intrigue your visitors to read the post with this excerpt.
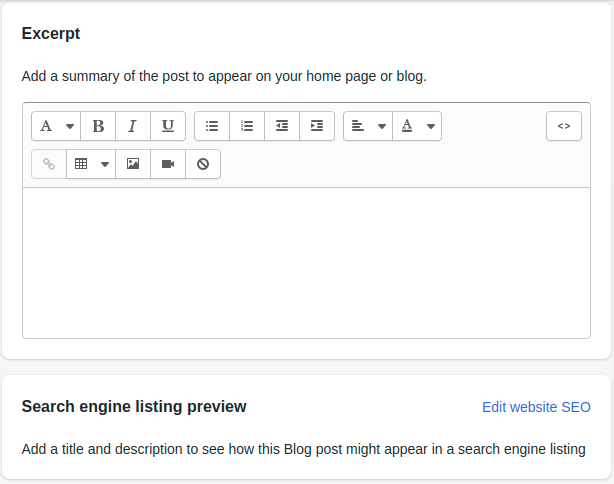
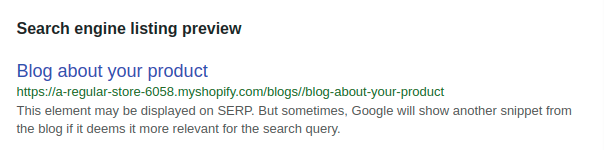
A more important element is the listing preview. This SEO element tells Google what to show on search engine result pages.
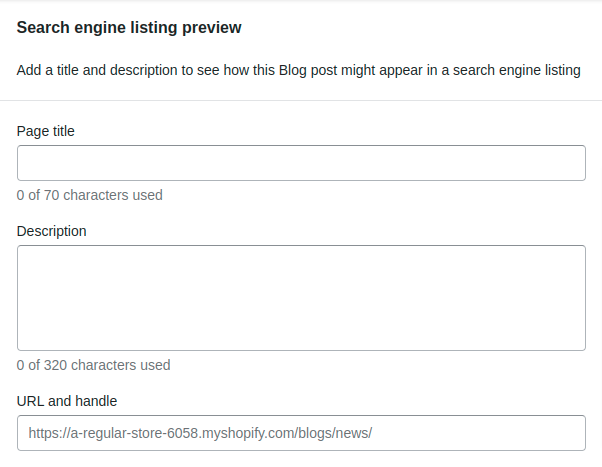
The title is displayed as the blue link in SERP and should ideally both contain the target keyword and interest users in reading your article. The description is the short summary text displayed below it.
The last thing you have to do before publishing is giving your blog a name and add a tag to this blog post. By default, Shopify puts all blog posts under “News” blog category. If you want to change that, select the “Create a new blog” option and name your blog.
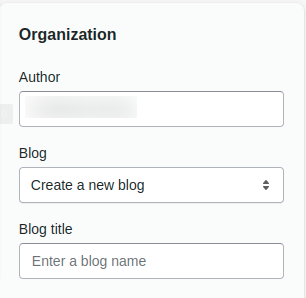
The name of the blog will become a subfolder and will be shown as a part of a URL, so choosing a name with a keyword in it is a good idea.
When you’re done with all the steps above, scroll down to the Save button on top of the page, click on it, and your post will be live in seconds.
How to add a Shopify blog to the website
By default, Shopify doesn’t add the blog to the website menu. You’ll have to do it manually if you want website visitors to find it.
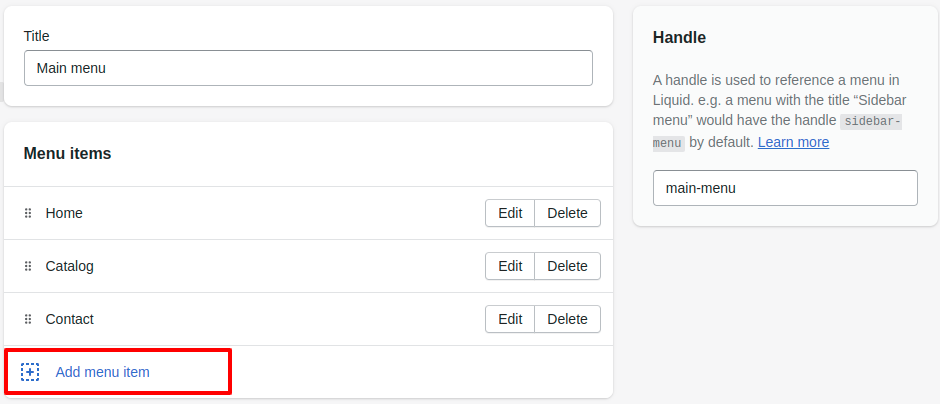
To add a blog link to the navigation menu, scroll down to the Sales channels submenu and choose “Navigation.” Then, go to the Main menu.


Here, scroll down in the list of menu items and choose “Add menu item.”
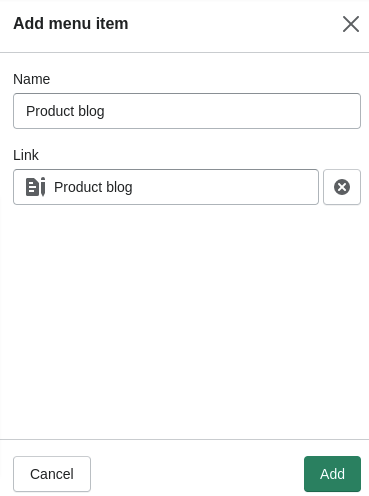
When picking the link to display, choose between “blogs” not “blog posts” — the latter are individual blog posts, and we need a link to the general blog feed.
Choose the name of your blog from the list and add it as a menu item. You can change the “Name” bar to “Blog” if your blog’s name is too long to be displayed in the navigation menu comfortably.
Once added, click save, and you’re all done.
5 Top tips for blogging on Shopify
Knowing how to post a blog post on Shopify is only the first step toward receiving organic traffic. Knowing what to post is a much harder thing to master.
Here are five tips on building your blogging strategy on Shopify.
Do basic keyword research
Since the end goal of any blog post is to appear on SERP to people who may be interested in your business, you have to find the keywords that are related to your business. Finding the right keywords allows you to optimize blog posts and make them more likely to appear in SERP.
Specialized keyword research tools can set you back upwards of $300 a month, but you don’t really need them, especially at the start.
You can do basic keyword research for free in Google Keyword Tool or hire a professional on Fiverr or UpWork to do this for a moderate sum of money.
For the blog, you’ll need a list of long keywords, particularly those that can be presented as a question.
Create an editorial calendar
With the list of these keywords, form blog post ideas that you can cover. Then, research blogs that write about topics similar to yours to pick up more ideas.
Creating a blog that brings you leads is all about consistency and planning, so you should organize your blog post ideas in an editorial calendar. It can be a simple Google Spreadsheet with blog post topics sorted by week or month.
It will be very handy when inevitably your creativity runs out. Without an editorial calendar, you may be stuck, not knowing what to write about — a typical beginner blogger mistake.
Write with your customers in mind
When you start acting on the editorial calendar, write with your customers in mind. You are the author of this blog, but it’s not a personal blog you can write anything in. It’s a company blog with the end goal of making you money.
This means you should write with the specific audience in mind. Your audience.
The first step to that is understanding your audience. Make conclusions about them based on sales data, and marketing performance data, or run a survey to dig deeper.
You should find the right voice that will be in tune with your audience, write in a way that’s easily understandable to them, and cover the topics they’re interested in.
Incorporate your products
A well-written and well-optimized blog post can give you organic traffic. Now, your job is to monetize that traffic and direct users to make a purchase.
Incorporate your products into blog posts where it makes the most sense and leave a CTA encouraging visitors to use your services.
Here’s how a storage unit company does this in a blog post about storing pet products.
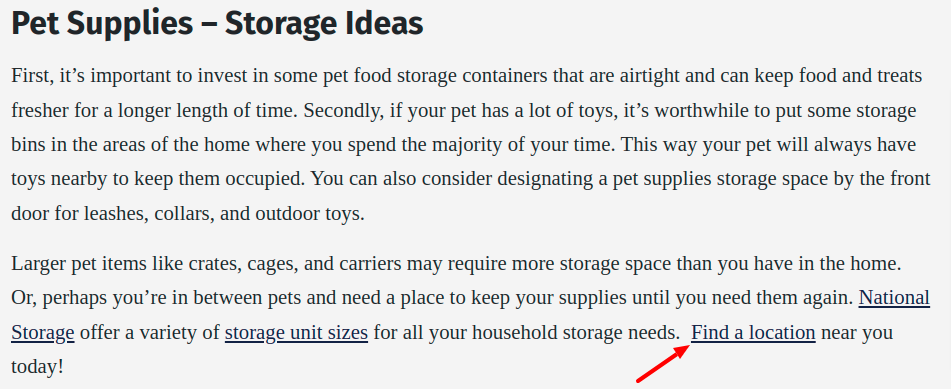
Source: Store National
Don’t bombard them with sales messages, though, make your offer clear and present in a place that makes sense. If a particular blog post doesn’t lend itself to promotion, don’t offer anything — the conversion rate is likely to be low anyways.
Distribute content
A part of the blog strategy that is often overlooked is content distribution. Your blog posts need to be seen, shared, and linked to if you want them to rank well on Google.
Here are some points to implement:
- Send quality blog posts to other blogs
- Share new blog posts in a newsletter
- Share blog posts on your social media
- Add social sharing buttons to posts
- Use influencer marketing
All these strategies will bring direct traffic to your pages, and if they attract links, the post is likely to rank higher in SERP.
Conclusion
Adding a blog to Shopify may be counterintuitive, but it’s not very hard. What’s more difficult to learn is making your blog an effective marketing tool.
Follow the tips above, and you’ll start generating revenue from organic search with little to no investment.


Comments 0 Responses