
A Squarespace website is easy and fast to build from scratch, even without a prior web designer experience. Apart from being intuitive, the platform offers all the tools you need to get your site up and running in one place.
For about 17 years, Squarespace has helped millions of customers build websites.
This website builder and content management system (CMS) comes with an enormous knowledge base. It’s easy to know what you should do per time, thanks to its checklist feature.
However, to reduce the time you’ll spend in building yours, this article goes straight to the point. This Squarespace tutorial will help you get things right from the get-go.
How to Use Squarespace: Table of Contents
- Steps to Build a Squarespace Website
- Step #1. Explore
- Step #2. Pick the Right Template
- Step #3: Create a Squarespace Account
- Step #4: Add Your Site Title
- Step #5: Edit Title and Logo
- Step #6: Edit, Add or Remove Pages
- Step #7: Change Fonts and Colors
- Step #8: Add Images
- Step #9: Connect and Update Domains
- Step #10: Optimize for Search
- Step #11: Launch Your Site
- Step #12: Incorporate Marketing
- Squarespace Pricing
- Wrap Up
How to Use Squarespace: Steps to Build a Squarespace Website
Building a website with Squarespace is like taking a tour. It’s intuitive; you’ll find a short Squarespace tutorial to guide you with every click. Hence it makes taking action easy.
Follow these simple steps to build your website.
Step #1. Explore
To start creating your website, go to squarespace.com and click on the “Get Started” button. You’ll find one at the top right of your screen, and the other at the left, towards the bottom.
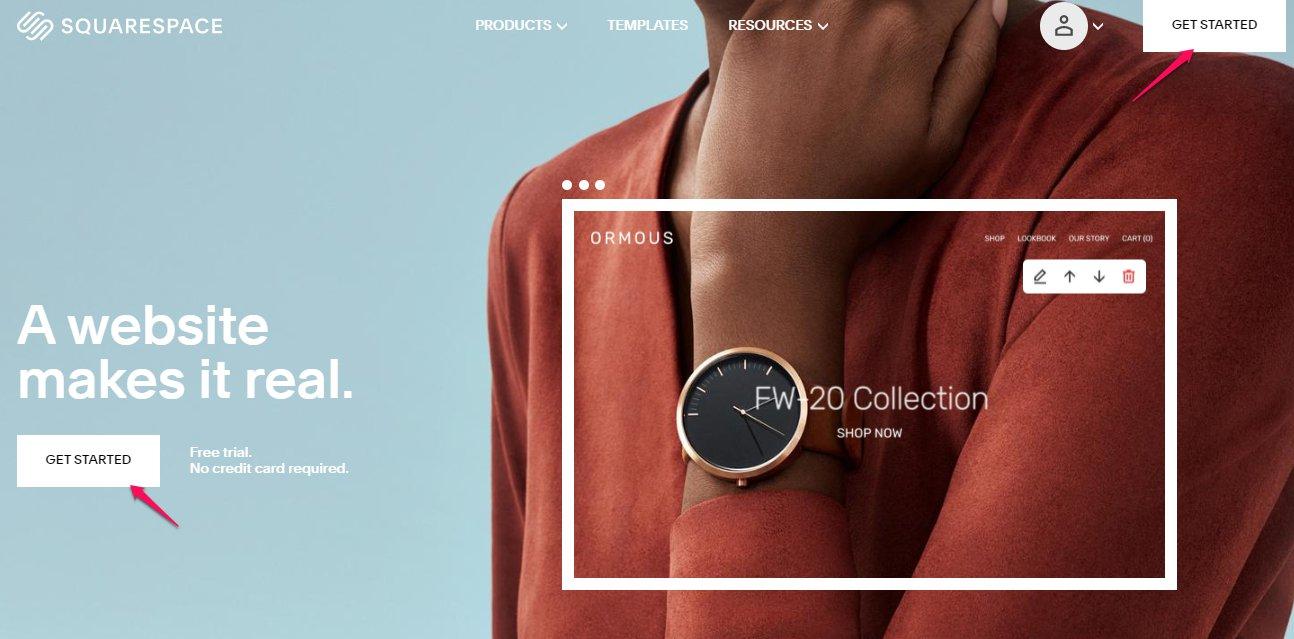
This action immediately leads you to the Templates section and allows you to start using Squarespace for free in the next 14 days.
Within your trial period, you’re free to:
- Explore the platform
- Test your designs
- Upload content, and
- Share your progress
Step #2. Pick the Right Squarespace Template
Squarespace provides attractive templates with interactive layouts. Your part is to choose a template that matches your business needs.
Your first stop brings you face to face with their most popular design options. However, the platform allows you to browse Squarespace website templates by the following categories:
- Popular Designs
- Portfolios
- Online Stores
- Photography
- Professional Services
- Blogs and Podcasts
- Community and Non-Profits
- Local Business
- Weddings
- Events
- Musicians and Bands
- Real Estate and Properties
- Personal and CV
- Restaurants, and
- Launch Pages
You’ll find these categories listed on the left-hand side.
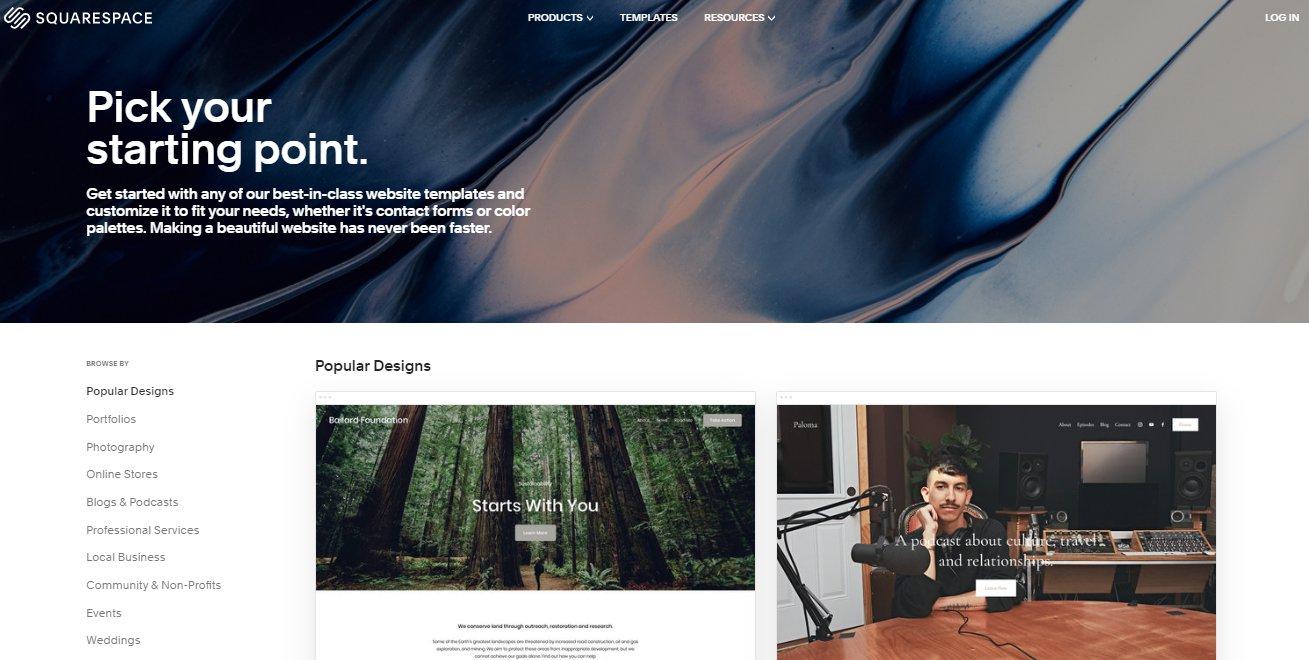
Selecting any of the categories shows you all the templates that might match businesses in that field. When you choose a group, you can start immediately with a Squarespace template that interests you. You can also preview several templates if you’re finding it difficult to decide what you want.

While previewing, Squarespace allows you to see what the template looks like on desktop, tablets, and smartphones.
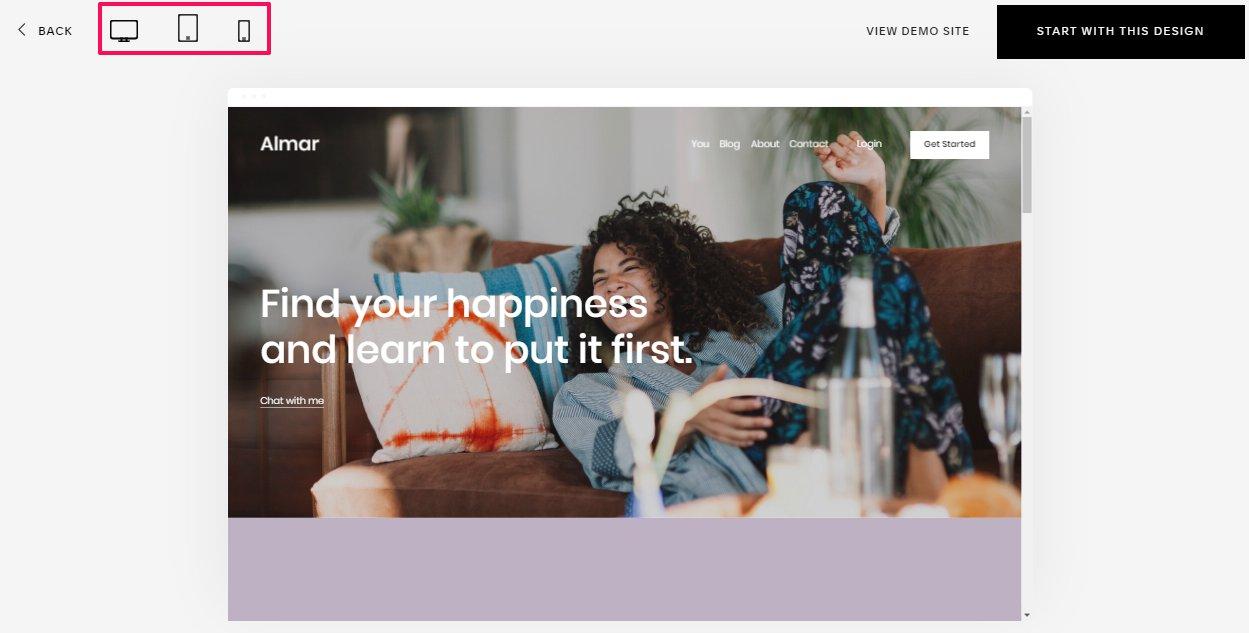
At this point, you have several ways to proceed. You have the option of checking out what the website would look like by clicking on “View Demo Site” or the “Get Started” button on the preview screen or simply scrolling through the preview screen.

You can click the “Start With This Design” button at the top right of your screen when you decide to use a template.

Step #3: Create a Squarespace Account
At this point, Squarespace will prompt you to create an account. Albeit, proceeding to fill and submit the form means that you’ve agreed to Squarespace’s Terms of Service and Privacy Policy. So, you might want to read them up before you proceed.
If you’re OK with their ToS and Privacy Policy, then go ahead and create an account.
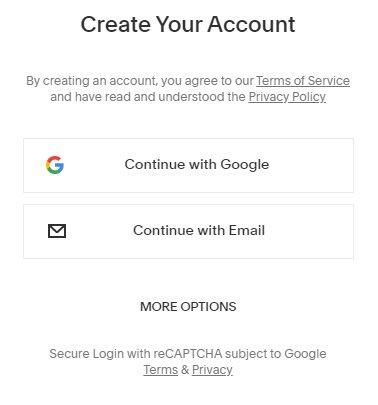
If you take the “Continue with Google” route, it will sync with your Google account and log you in immediately. You can also sign up with other accounts apart from Google.
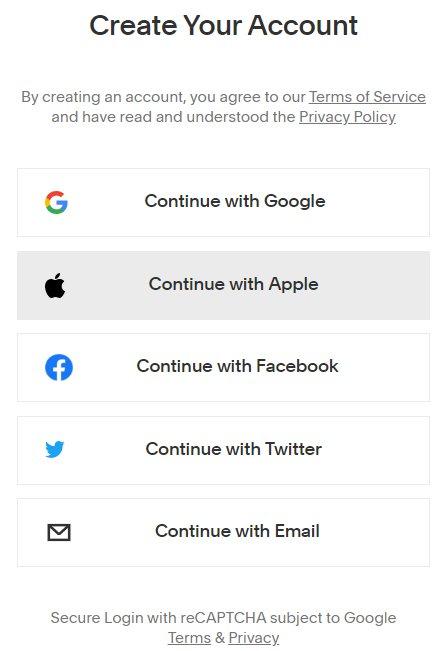
If you prefer to sign up with your Apple, Facebook, or Twitter accounts, click “More Options” and then select your preferred account. Otherwise, use your email address.
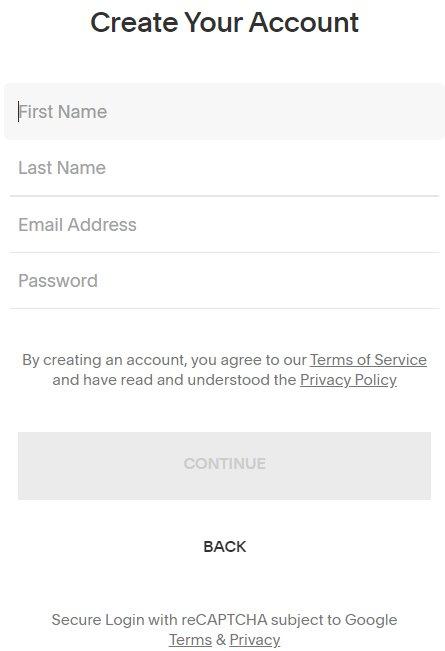
If you select “Continue with Email,” a signup form will appear. Fill that form if you prefer to create an account with your email address.
Step #4: Add Your Site Title
When you’ve created the account successfully, the welcome page would prompt you to add a site title.
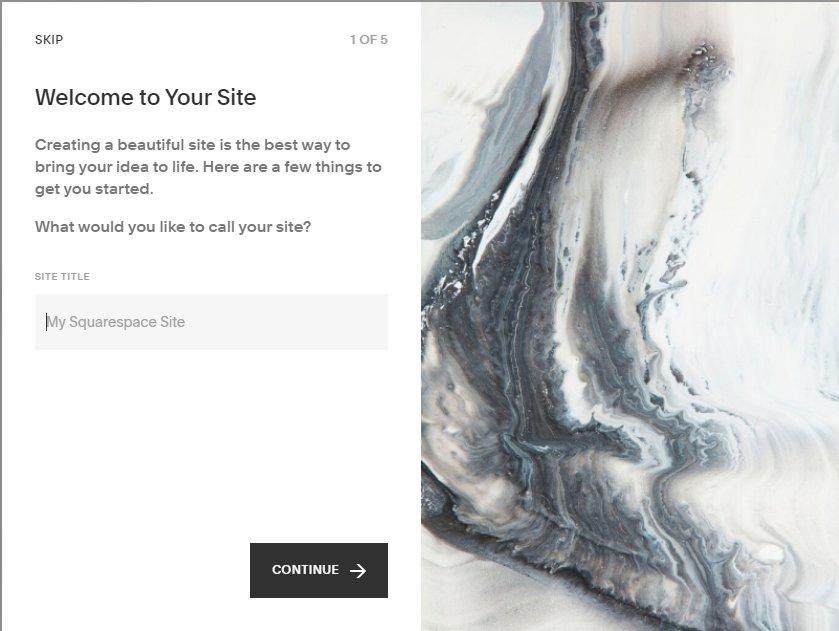
In simple terms, the page is asking you to name your website. You could choose to use:
- Your name
- The name of your blog
- Your brand, or
- The name of your business
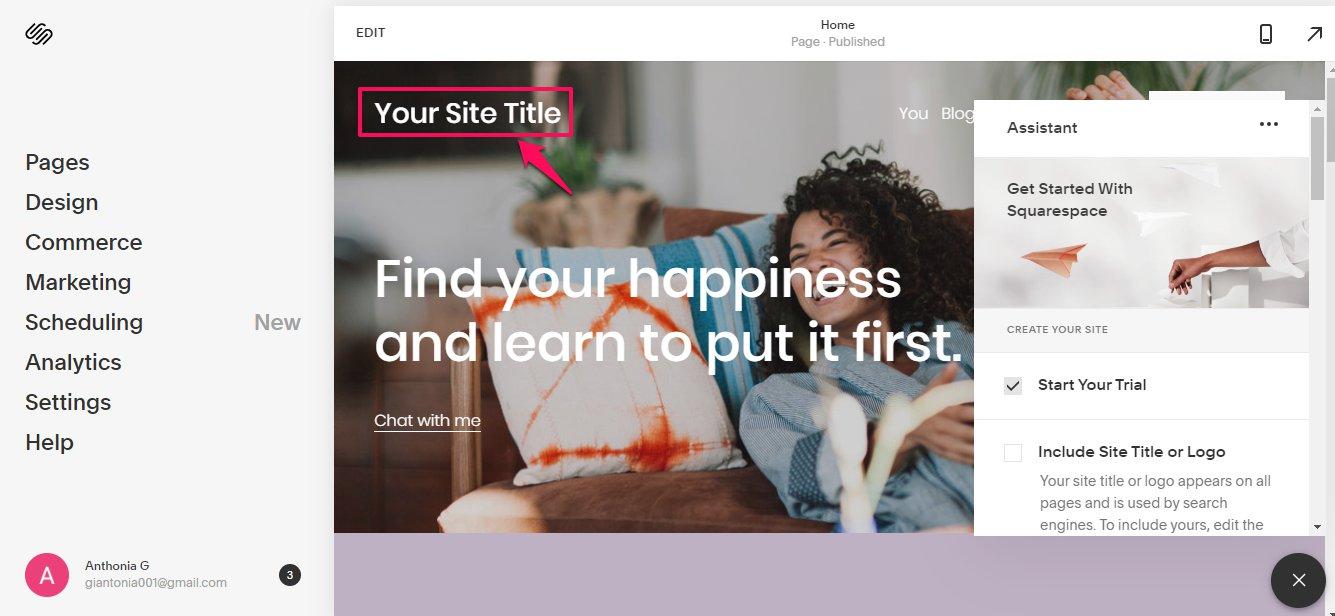
Step #5: Edit Title and Logo
When you click “Continue,” the next page is a gif that describes how to edit your pages.
Click “Next” to start editing your website.
Site Title
You’ll see your site title in the header or a top corner of your web pages, depending on the Squarespace template you use.
You can replace your site title with a logo if you choose.
For SEO purposes, you can add a separate title that’ll replace your site title in browser tabs and search results, but won’t show on your site.
It doesn’t matter if you clicked “Continue” in the previous step without adding your site title. You can add it here. You can also edit what you chose if you want something else instead.
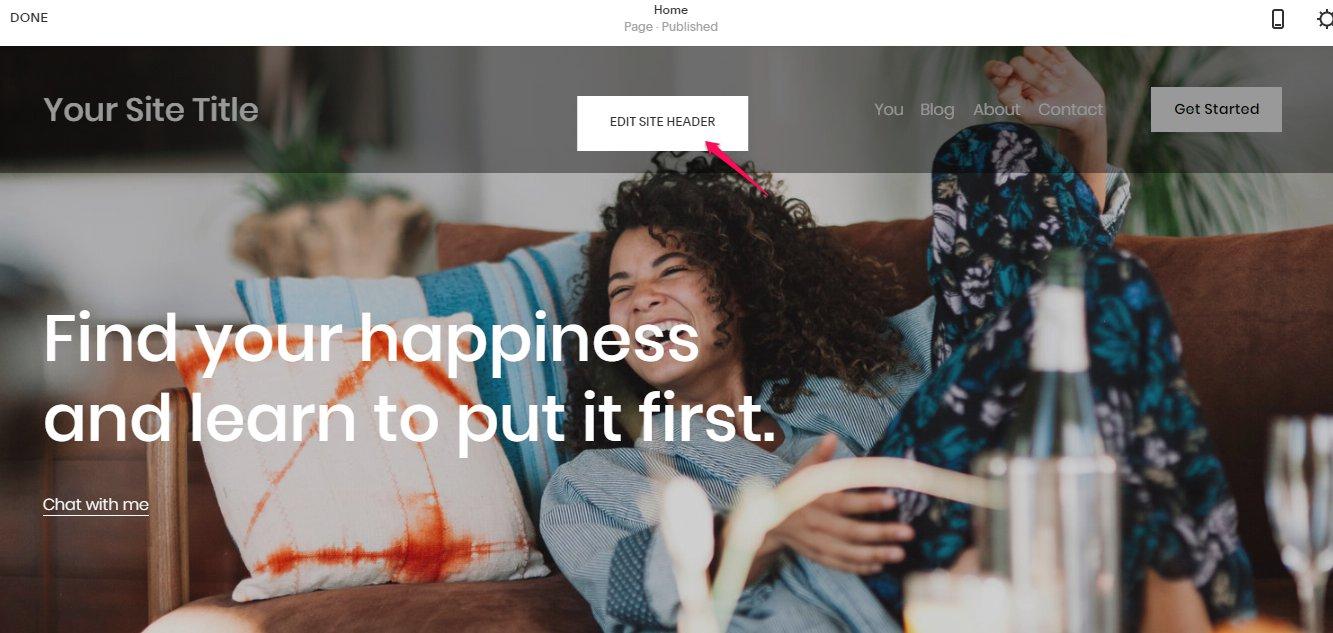
Click “Edit” on the top left of your preview screen.

Hover your cursor over the header and click on “Edit Site Header.”
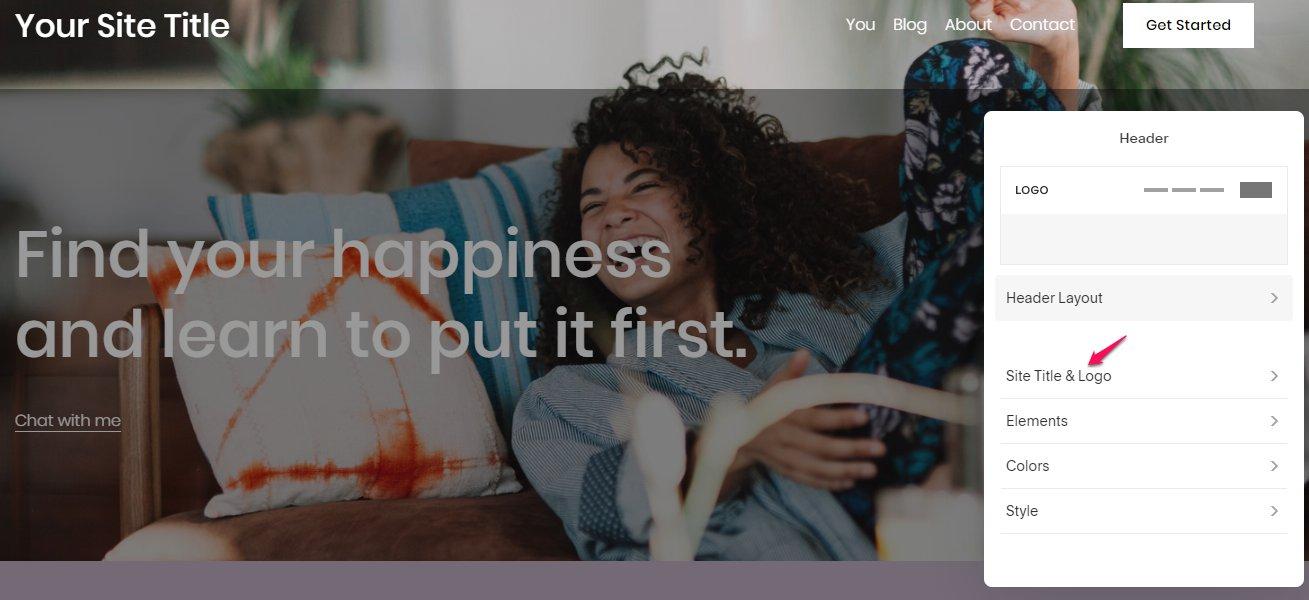
Select “Site Title & Logo.”
Enter your site title in the text field.
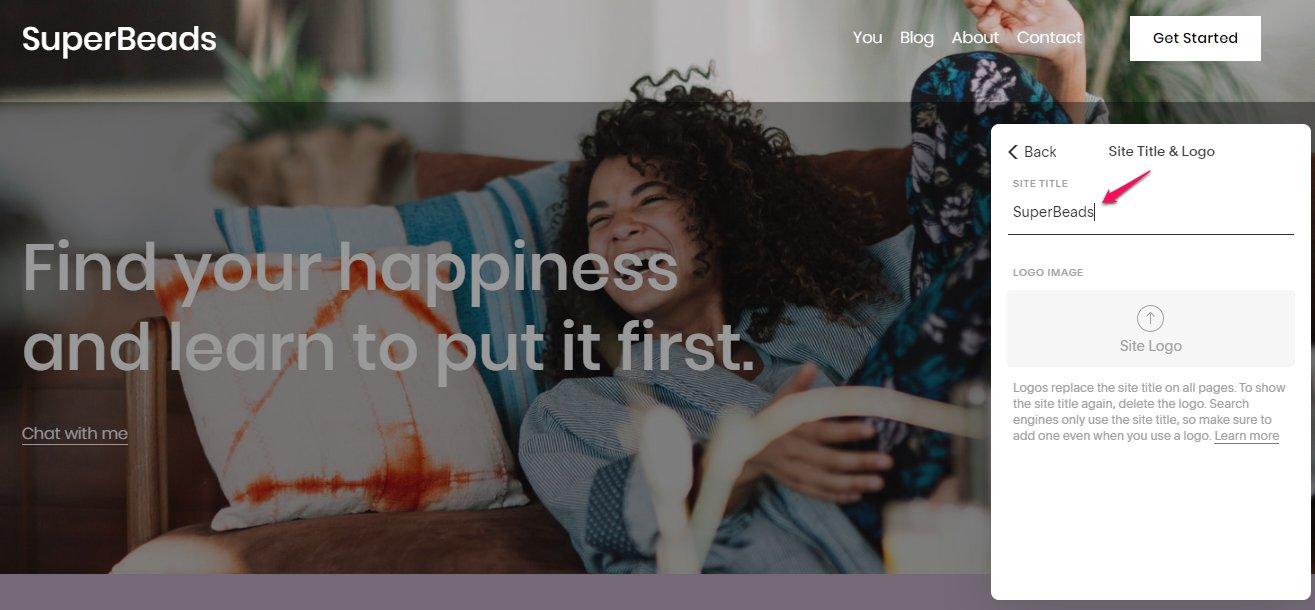
Click the dropdown menu beside “Done” and save it.

Add Logo
You might want to add a personal touch with your logo. In that case, it’ll replace your site title and also direct clicks to your homepage. Albeit, Squarespace recommends that you still have text in your site title field for easy indexing by search engines.
To add a logo, follow the process you used for your “Site Title” as shown above. When you click on “Site Title & Logo,” go to the “Logo Image” area.
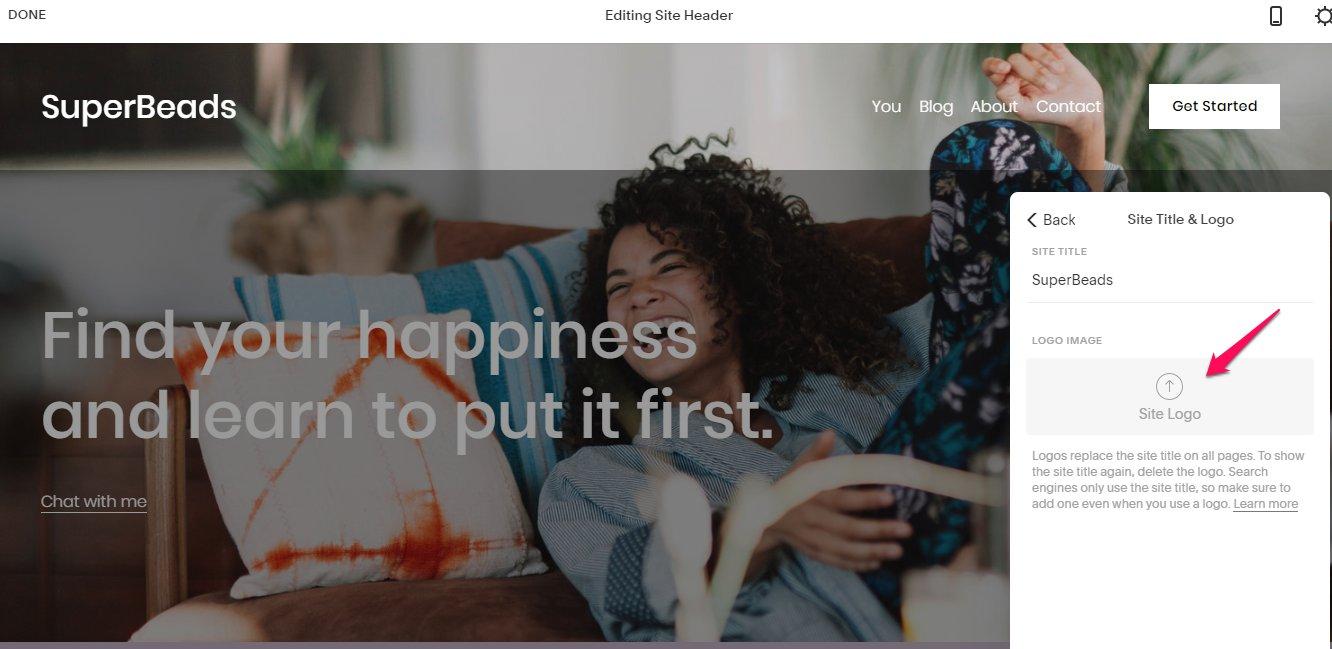
Upload your logo by dragging it to the uploader or by clicking the uploader area to select a saved file on your computer.

Logo credit: British Library
If you’re satisfied with your logo, click the dropdown beside “Done” on the top left corner of the screen and “Save.”
Create a New Logo
Squarespace allows you to create free logos on the platform, but you have to be on a paid plan to enjoy that.
Follow the processes for adding “Site Title” and “Logo,” but when you get to “Site Title and Logo,” click “Create a New Logo.”
You can’t display site title and logo at the same time. So, if you want to show both your logo and brand name, you must include your site title text in your logo’s image.
Step #6: Edit, Add or Remove Pages
Squarespace pre-loads each of the templates with demo content to show you the templates’ unique features and strength. The demo content is there to inspire you to build your website faster. So, you can’t use it for your final public site.
However, Squarespace provides tools that you can use to replace every demo content with your original content. The platform makes it easy to follow the process by providing a checklist on the right side of the preview page. This is a truly unique feature that other platforms like WordPress or Wix do not offer.
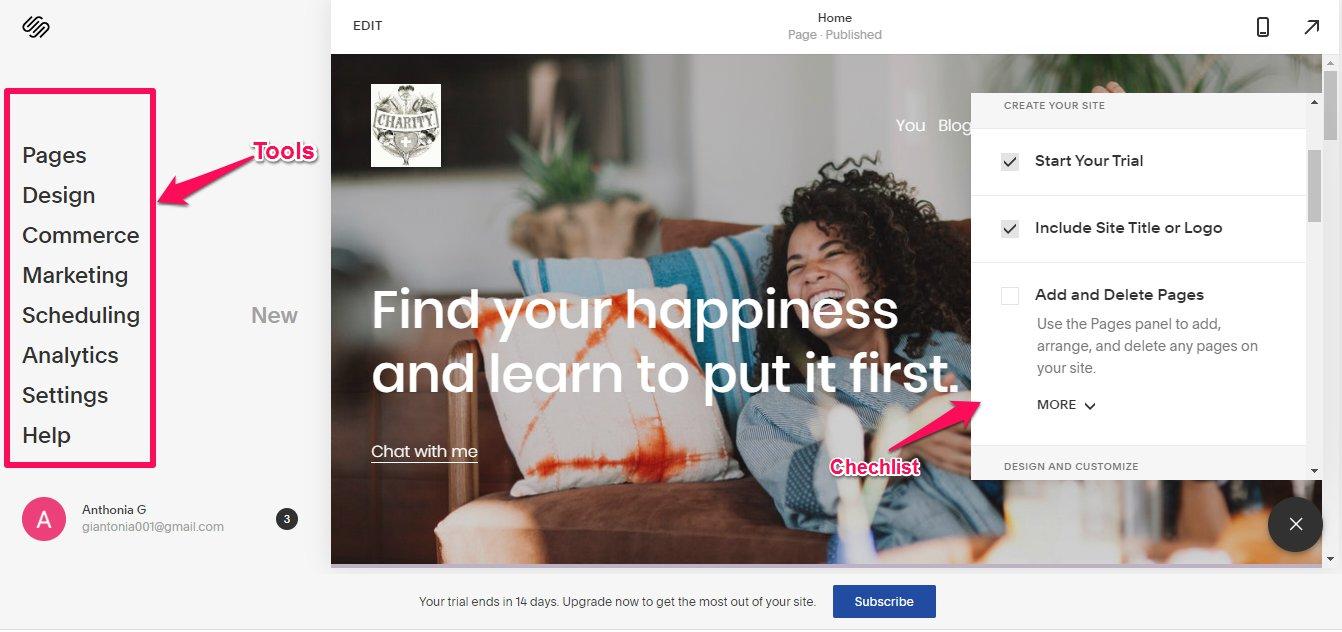
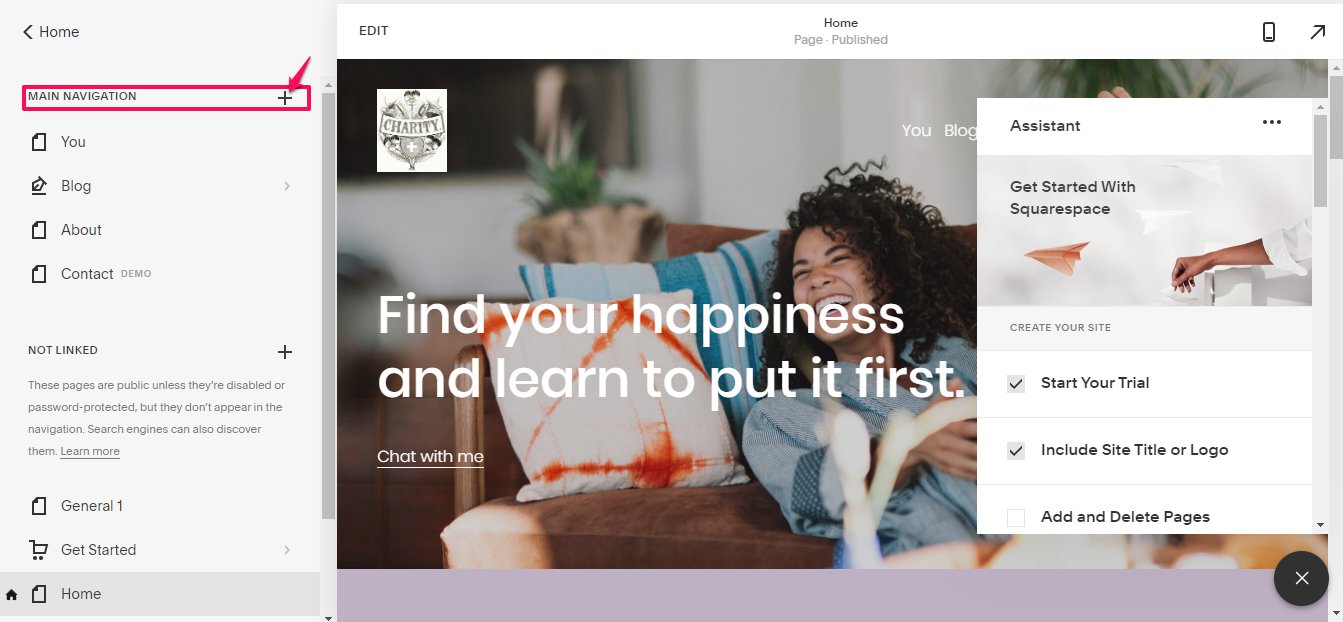
In the image above, you’ll notice that “Start Your Trial” and “Include Site Title or Logo” have ticked checkboxes. So, use the checklist to indicate that you’ve completed a task.
Edit Pages
If you like the structure of a demo page, you can click that page to make it yours.
The main pages in the template used in this article are named:
- You
- Blog
- About, and
- Contact
However, you can customize them to carry your preferred names.
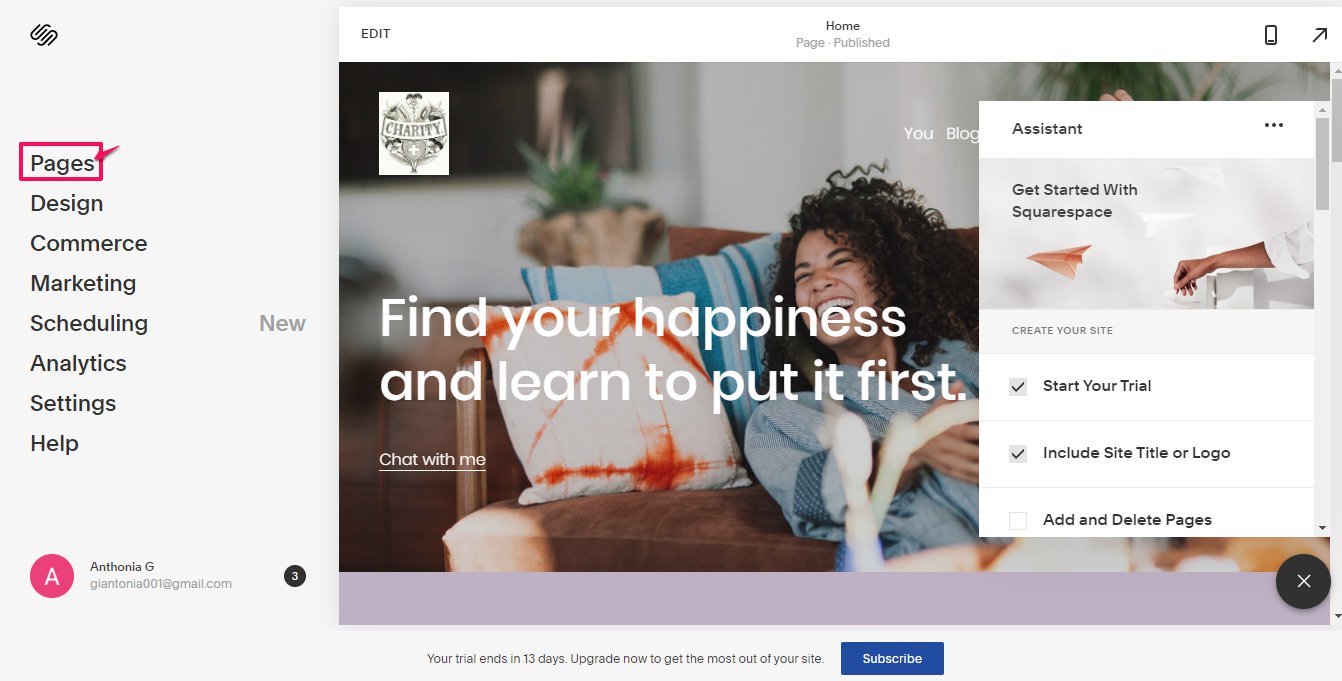
First, go to “Pages.”
You’ll see the above-mentioned main pages under the main navigation.
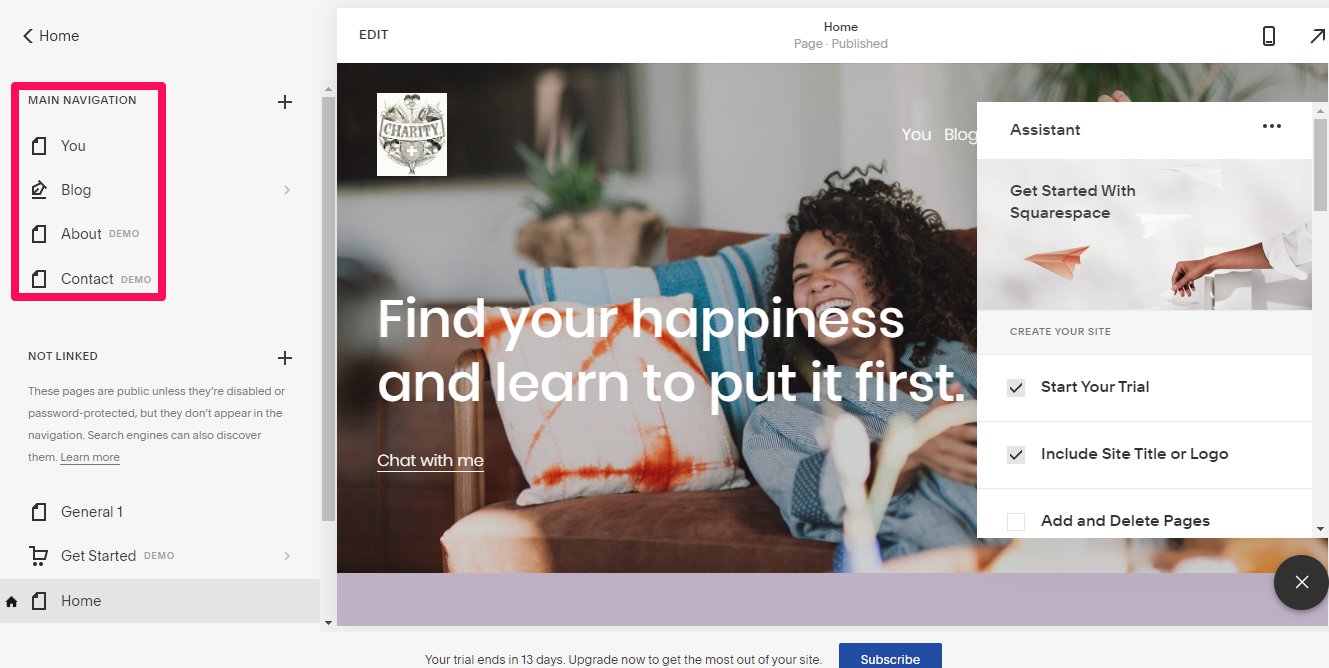
“General 1,” “Get Started,” and “Home” in the image above are also pages. Although they don’t appear on the navigation, the search engine discovers them unless you password or disable them.
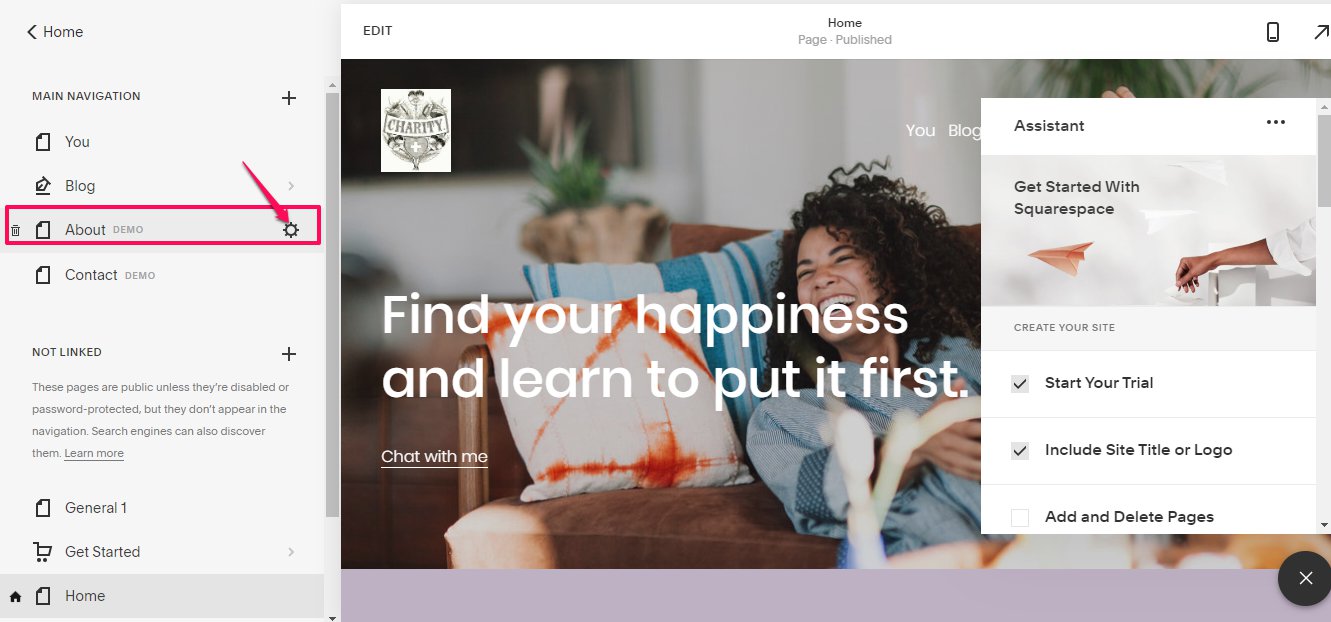
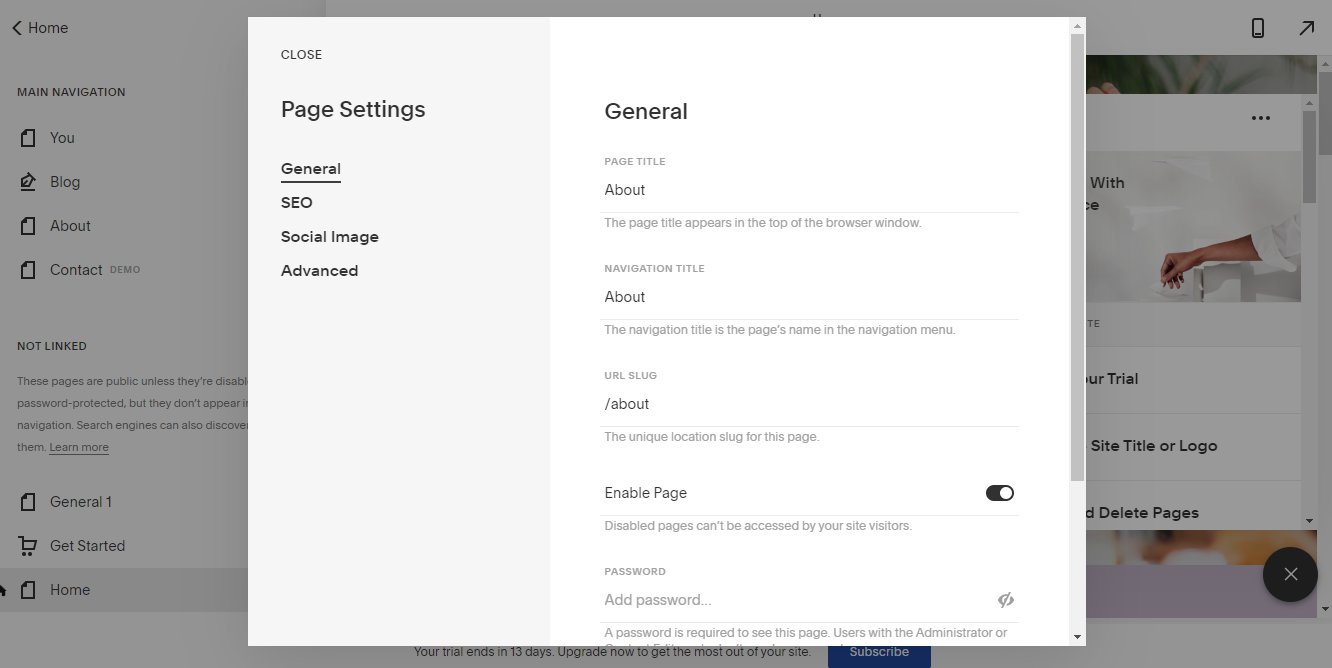
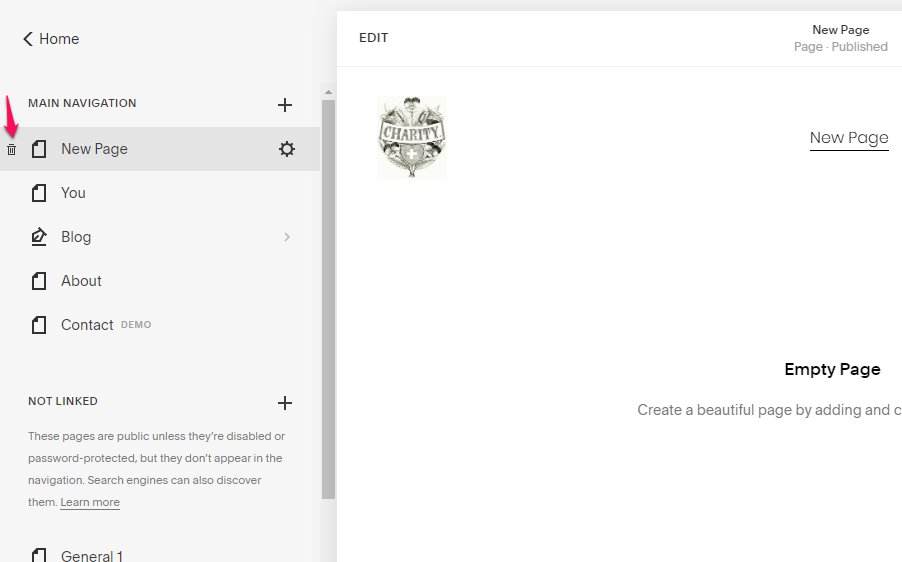
So, to edit the pages, hover your cursor over the one you want to change. You’ll notice a bin icon, a settings icon, and in some cases, an arrow.
Click the “settings” icon.
Once you feel the layout is right for you, you can edit the page for General, SEO, Social Image, or advanced purposes.
Add Pages
You can add as many pages as you want, then delete the pages you no longer need. And if you find out you needed any of those pages, after all, you can restore it within 30 days.
It’s that flexible.
To start adding pages, go to “Pages,” then click on the + icon beside “Main Navigation.”
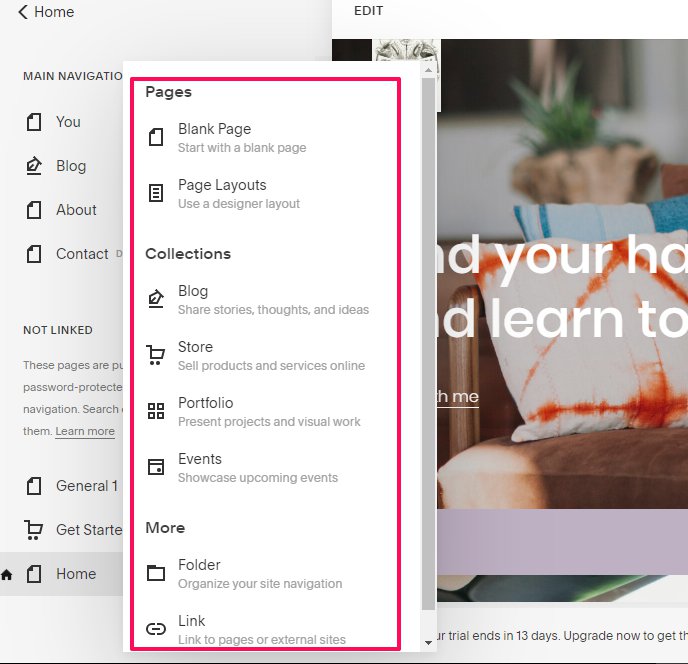
Squarespace categorizes pages into single pages, collections, and more. These pages collectively contain:
- Blank pages
- Page Layouts
- Blog
- Store
- Portfolio
- Events
- Folder, and
- Link
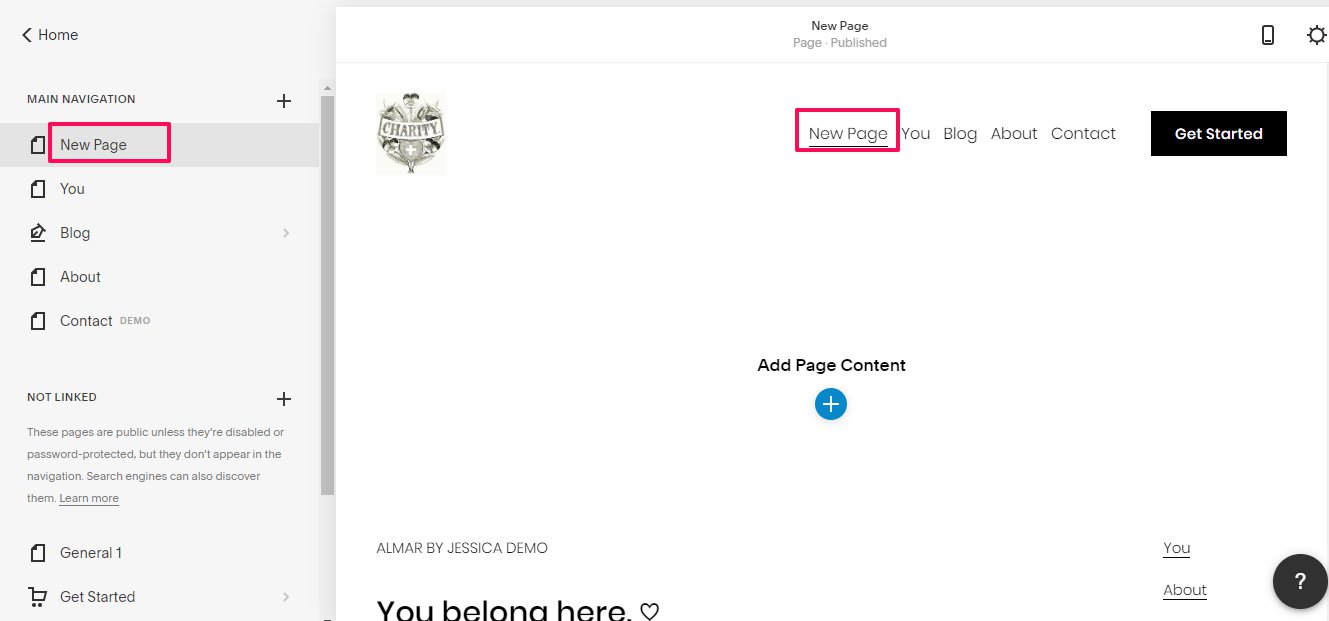
Clicking the “blank page,” for example, adds a “New Page” to your “Main Navigation” and it appears on your top navigation menu.
You’ll also notice that the preview page is empty, and you can create content by clicking the blue + icon in the middle of your page.
Delete and Restore Pages
If you decide that you don’t need a page for any reason, you can delete it.
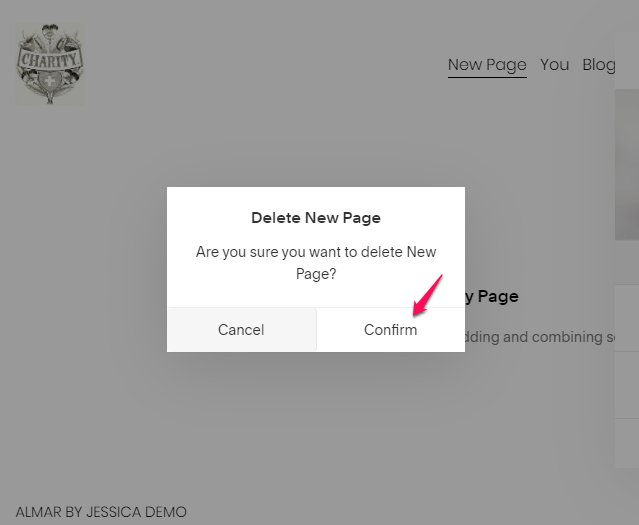
Go to “Pages.” Hover your cursor over the page you want to delete, and click the bin icon.
Then confirm.
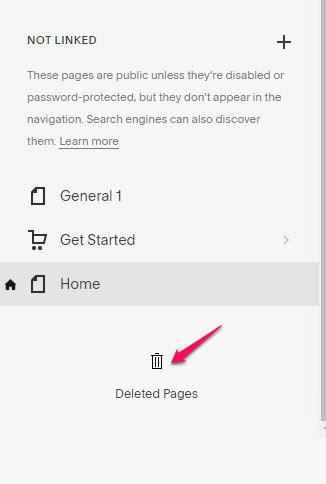
To get back a page you deleted, you’ll go to “Pages” and scroll down to the bottom of the panel.
Click the bin icon.
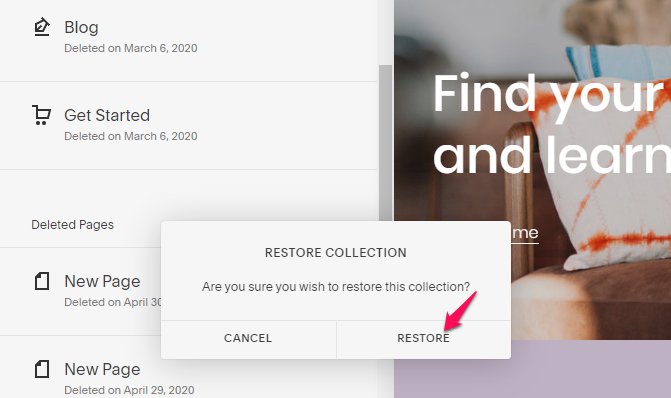
Then hover your cursor over the page you want to restore, and click restore.
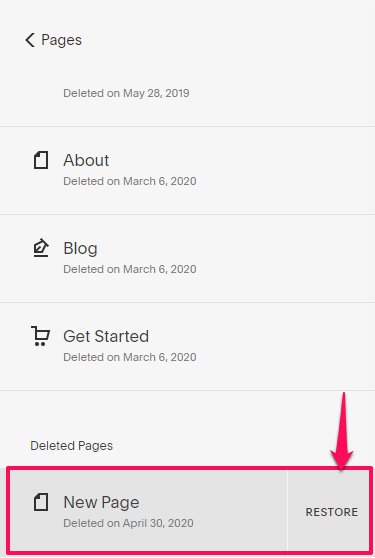
Then to confirm, click “Restore.”
Step #7: Change Fonts and Colors
For speed, you can customize your website further by editing your demo pages. Simply choose the color and font style that resonates with you.
If you make changes in your “Design” panel, it will affect the whole site. Albeit, you can change to individual pages by editing them.
Fonts
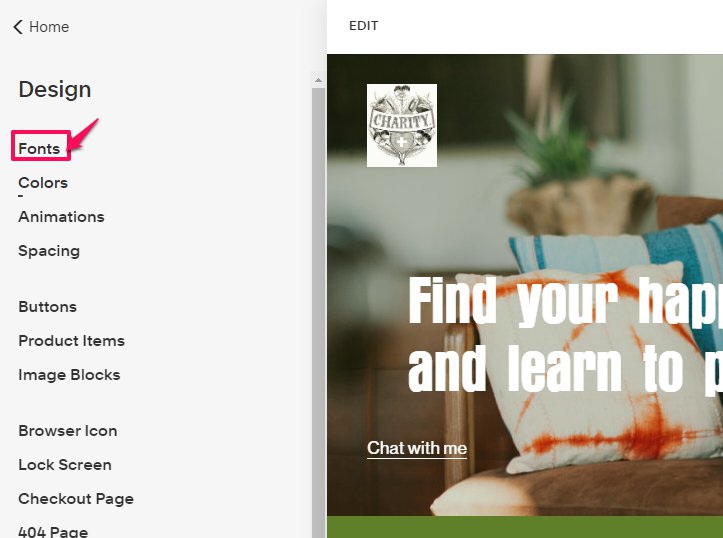
To change the font style of the whole page, click “Design” on your home panel.

Then select “Font.”
You can now choose between three main font groups.
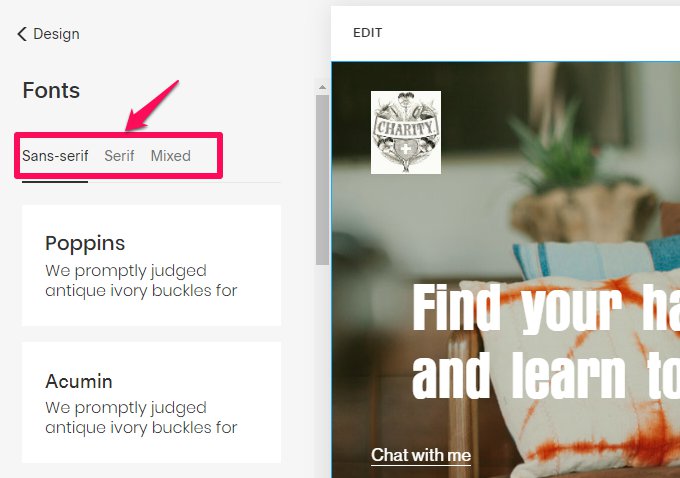
If you select any of the fonts here, all the texts in your site will carry that font style. Albeit, if you tap on the preview page at this point, it will give you more advanced options.
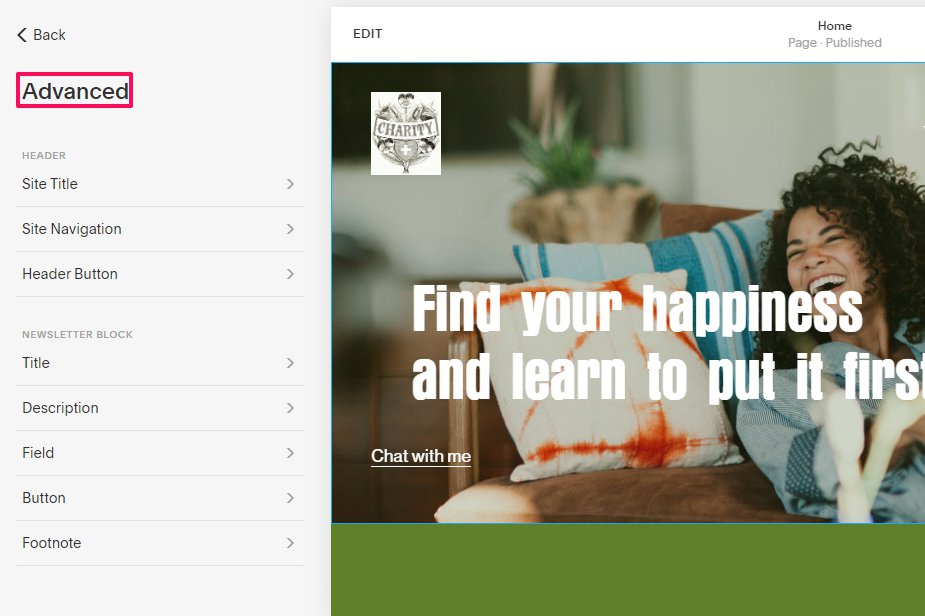
However, this allows you to edit the “Header” and “Newsletter Block” alone. Squarespace sets most fonts locally, so you can only change their font by clicking “Edit” on the preview page.
When you click the text you want to edit, you’ll notice an editing panel over the text box. It’ll allow you to:
- Change the size
- Select alignment
- Make it bolder
- Use italics
- Insert links, and more
Color
Just like the fonts, color changes that you make on the design panel will affect the whole site. Albeit, you can change the color of nearly everything on your website, including a single alphabet or number.
If you want to change the default color of your website, go to “Design” on your home panel. Click “Colors”
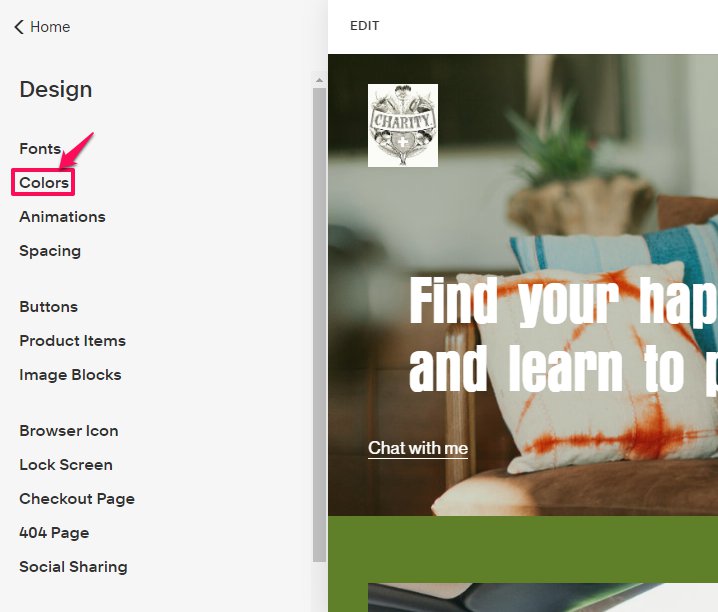
You can select your color by clicking “Edit.” beside the palette or any part of the palette.
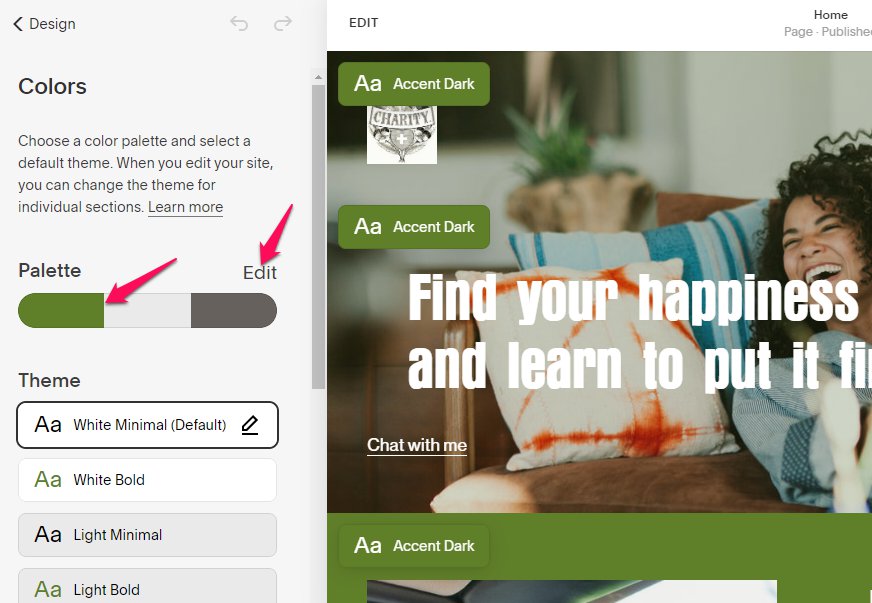
You can then customize your colors by choosing a shade from the dropdown.
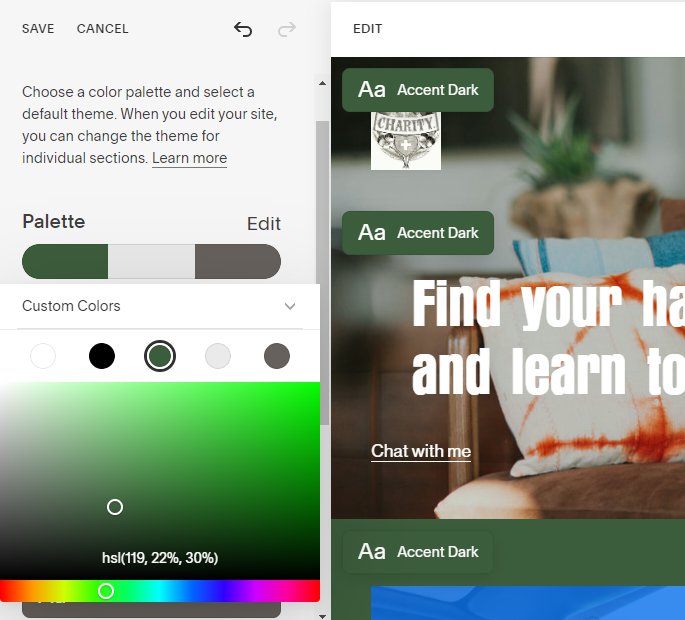
If you want to0 change text color, however, you’ll need to use codes.
Step #8: Add Images
Squarespace integrates well with Unsplash and Getty Images, which offers you access to countless stock photos. So you can change the images on your templates to further make your website original.
If you’re using a Squarespace version 7.1, uploading images can be a walk in the park.

On your preview page, click “Edit.” Then scroll to the image you want to edit and hover your cursor over the area. Click the icon for editing that section.
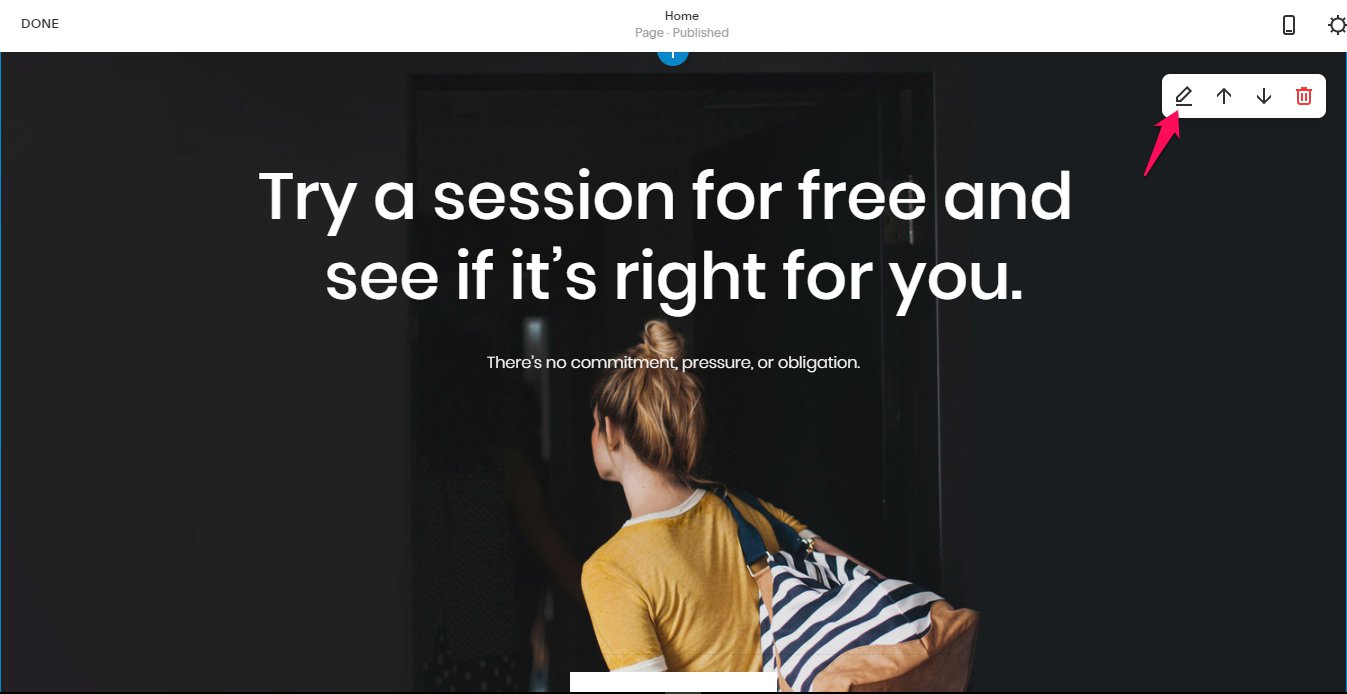
Then select “Background” from the pop-up.
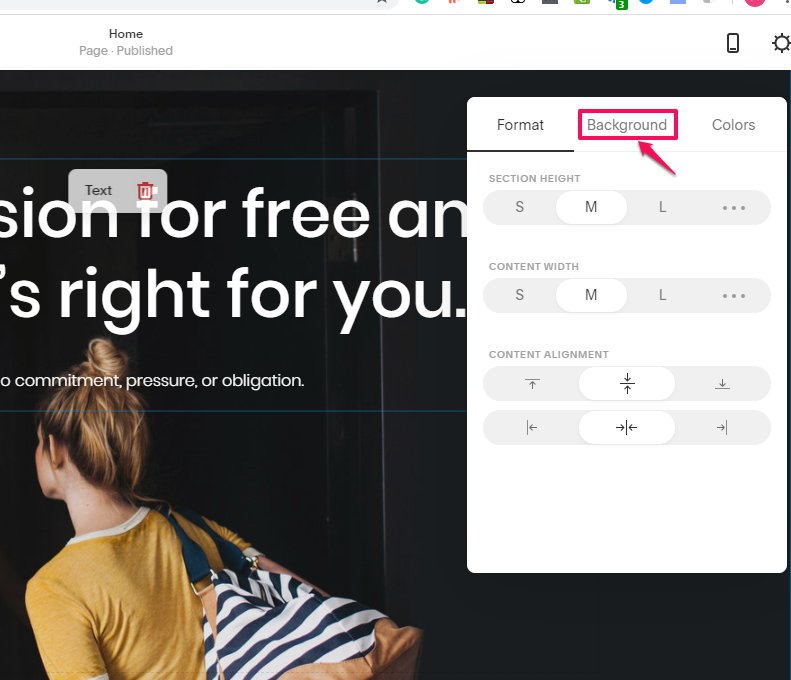
This allows you to replace, delete, or edit the image or video presently in the space.
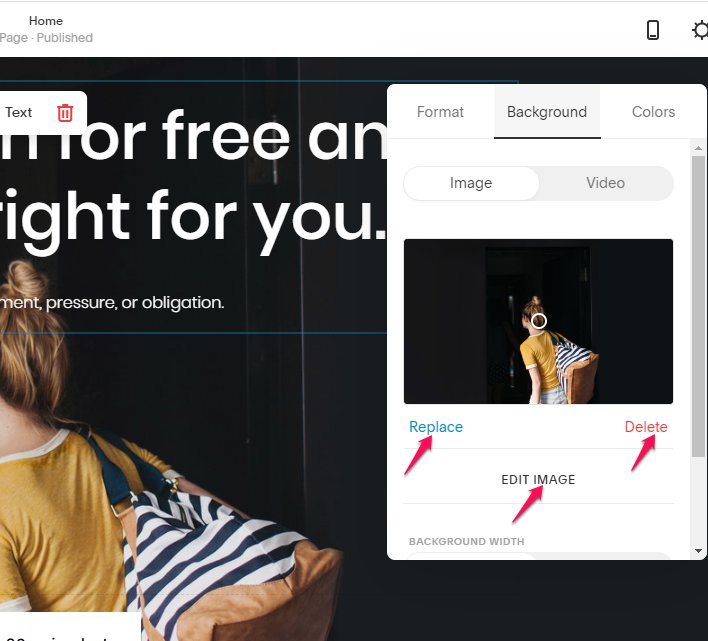
If you select “Replace,” it will enable you to substitute the present image with one from your computer.
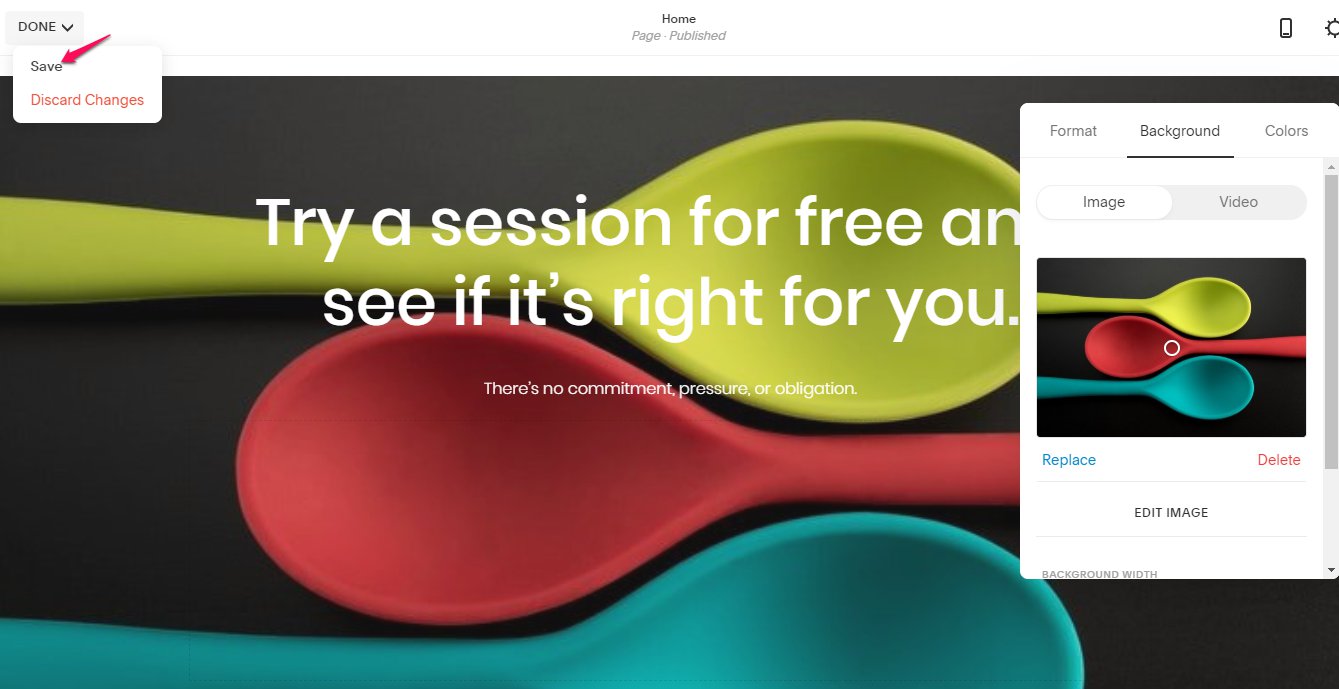
Click the dropdown beside “Done,” then click “Save” to apply the image.
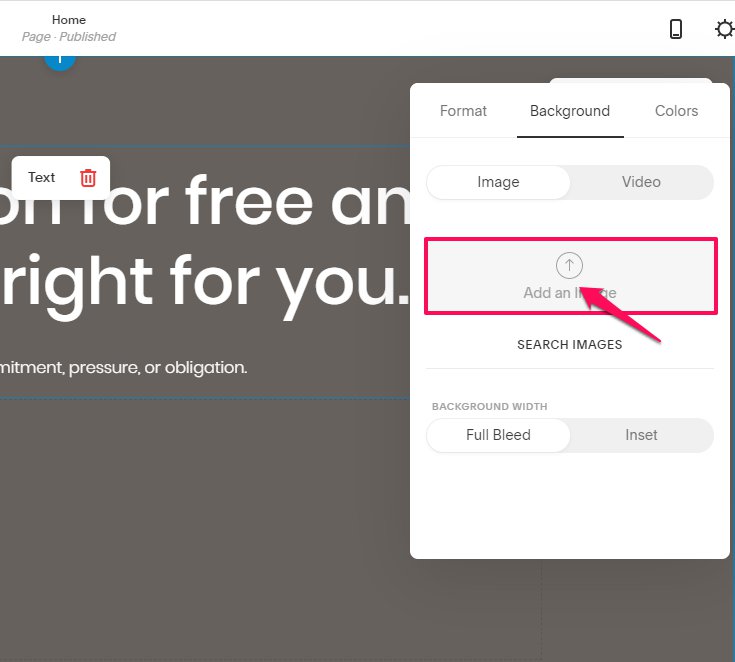
If you go the “Delete” route, you’ll first remove the image that’s in the space. Then you can drag and drop an image in the image uploader.
However, if you want to edit your images, you may adjust its
- Brightness
- Sharpness
- Contrast, and so on.
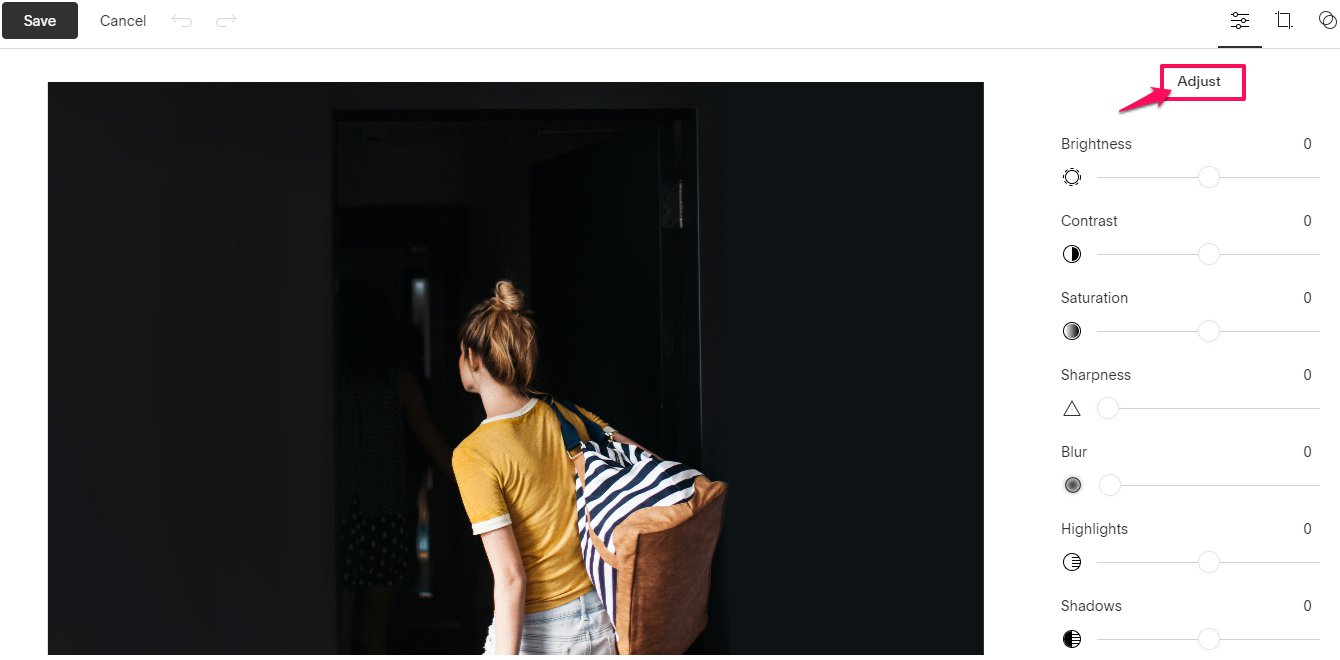
Be sure that you’re OK with the image before you save it because the changes you make will be permanent.
Squarespace recommends that you complete your edits within your two weeks trial period before you upgrade to the paid plan. But bear in mind that the layouts of templates and pages may differ.
Step #9: Connect and Update Domains
Squarespace provides an auto-generated .squarespace.com domain name when you sign up. So to personalize your account, you might have to get a new domain name or use an existing one.
The advantages of personalizing your account include:
- A professional look
- Improved brand strength, and
- Improved accessibility to your new website to visitors.
So, Squarespace helps you manage, connect, and transfer your domains.
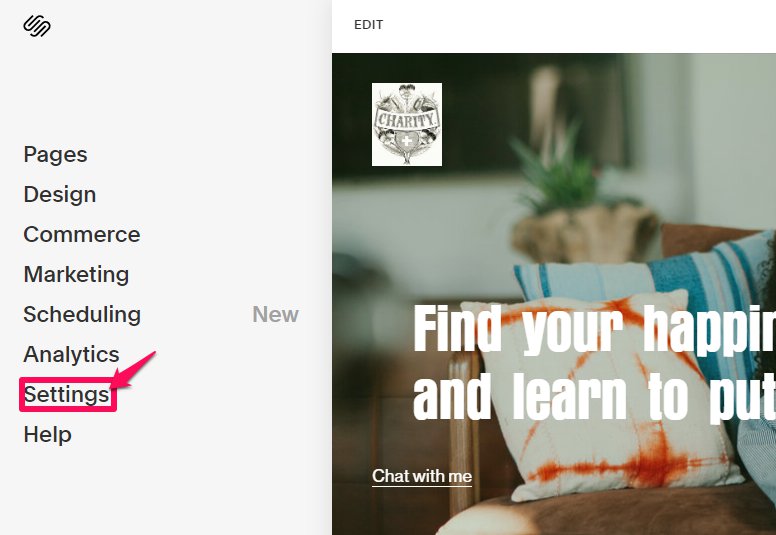
To personalize your Squarespace domain, go to your home page and click “Settings.”
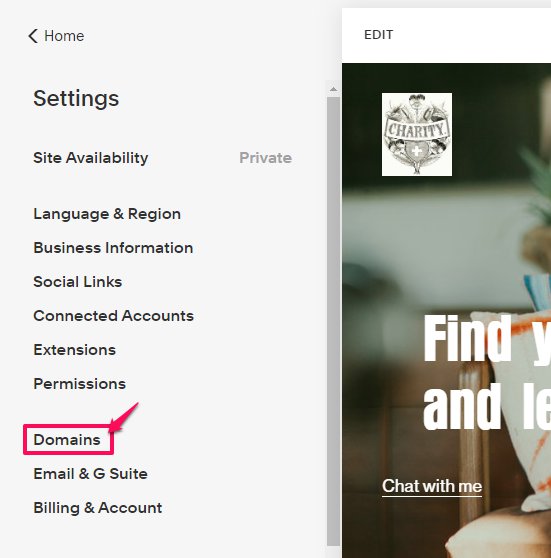
Select “Domains.”
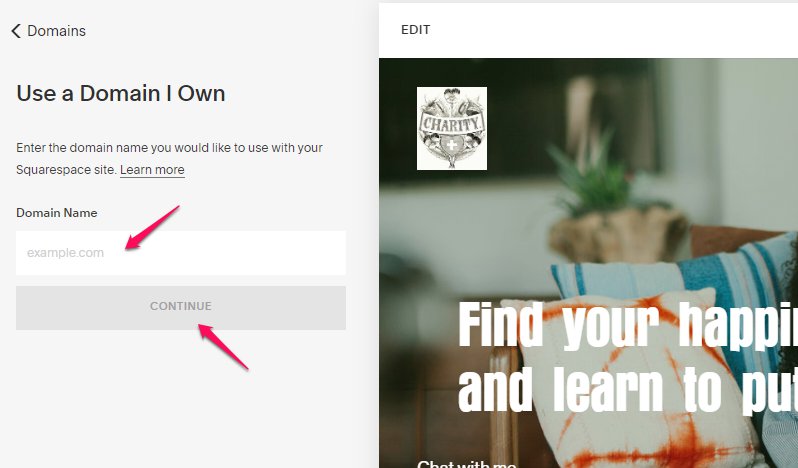
Now, if you already own a domain, click “Use a Domain I Already Own.”

Then enter the domain name in the right place. Once you’re done, click “Continue.”
This will lead you to choose from two options. One option requires you to transfer your domain to Squarespace, while the other asks you to connect from your provider.
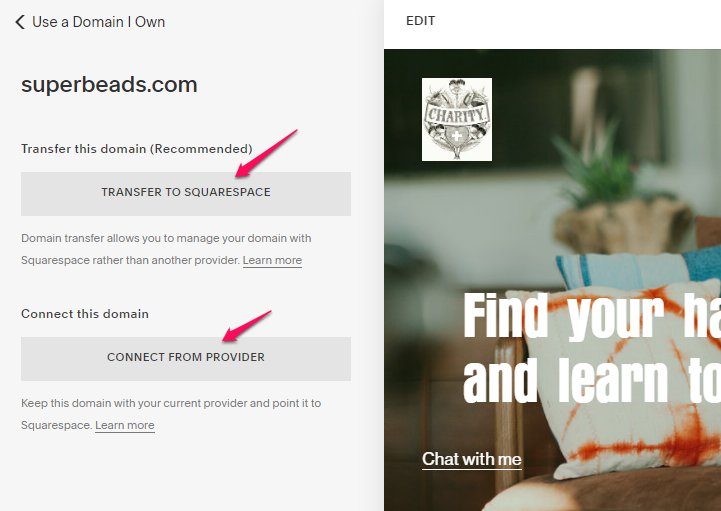
Transfer to Squarespace
The first option allows Squarespace to manage your domain within your site. That way, you can handle your billings and settings from your Squarespace account. It doesn’t matter if you’re still using your trial or are already using a paid plan.
Plus, if you don’t have a site yet, Squarespace links your domain to a parking page until you get one.
If you select Transfer to Squarespace, follow the guidelines and instructions that come next.
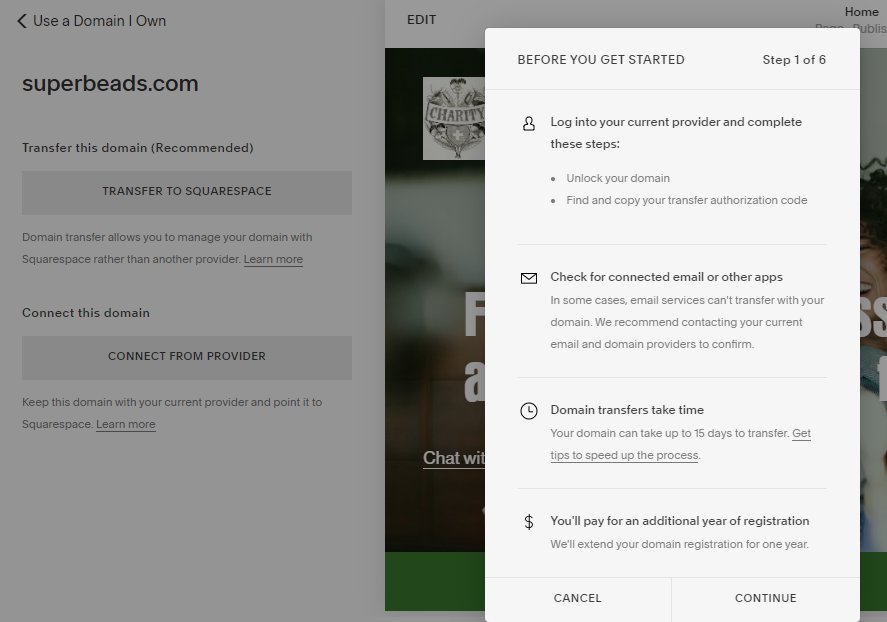
If you click “Continue,” then be ready to provide the Transfer Authorization code.
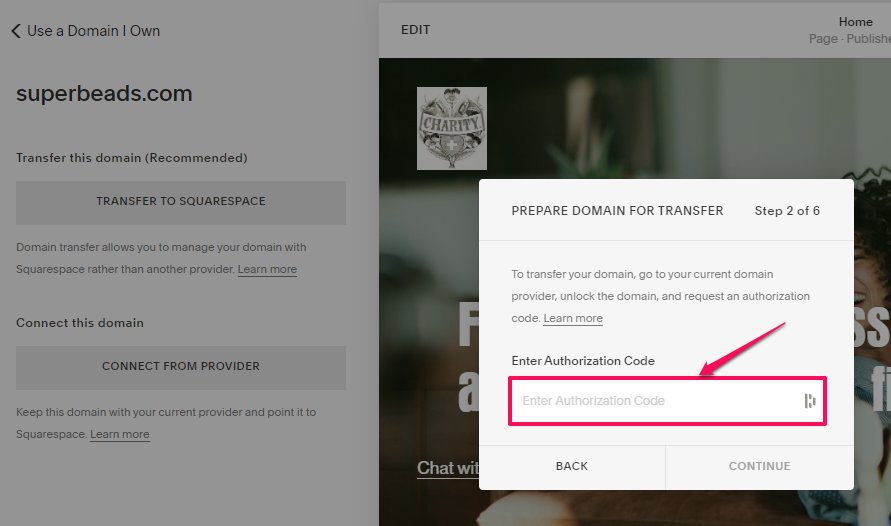
Click “Continue” and follow the rest of the instructions.
Connect From Provider
This option allows you to retain your domain with a third-party and still connect with Squarespace. It follows a process known as domain mapping. You’ll have to make a few changes to your registrar’s account.
In the end, you’ll still be registered with the third-party you purchased from, but remain connected to your Squarespace account. First, find out what you need to put in place to start the connection.
To connect your domain, follow the previous steps to get a domain till you reach the options to transfer to Squarespace or connect from a provider.

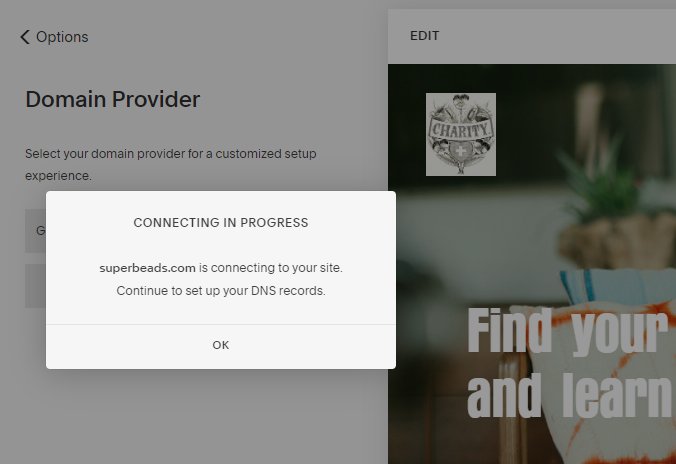
This time, however, click “Connect From Provider.” Then select a provider from the dropdown menu and click “Connect Domain.”
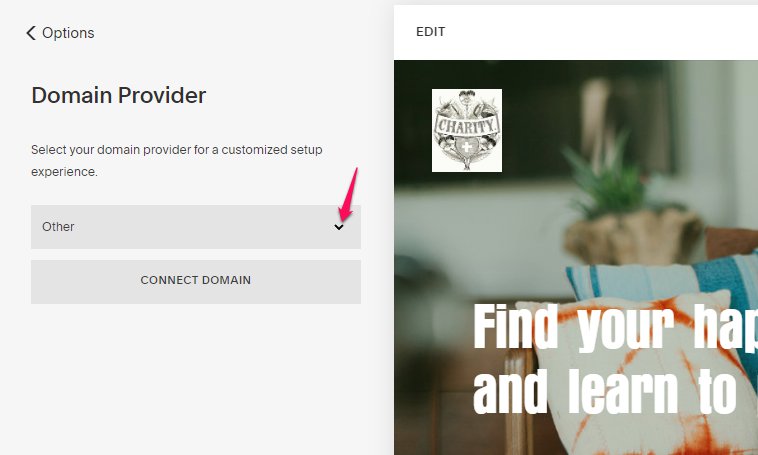
Click “OK” to accept the message that pops up.
Purchase a Domain
If you don’t already have a domain to connect or transfer, you’ll have to buy one to get a personalized feel.
You’ll go through “Settings” to “Domains,” but this time, click “Get a Domain.”
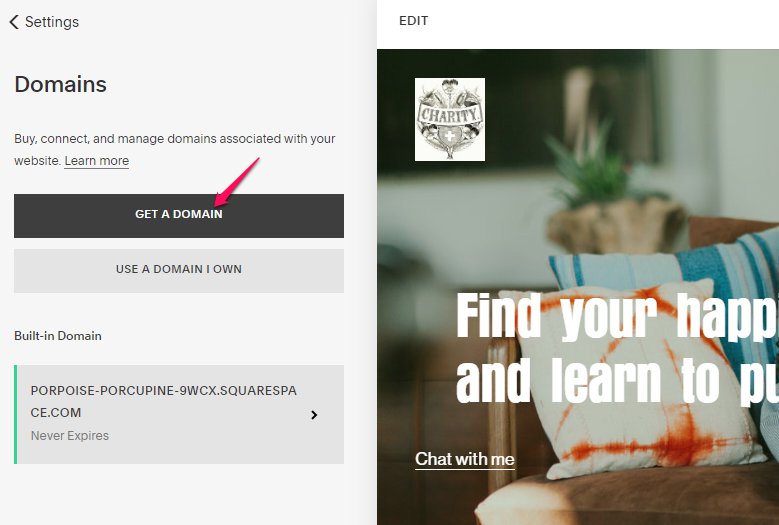
You’ll get suggestions for domain names that incorporate the name you used for your site title. You’ll also see the names that are taken and the price of those available.
When you hover your cursor over the name you’re interested in buying, “Add” will appear where the price was.
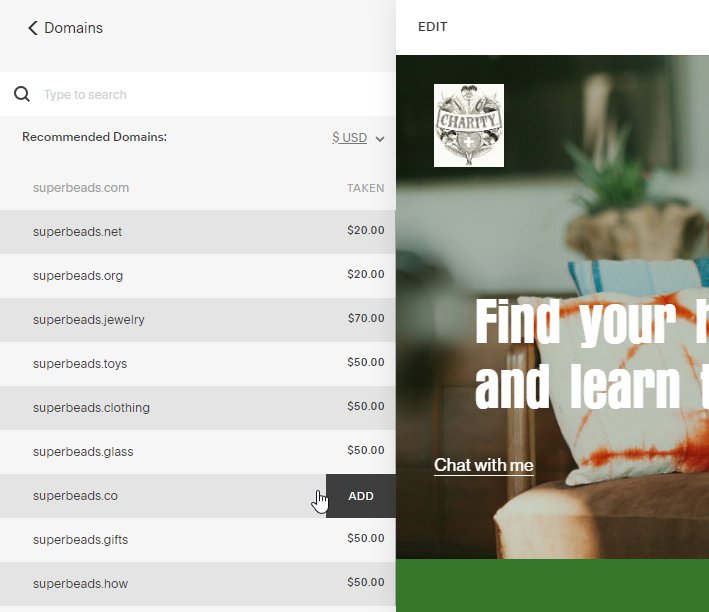
Click “Add,” and you’ll have it in your cart.
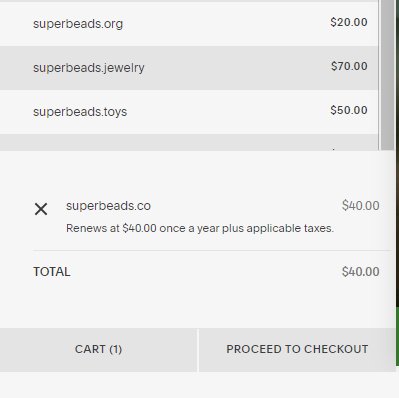
Click “Proceed to Checkout” to make it yours.
Change Your Built-in Domain Name
If you don’t have an existing domain and aren’t ready to buy, you can change your built-in domain to shorten it.
Follow the same process as the other two, but this time click the box under the “Built-in domain.”

This section will prompt you to rename the string that appears before .squarespace.com. Replace what you have there and click “Rename.”
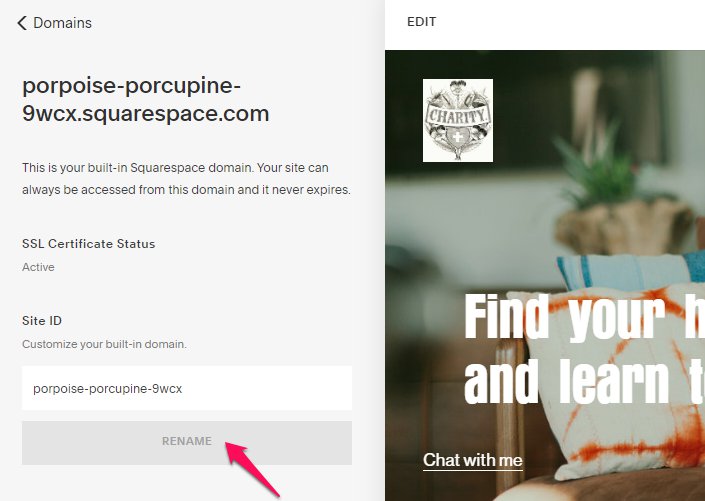
Click “Confirm” on the pop-up that appears.
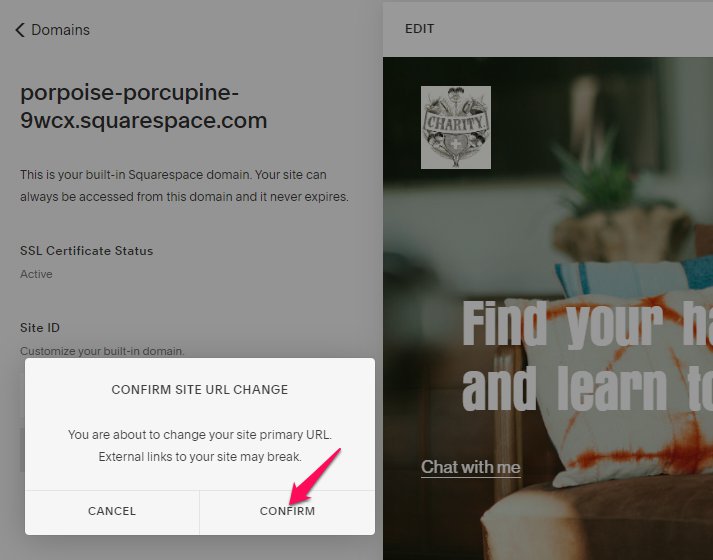
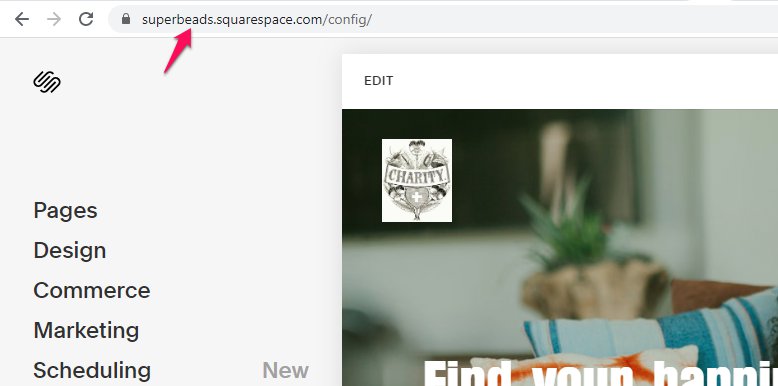
As your built-in domain changes, so would your URL.
However, Squarespace offers a one-time free custom domain for a year. Albeit, you must be on an annual billing plan, and the domain must have an eligible TLD. The one year starts to count from when you register or transfer your account.
Step #10: Optimize for Search
The easiest way to make your potential users find you is to optimize your website for search engines. Search engines show you headings, page titles, and site title.
To optimize your website, go to “Marketing” on your home panel.
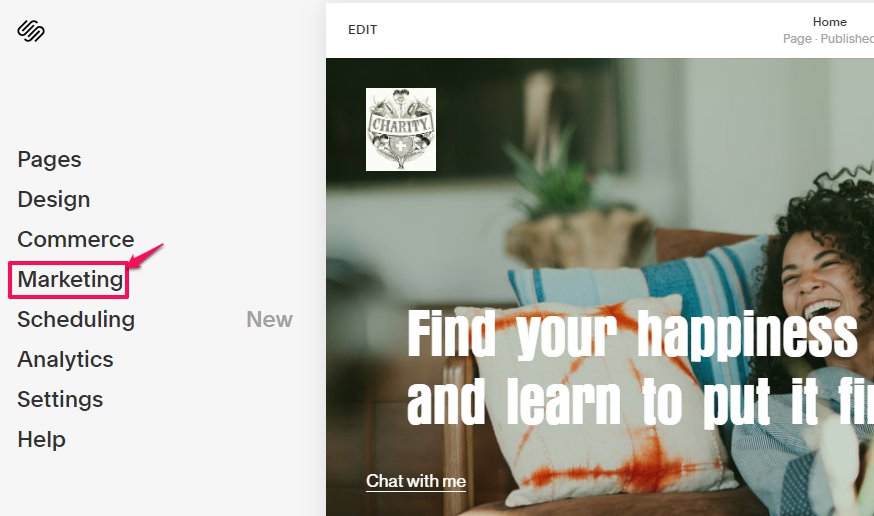
Then click “SEO.”
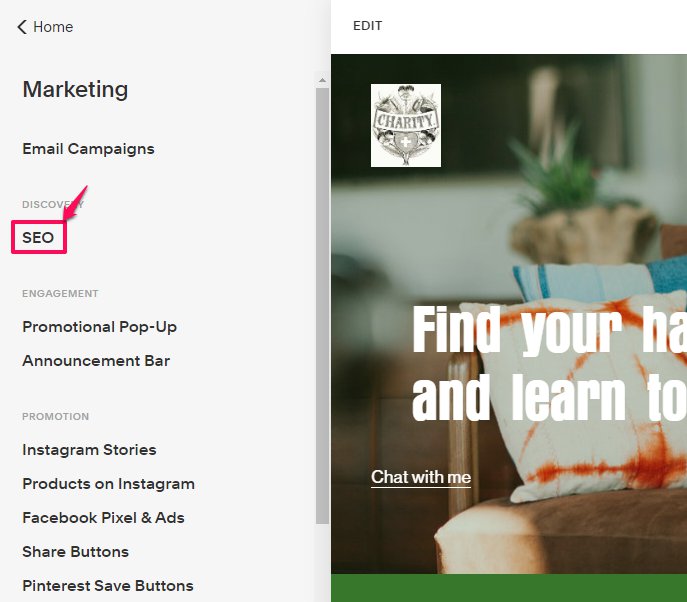
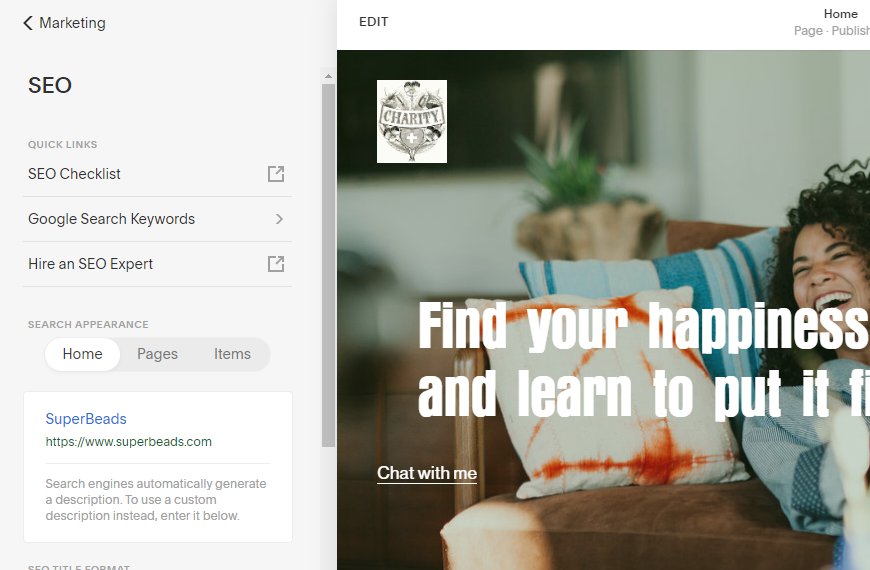
You’ll find links to an SEO checklist that help you remember all that you should do while optimizing your website. “Google Search Keywords” allows you to verify your site with Google Search Console.
So, you’ll have access to keywords that’ll help you drive traffic to your website and improve your sit’s performance.
You can choose your search appearance, format your SEO title, and even hire Squarespace experts if you want.
Squarespace offers built-in SEO tools to work with. Before you launch your site, use Squarespace’s SEO checklist to be sure you don’t leave anything out.
Some of the critical things worth remembering include:
- Site title
- site description
- Connect a custom domain
- Connect to social media accounts
- Enable AMP
- Add a browser icon
- Create a custom 404 page
- Verify your site with Google Search Console
- Use keywords strategically
- Link to your site’s content
- Use analytics tools like Google Analytics
Your ranking may fluctuate as search engines index your changes. Albeit, if your ranking doesn’t improve in a week or two, use analytics to see trends that might explain the dip.
You might need to update your keywords by using different search terms. Your visitors are humans, so include words and phrases that match what people are likely going to use to find you.
After updating your SEO metrics, you can use Google Search Console to request that Google index your website. But make sure you disable passwords on your site or pages.
Once you connect Google Search Console, you’ll start getting reports of the keywords your visitors use to find you.
To begin tracking passwords, go to “Analytics” on the home panel.
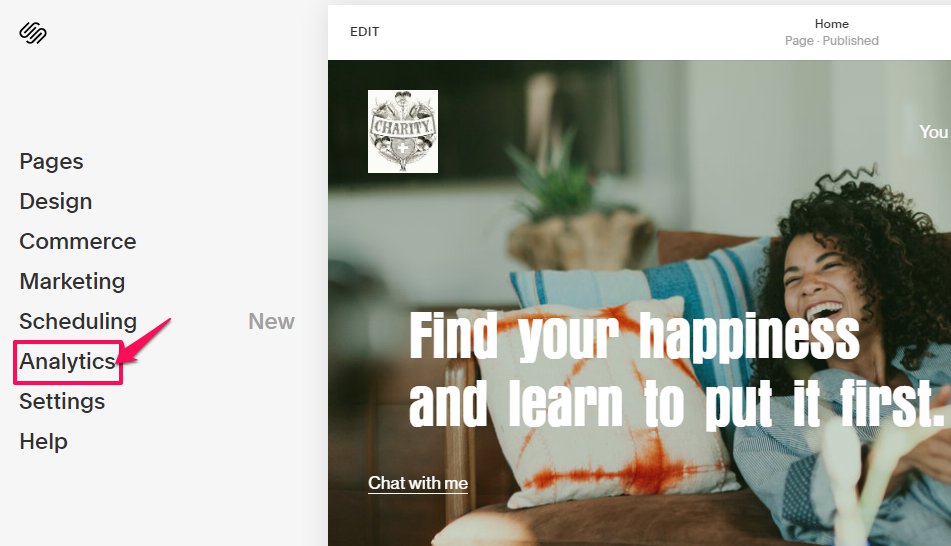
Click “Search Keywords.”
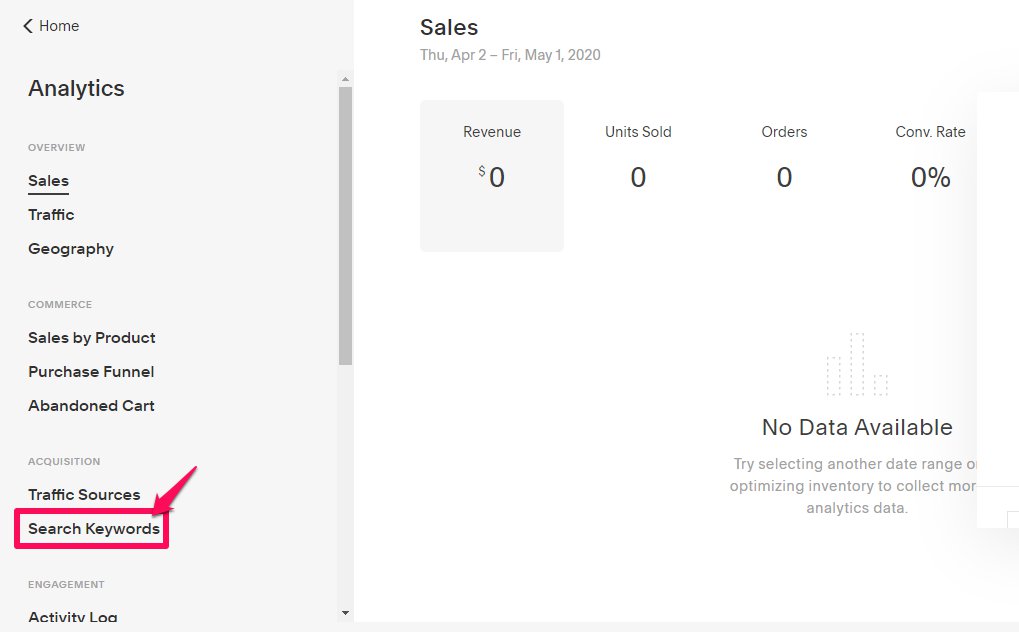
Click “Connect.”
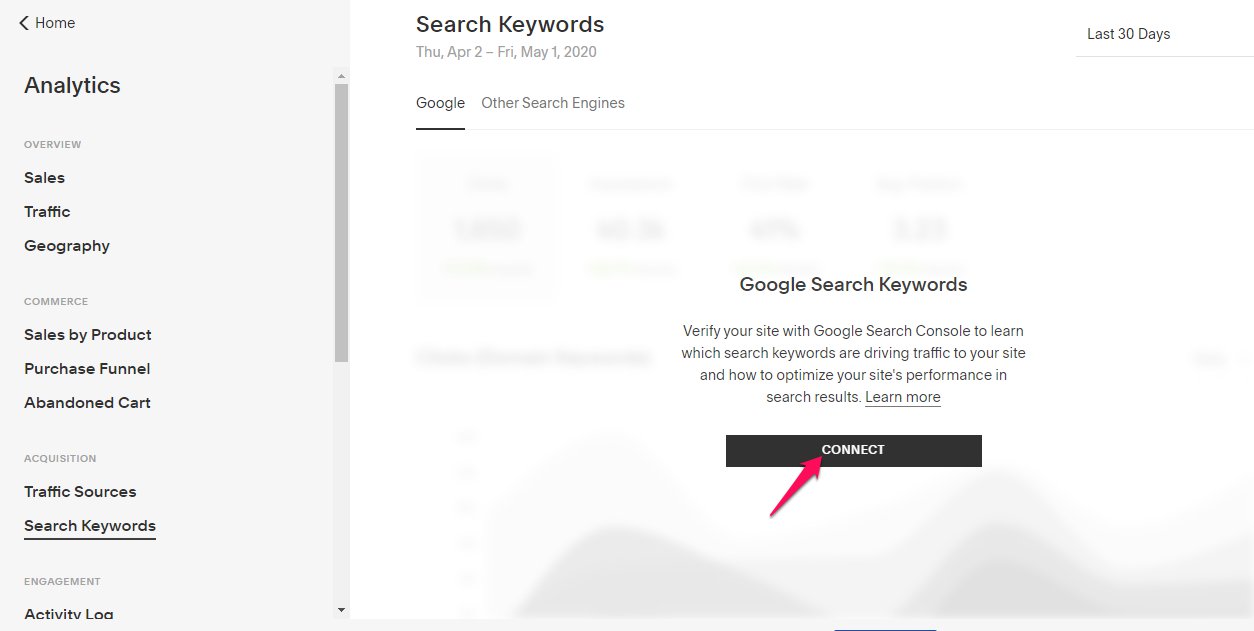
Then login to the Google account connected to your site. You have to click allow to get the data you’re searching for. The data will populate in about 72 hours.
If you’re still in your trial period, you can’t complete the verification with Google Search Console. At this point, your website is hidden from search engines. So, you must launch your site first before you can continue.
Step #11: Launch Your Site
Before you publish your website, go over the checklist, and tick the items you’ve done. It helps you confirm the areas that you want to perfect.
Although Squarespace provides a 404 page for every site, you can customize yours if you wish.
Step #12: Incorporate Marketing

Squarespace includes marketing tools to help you drive more traffic. You can manage email campaigns and track performance. You can integrate Mailchimp too.
You also get to promote your site on social media and other platforms, including:
- Tumblr
You can use promotional pop-ups if you’re on a business or commerce plan. Plus, they come in different layouts that you can change to fit your needs.
You get a URL builder that helps you create a URL for your ads. It shows you the performance of your paid ads and the sources of your traffic.
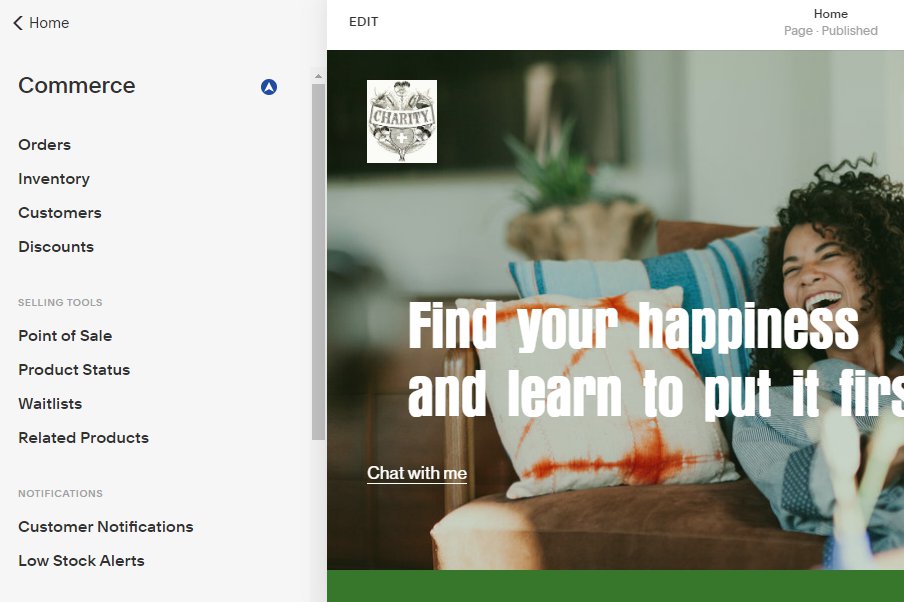
Squarespace allows you to manage your order, inventory, customers, and discounts on your website. You also have access to selling tools and notifications.
Although you have to be on a paid plan to use most of them, you can use your trial period to learn how they work.
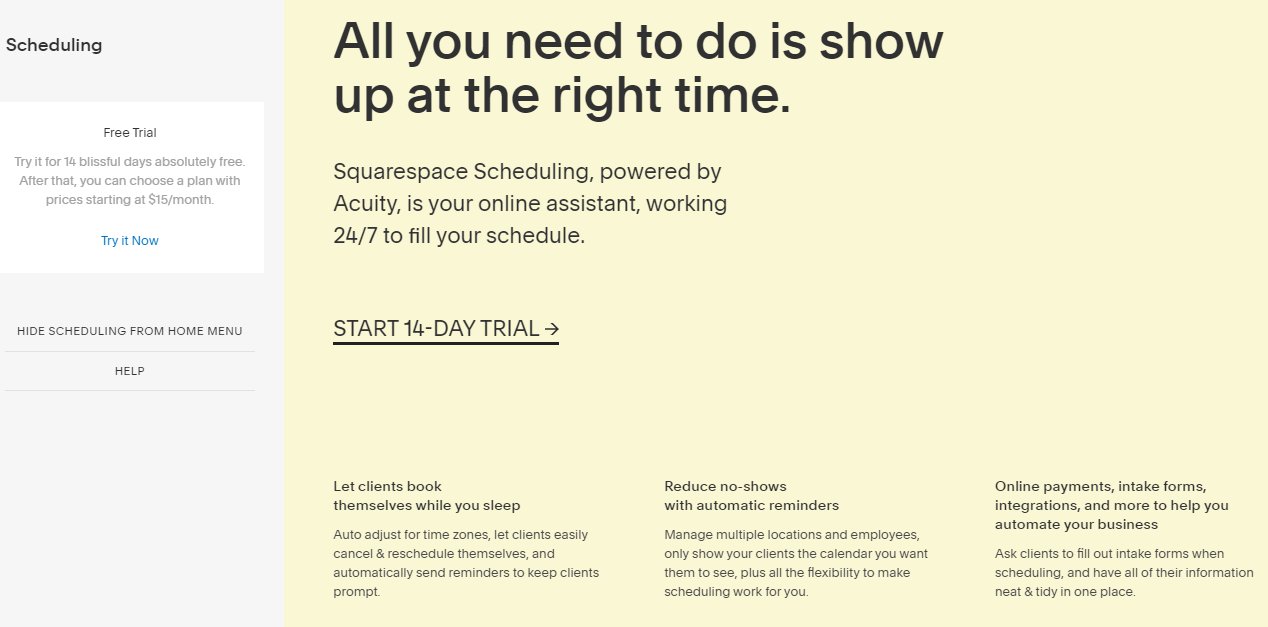
The platform helps you with scheduling. Clients can book themselves, and because it adjusts for time zones automatically, you’ll have fewer conflicts. It automates intake forms, online payments, and integrations.
Plus, automatic reminders help you reduce no-shows.

Squarespace Pricing
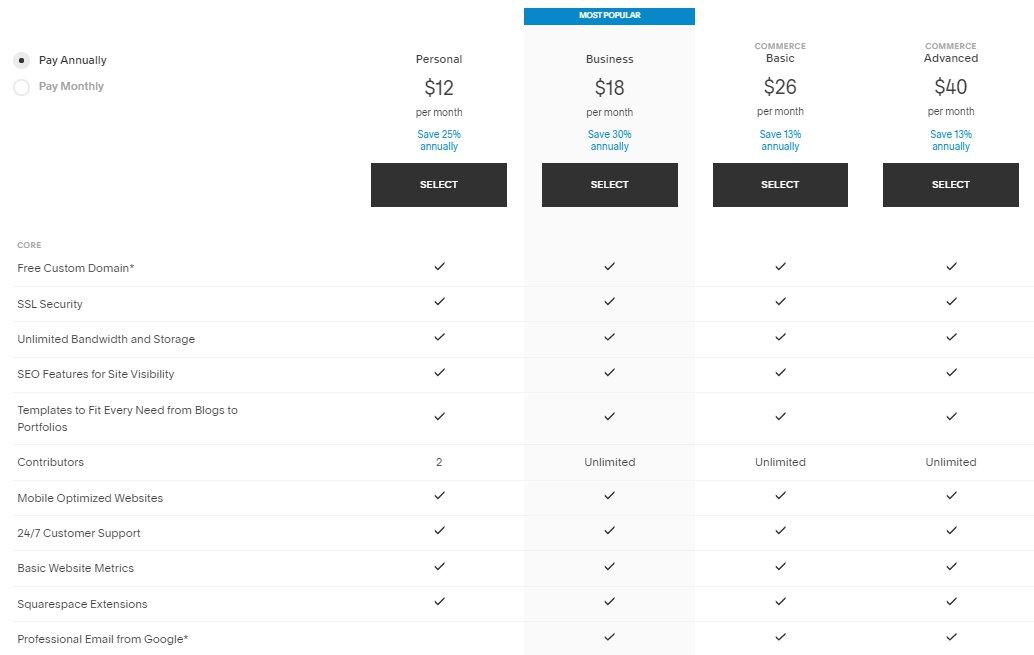
When your trial period is over, or you feel like upgrading to a paid Squarespace pricing plan, you can choose from any of the platform’s four main price plans. These are:
- Personal
- Business
- Commerce Basic
- Commerce Advanced
Squarespce Personal Plan
At $16 per month, or $12 if you pay annually, this Squarespace pricing plan offers:
- Free custom domain
- Unlimited bandwidth and storage
- Search Engine Optimization features
- SSL security
- Templates that match every need from portfolios to blogging
- Two contributors
- Customer support round the clock
- Basic site analytics
- Mobile optimized sites
- Squarespace extensions
So, you save 25 percent if you pay annually.
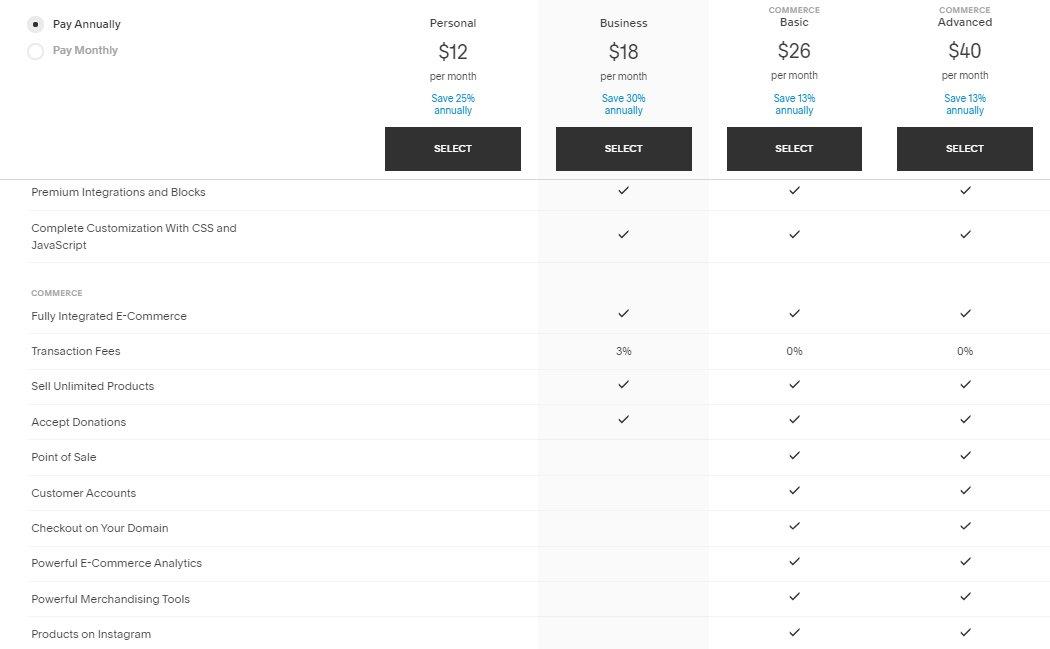
Squarespace Business Plan
The Business plan goes for $26 per month when you pay monthly. But you spend $18 when you pay it annually, which gives you a discount of 30 percent. So, the Business Plan offers you all the features of the Personal plan and more.
So, in addition to the personal plan, the Business plan is:
- Professional Google email
- Fully integrated e-Commerce
- Conditional $100 Google Adwords Credits
- Integrations and content blocks
- Full CSS and JavaScript customization
- Three percent transaction fees
- Sell unlimited products
- Accept donations
- Unlimited contributors
- Advanced website analytics
- Promotional pop-ups and banners
- Gift cards

Squarespace Commerce Basic Plan
Commerce Basic offers all the features of the Business plan and more. At $30 a month (and $26 if you pay annually),
this plan offers:
- No transaction fees
- Point of Sale
- Customer Accounts
- Checkout on Your Domain
- Powerful E-Commerce Analytics
- Powerful Merchandising Tools
- Products on Instagram

Squarespace Commerce Advanced Plan
Commerce Advanced goes for $46 per month (and $40 if paid annually). In addition to the Commerce Basic plan, this plan offers:
- Sell Subscriptions
- Advanced Shipping
- Advanced Discounts
- Commerce APIs
- Limited Availability Labels
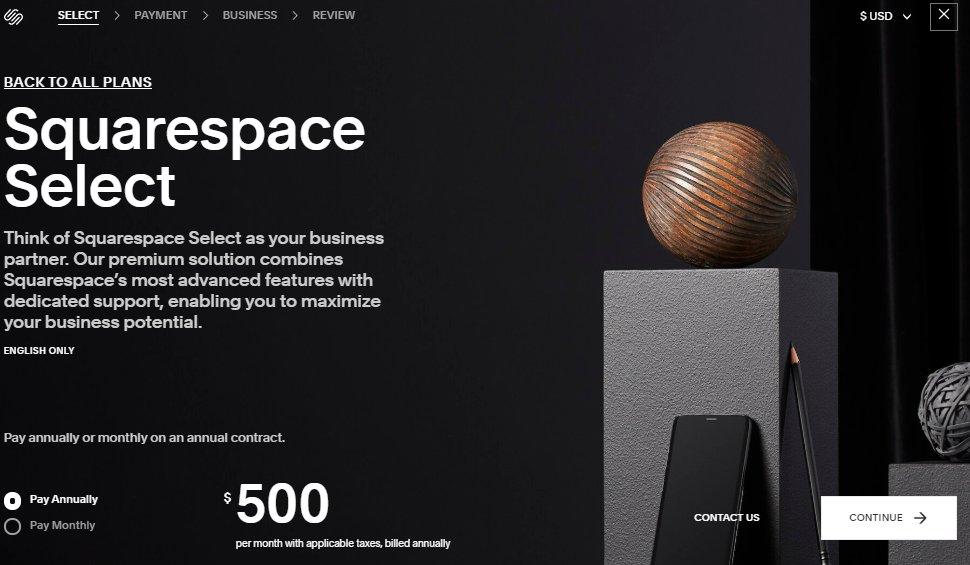
Squarespace Select
Squarespace Select is a premium solution for enterprise, small business, and individual users that want tailored, hands-on support. This plan gives you a customized experience. So, at $500, it offers advanced features and undivided support to help small business owners thrive.
For more info check out our Squarespace review and Squarespace pricing guide.
How to Use Squarespace: Wrap Up
Squarespace makes it easy to understand your website from start to finish.
So, you’re able to access and even build your site before you start using it. In other words, Squarespace lets you enjoy your subscription time like a professional.


Comments 0 Responses