Look, I haven’t had a job in years.
Instead of rushing to be at work on time, I have the freedom to live each day on my terms.
Building websites that generate revenue is how I won that freedom.
I’ve learned a ton over the years. What to do. What not to do.
In this post, I’m going to teach you how to build a website right the first time.
We’ll walk together through the entire process. If you follow this post, you’ll have a website when you are finished.
Everything is explained in plain English, so don’t worry if you are not familiar with domains and hosting. I’ve included clear, simple guidance for every possible stumbling block.
The important thing is getting your site up now. It’s the first step on the road to steady income and your new job-free life.
Build Your Website: Two-Minute Quickstart Cheat Sheet
Want to get your website set up in the next hour?
This section is the barebones cheat sheet to help you get set up right away.
Ready?
- You are going to need a web host. I recommend Bluehost because it’s safe, reliable, and costs less than a cup of coffee each month. Plus, readers of my site get an exclusive deal. When you sign up, I highly recommend purchasing the Domain Privacy + Protection to keep your personal information off the public record. It’s an extra cost, but totally worth it.
- Next, you need a domain name. This is where people will find you on the internet, at www.your-domain-name.com. If you sign up with Bluehost, they include a free domain name for the first year, which saves an extra $10-15.
- Finally, download and install WordPress on your site. This is how you will manage all of your content. With Bluehost, WordPress is a one-click install.
Congratulations! You are ready to start building your website.
Sure, there’s a lot more to do. But now you are on your way to putting in your two weeks and working for yourself.
If you had any issues following instructions in those first three steps, everything is explained in much more detail below. Plus, there are tips for how to edit your site safely and start marketing your business.
Build a Website Step 1: Your Site Needs Somewhere to Live (i.e. Web Hosting)
The first component of building a website is finding a web host.
It might seem intimidating, but it isn’t.
Think of your website as a collection of files. When it’s “hosted” on your computer (like all of your other files), only you can open it.
When you host those files on a web server, anyone can connect to that server through the internet.
Hosting companies offer space on these servers for people’s websites so they don’t have to maintain their own server.
When I’m evaluating different web hosts, there are really three major things I’m looking at: uptime reliability, site speed, and customer service.
- Uptime is how often your website is up and running. If your site is down, people can’t access it, which renders it useless.
- Site speed is super important. People don’t stay on websites that take a long time to load and Google ranks faster sites higher.
- Customer service really matters because websites have issues. They just do. Being able to reach out to expert support and get your problem solved is hard to put a price on.
All of the reputable web hosting providers will have these areas covered, just make sure you aren’t going with a dodgy one.
Bluehost has been around a long time and has a great reputation. You’re not going to have to think about uptime or speed, and 24/7 customer service comes with every plan they offer.
Worry-free hosting is the first reason I recommend Bluehost. It’s $2.95/month and comes with a free domain name, one-click WordPress install, and a 30-day money back guarantee.
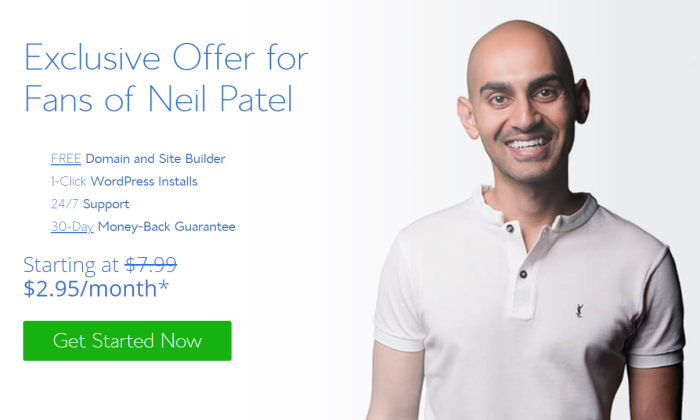
To take advantage of the discount simply visit Bluehost and click “Get Started Now.”
That’s going to open up a new page that outlines three different plans. You want the Basic plan. It’s got everything you need to get one website off the ground for an unbeatable price.
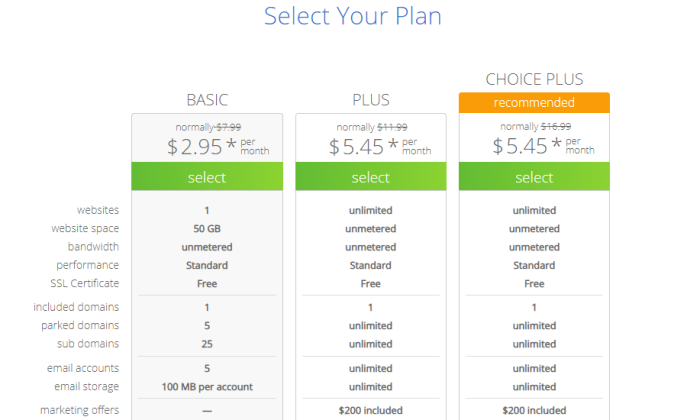
Click “Select” under the Basic plan.
This brings up a new screen that asks you to set up your domain:
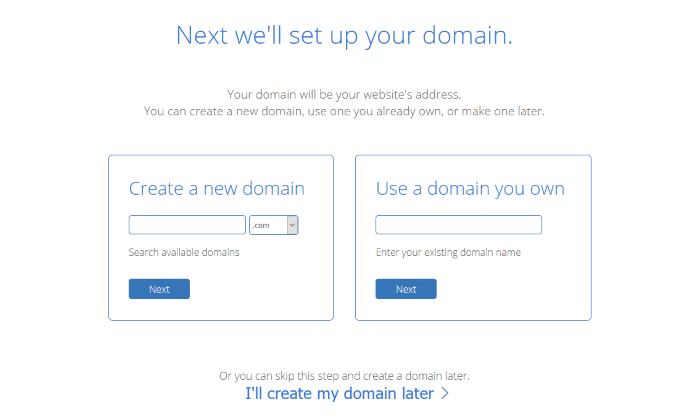
Assuming that you don’t already have a domain, you’re going to need to create one. Bluehost makes it super easy, and we’ll go over creating a new domain name in step 2 below.
So type in your desired domain name if you have it. Otherwise, click “I’ll create my domain later” below the two boxes. This will open a new window where you can enter your information and finish signing up.
After you fill out your information, it will ask you which package you want to purchase:
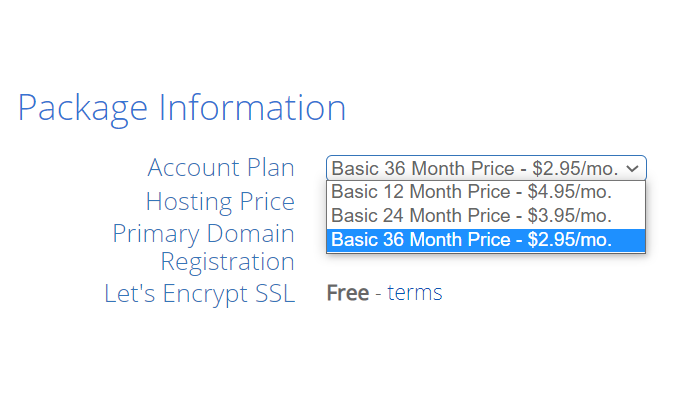
I recommend going with the “Basic 36 Month Price” in order to get the cheapest hosting plan for the longest time. There’s a higher upfront cost than the one-year and two-year plans, but this will save you the most money in the long term.
Below the package information are the various package extras you can choose:
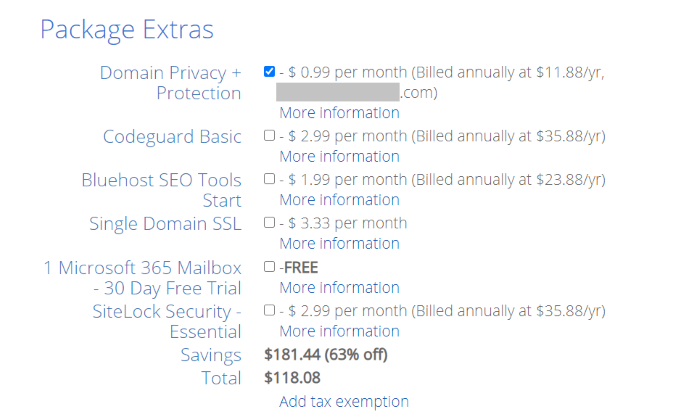
With the exception of Domain Privacy + Protection, you can ignore all these extras for now. Some of them may be checked by default, so be sure to deselect the ones you don’t want.
You want Domain Privacy + Protection because it keeps the personal information you used to register your domain from becoming part of the public record. Once the extra protection is enabled, potential attackers will only be able to see Bluehost’s business information when they look up your domain.
After that, add your payment information, check the box that says you’ve read the terms and conditions, and click “submit.”
Just like that, you have a host for your website.
Important Note: If you decide to finish the Bluehost signup process and create your domain later, you won’t see the Domain Privacy + Protection listed under package extras. You will have to upgrade that option later.
Build a Website Step 2: Choose the Perfect Domain Name
If you haven’t already, it’s time to pick a domain name for your website. In this section, I’ll walk you through how to sign up for a domain name with Bluehost.
The hardest thing about choosing a domain name is finding one that isn’t taken already, so I’m also going to share two methods you can use for coming up with something new.
Already have some ideas? Enter your potential domain name here to see if it’s available:
You need both a web host and a domain name to build a website, so it’s really nice that Bluehost includes a free domain for the first year. You can choose your domain as part of the signup or you can do it later.
When you are ready to create your domain name on Bluehost, type it into the box labeled “Create a new domain.”
You can select other domains besides the ones that end in “.com”. Bluehost lets you get .org, .tech, .io, and others. This is helpful because tons of the .com names are already taken.
When you enter your idea, Bluehost will let you create the domain if it’s available. If not, they will offer suggestions of domains that are available and close to the name you typed.
For example, I tried to create bestmarketing.com, which was already taken. Here are the suggestions from Bluehost:
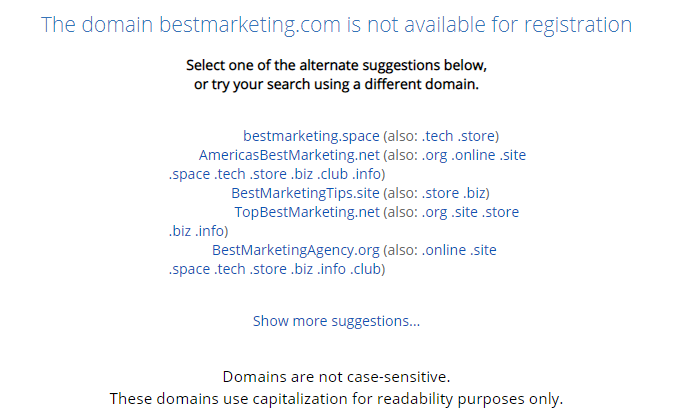
As you can see, there are plenty of options available that are pretty close to what I wanted.
It can take some time to come up with a domain name you like. You want something that speaks to your business, your brand, and your goals.
Don’t overthink it though. While some names might be a bit better than others, it’s ultimately a very small part of your business, compared to the actual content on your website.
Come up with a few names using the following methods, then put them aside for a night and pick your favorite in the morning.
Option #1 – Brute Force Method
If you’re a particularly creative person, you can try your hand at coming up with a great domain name by yourself, off the top of your head.
This was much easier years ago, when fewer good domain names were taken, but it’s still possible if you get creative.
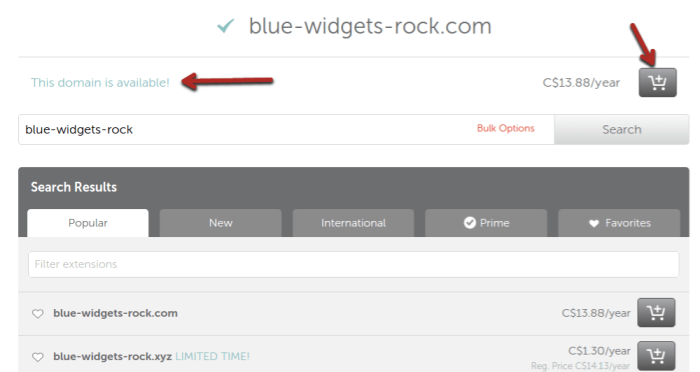
Pick any domain name registrar (where you can purchase the domain), and then search for the domain names that you come up with. It will tell you if the domain is available to purchase or not.
Note that you should try to avoid using hyphens in a domain name, even if the domain name registrar is trying to give you the deal of the century. If you’re brand new, take some time and review this list of domain name best practices.
One of the most highly rated domain registrars is Domain.com
Option #2 – Use a Tool
If you need a little spark in creativity, there are some great free domain name generators at your disposal.
Enter one or two keywords and the generator will look for ways to combine those words into a domain name. The really convenient part is that they also show you if the domain is available.
You can register a name through the link they provide (which will be an affiliate link to a domain name registrar), or just go to your favorite registrar and do it.
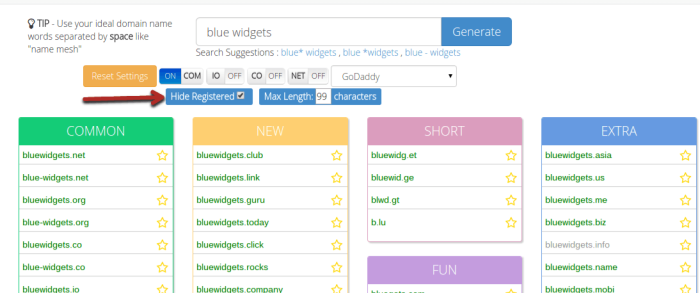
The first tool example I have is NameMesh. As the name suggests, it tries to mesh words together. If you check the “hide registered” button, you’ll only see domain names that are actually available.
Another good tool is Panabee. It works in the exact same way, but could give you different results. If there’s a blue heart next to the suggested domain name, it means that it is available for purchase.
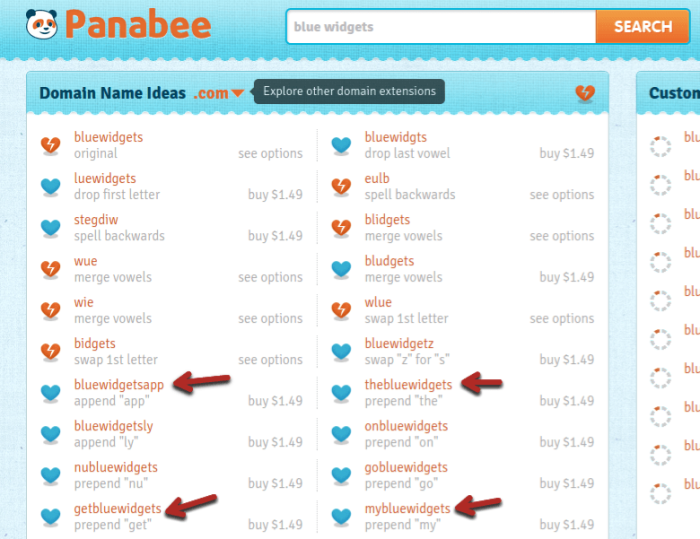
Many of the names will be silly, but you’ll typically get a few that are pretty good.
Once you’ve picked a domain name, you need to register it and then point your domain name to your hosting account. This is fairly simple. Your hosting company will send you an email after registering that will contain DNS servers (which look like web server addresses).
If you Google “[name of domain registrar] + DNS servers”, you can typically find a help document that will show you where to input your domain name within your hosting account.
In some cases, you might find your preferred domain name is unavailable. If that happens, try mixing up the words, or adding a verb to the name.
Build a Website Step 3: Choose a CMS
CMS stands for content management system.
Remember that you store your website’s files on your hosting server. If you really wanted to, you could edit these files every time you wanted to make a change to your business website.
Obviously, that’s kind of a pain to do.
A CMS lets you edit your website from the domain itself. You can log in to the domain and then customize your layout, settings, and content, and create new posts and pages, often using website templates that are easy to use.
In other words: It makes creating and updating a website much easier and saves you a ton of time.
There’s no perfect CMS. There are hundreds out there, some better than others. In general, though, all of the top ones have different strengths and weaknesses.
I’m operating under the assumption that you’re just trying to get a relatively basic website or blog up and running. If you are, stick to one of the popular CMSs that I’m about to outline. It will make your life a lot easier.
If you’re trying to create a custom web app or complicated tool, you’re going to need a custom solution. Either partner with a developer for your project or hire a development firm.
It would be impossible to show you, step-by-step, how to install each of these on every web server, but you can find a tutorial if you Google or search on Youtube for:
“install [CMS name] [hosting company]”
Option #1: WordPress
WordPress is the king of CMSs. It is by far the most popular option for this and it’s user-friendly business website templates and ease of social media sharing.
Just to save from some confusion: WordPress.com is the third party site where you can create free blogs, but WordPress.org is where you can download the WordPress software to install on a website.
WordPress rose to fame as a fantastic blogging platform. If you’re mainly looking to set up a blog-based website, it’s a great option.
It features a very intuitive admin back end that makes changing the most basic website template options, as well as creating new posts and pages, simple.
One area that is both a strength and a weakness is plugins.
WordPress has over 57,000 plugins in its library – it’s huge.
This is good because it means that you can use plugins to make WordPress do almost anything that you want, including using social media to drive traffic to your business website.
However, not all aspects of plugins are good:
- They can bloat your site: It’s important to not get carried away with plugins. If you have too many, they will significantly slow down your website.
- They can be security risks: When plugins are kept up to date, they’re pretty safe. However, since most plugins are free, the creators often stop maintaining them. Over time, they can become security risks and can lead to your site getting hacked.
- They aren’t heavily reviewed/tested: Anyone can publish a plugin for WordPress without approval. So, when you install a plugin, you take a risk. Sometimes you will update a plugin and it will crash your entire site.
Overall, plugins are nice to have when you really need them, but try to minimize how many you use. For more, check out this video:
Option #2: Joomla
Right behind WordPress is Joomla. It’s not quite as intuitive but is still relatively simple.
Again, it’s fairly easy to create and edit posts and pages and you have some control over website settings.
Also, like WordPress, Joomla has a large (not quite the same scale) library of plugins. But again, these share the same limitations. They are not tested by anyone and often get outdated, leading to security risks.
Option #3: Drupal
Of these first three website building options, Drupal is the most advanced. It will be the hardest to learn, but it also allows you to customize more.
It’s a lot like Lego blocks, where you put together the pieces that you want (not easy for beginners).
Instead of plugins, Drupal has modules. It isn’t as big as either of the alternatives, but there’s a reason for that. Drupal shows you which modules are under active development and are being maintained. This goes a long way toward mitigating your business website security risks.
I wouldn’t really recommend Drupal for a beginner, but if you know you’ll need some advanced customization, it might be an option as far as a website template.
Option #4 – Rainmaker
The Rainmaker Platform isn’t as popular as the first three options, but I wanted to include it. It was created by the geniuses at CopyBlogger, which is how you know it’s a high-quality product.
The reason I included it here as an option is because it’s not only a highly polished CMS, it’s a CMS designed specifically for Internet entrepreneurs.
Here are just some of the features it provides:
- Build membership sites, forums, and online training courses
- Upload, manage and sell digital products like software, ebooks, and more
- Built-in analytics & reporting
- Built-in A/B Testing
- Cloud-hosted, with upgrades, maintenance, and security, all taken care of.
- Export content to WordPress at any time you choose.
Those are some very unique and useful features, solving problems that internet marketers often have, without having to find a plugin or service to use.
You’ll notice that many aspects look like WordPress because it is based on WordPress.
One limitation is when it comes to themes (I’ll go into more detail shortly).
Rainmaker is limited to Genesis themes. There are currently around 30 of them. If you like simplicity, this makes it easy to find an attractive theme, so maybe it’s not really a weakness.
Once you pick a theme, it’s fairly simple to apply any custom CSS or design changes that you’d like:
One really big bonus is that it supports so many content types.
Instead of having to buy a landing page tool or find a good podcasting platform, you can use the content tools provided. This helps with social media brand building.
Finally, you can monitor traffic and do conversion rate optimization, right in the CMS. That’s an incredible feature, done in a simple way, which is great for beginners.
The main limitation is that if you want a feature that is not built-in, you’re out of luck. There are no plugins on the Rainmaker platform at the moment, so what you see is what you get.
Build a Website Step 4: Choose Your Brand Identity
At this point, you have some sort of website up and running.
Now, we have to make it awesome.
For any major CMS, you’ll install a theme. Themes are built on the basic CMS but are customized to look and function differently. This allows themes to be built for different businesses: artists, entrepreneurs, podcasters, local businesses, etc.
I’m going to go over themes for the main 3 CMSs I outlined above. They all work virtually the same.
How to Find a Great WordPress Theme to Build a Website
You have a few different options when it comes to choosing a WordPress theme. The first option is to search within WordPress.
Go to “Appearance > Themes” in the side menu and then click “add new” at the top:
You can sort themes by “featured”, “popular,” or by any advanced “feature filter” that you’re looking for.
If you like the look of the theme’s thumbnail, click anywhere on it to bring up a preview window.
If you like the preview (on the right panel), click install. Otherwise, click the “X” button and you’ll go back to your search screen.
Once you install a theme, you need to activate it for it to light up on your website. You can do that directly from the successful installation screen. Or, go back to your main themes page and you’ll see your new theme as an option.
Click it like before, but this time there will be an “activate” option, as well as a “live preview” option if you’re not sure that you actually want to activate it.
The second option is to find a theme using a third party site. These are typically premium themes, so expect to pay $30-60 for a theme. You can find some great free themes, but the best ones are all premium options.
It’s a one-time fee and I recommend it if you’re serious about your business. You can always start off with a free theme and convert to premium later, though.
The most well-known marketplace is Themeforest, but, if you’d like to try others, just search for “WordPress themes” in Google.
What you’ll find, with Themeforest, is that there are a lot more options:
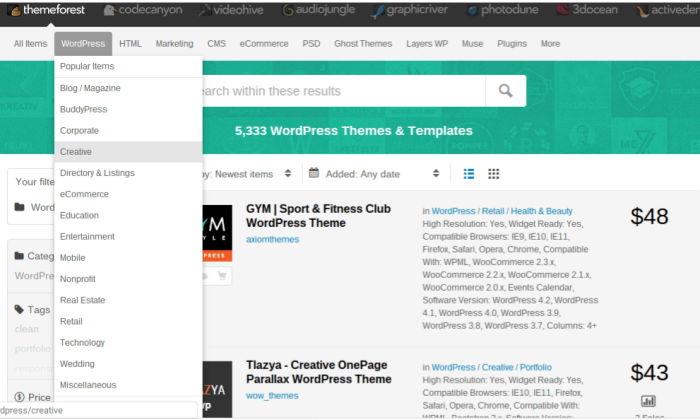
You can sort themes by category, tag, price, popularity and more. On the right, you’ll see a price for the theme, as well as the amount of sales it has.
If you click on a theme, you can see any reviews, as well as a preview and more details about the theme.
With a premium theme, not only do you get better themes in general, but you also get support from the theme creator themselves, which can be very useful to beginners.
Build a Website Using Drupal Themes
Drupal, like WordPress, has their own depository of themes. The difference is that it’s located outside of the admin panel.
The search engine isn’t quite as friendly, but you still have a decent amount of theme options (I wouldn’t say as good as WordPress, though):
There’s no easy preview, in most cases, so you’ll have to go into each theme and look around for links to documentation and demos.
If you do find one that you like, scroll down a bit, under the intro for the theme, to the downloads section. Download one of the most recent versions.
Pay special attention to the version number. Version 6 themes will not work on version 7 of Drupal and vice versa.
You’ll need to upload the theme into the theme directory in Drupal:
/sites/all/themes/yourThemeName
Then, navigate to “administer > themes” and click “enable” on the new theme. Finally, you’ll need to go to user preferences and select the new theme.
If it sounds difficult, here’s a short tutorial that shows you how to do it:
You can also buy premium themes for Drupal, which I highly recommend. They are much easier to search through, plus they typically look nicer as far as a website template. Again, you can use Themeforest or any other theme marketplace that you’d like.
Build a Website with a Joomla Theme
Joomla is a bit different, in that you’ll need to find a theme on a third party site. But, if you search for “free Joomla themes,” you can find many solid free options.
Alternatively, you can still use Themeforest, or any other premium marketplace.
The installation is pretty straight forward. You need to download the theme and then upload it to your CMS.
Watch the following video to see how to do it:
Build a Website Step 5: How to Edit your Website Without Messing Everything Up
I remember being a complete beginner to all things internet and being scared that I would break a website. While it’s not likely to happen if you’re careful, it can happen.
One of the most important steps to build a website is to protect it by using a child theme. A child theme is typically a style sheet that is kept separate from the rest of your theme’s files on the webserver.
You can input CSS into a child theme to customize the look of your website. There are 2 reasons you do this:
- It’s hard to break your site – you can always go into your hosting and simply remove the child theme files, if necessary.
- It protects you from updates – if you update a theme in WordPress (which is needed often for security reasons), it will wipe out any changes that you made in the theme files themselves. A child theme will not be affected, so you don’t have to waste time redoing your changes.
Create a Child Theme in WordPress
The reason that most sites are hacked is because of outdated software. Considering how often WordPress, its themes and its plugins get outdated, you need to always update everything, when possible on your web server.
A child theme is a necessity in WordPress.
Creating a child theme involves creating a new CSS sheet (you can use a simple text editor) and adding basic theme information (look at the picture below).
From there, you just need to upload it to WordPress (like any other theme) and activate it. Since there’s no functionality in your child theme, WordPress will keep using the parent theme (as long as you identify it correctly in the child theme).
Here is a complete and simple guide to creating a child theme.
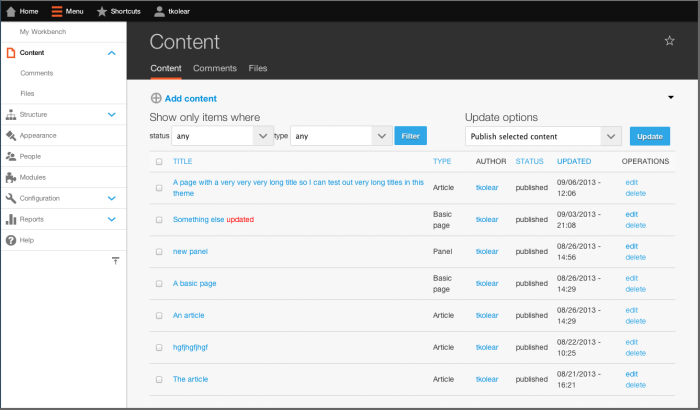
Once you have a child theme, you can see it by navigating to “Appearance > Editor”. You can add any custom CSS that you want and then click “save” for your changes to take effect.
Create a Sub-Theme in Drupal
If you go with Drupal, you can’t create a “child” theme, but you can create a “sub-theme”.
It’s the same concept. You can apply styles to sub-themes, which will override the parent theme.
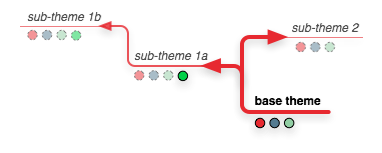
Here’s a complete guide to creating a Drupal sub-theme.
Create a Duplicate Theme in Joomla
You can’t create child themes in Joomla. The closet you can get is to create a duplicate theme.
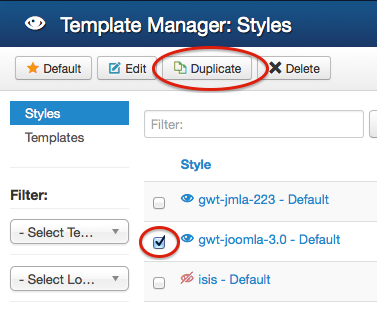
When you click duplicate, it will create an exact copy of the original theme and become the default copy.
Note that this is not the same as a child theme, unfortunately. Essentially, you’re creating a new duplicate theme, once in a while, to serve as a backup, in case something goes wrong.
Step 6 to Build a Website: Start Marketing Your Business
At this point, you should have a website that works and looks decent.
You can finally finish with most of the technical part of building a website and move on to the things you originally wanted to do.
While it will vary, depending on your project or business, try to do the following four things next.
Step #1: Get a logo
Branding yourself is important. A logo is one of the main ways that customers will recognize your business.
If you have a business already, you may have a logo, which makes this easy. If not, you’ll need to get one created. Here are a few different options to find designers:
- Fiverr: You’ll pay $5-20 to get a logo. You won’t get an amazing logo for that price, but it may be okay to get you started.
- Upwork: Post a job here and designers will apply to create your logo. Foreign workers are typically very cheap, while experienced Western designers could cost a few hundred bucks. Again, you get what you pay for.
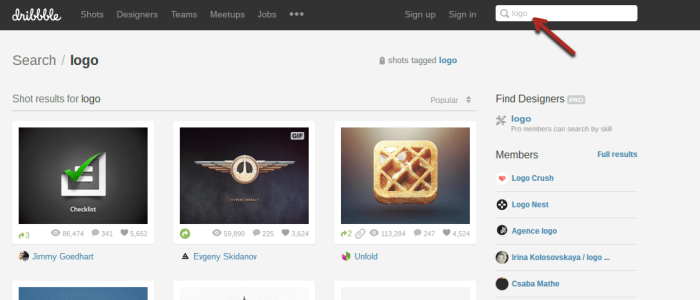
- Dribbble: If you want a top-notch logo, search for “logo” on Dribbble. Browse the designs that come up, until you find a designer that you love. Contact them and hire them. This is the priciest of all options.
Step #2: Write Your Website Copy
Right now, you have a pretty empty website. Start by getting familiar with your CMS. Then, create basic pages, like the “About” page.
Next, start filling in your home page with the first message(s) that you want new visitors to see.
Step #3: Install Google Analytics
While analytics don’t matter right away, you’ll want to start gathering data right away.
Install Google Analytics code into your website, so that you can track any visitors. Then read this guide to Google Analytics so you can start understanding how your website performs.
Step #4: Plan your Marketing Strategy
Now that you have a website and know how to use it, it’s time to figure out how you’re going to get visitors to the site.
I’ve written tons of articles on creating marketing strategies and generating traffic. Now, you can finally put them to use:
- The Beginner’s Guide to Online Marketing
- How to Grow Your Blog Traffic by 20,000 Visitors a Month
- The Advanced Guide to Content Marketing
- 13 Content Marketing Hacks That Will Help You Attract More Clients
- 9 Link Building Resources That’ll Increase Your Search Rankings
Conclusion
Before you get started with the six steps to build a website, I need to tell you one more thing: Be patient.
Everyone struggles a bit to build their first website and most struggle while building their first few. You will get better, the more that you practice.
If you’re getting frustrated with something, take a deep breath, relax for a minute, then Google your problem. If you stick to one of the CMSs in this article, there are tutorials for just about everything out there.
Alternatively, make use of Youtube. It’s often easier to follow along with a video than it is with a text walkthrough.
And, while getting a website up and running won’t make you a success overnight, it’s your first step up the mountain.
Keep learning, keep testing and you will slowly but surely see real progress.
If you have any questions about how to build a website, let me know in a comment below. I’ll try to clear things up.

See How My Agency Can Drive More Traffic to Your Website
- SEO - unlock more SEO traffic. See real results.
- Content Marketing - our team creates epic content that will get shared, get links, and attract traffic.
- Paid Media - effective paid strategies with clear ROI.
Are You Using Google Ads? Try Our FREE Ads Grader!
Stop wasting money and unlock the hidden potential of your advertising.
- Discover the power of intentional advertising.
- Reach your ideal target audience.
- Maximize ad spend efficiency.