How to add products to WooCommerce: The full guide for 2024
By: Bernard Meyer — Jul 16, 2023
Reading Time: 9minutes
Running an ecommerce store has become one of the most profitable business ventures of all time. The cost of starting an online store is low and you can sell just about anything online and earn a steady revenue stream.
WooCommerce is one of the best ecommerce platforms you can use to launch your online store. The platform integrates seamlessly with WordPress to make it easy for you to create your ecommerce store and start selling online.
After setting up your WooCommerce store, you need to add the products you will be selling through your store. How you present your products determines how many units you will sell. Present them well and you will have customers flocking to your online store to buy your products.
That’s why it’s important to take the time to learn how to add products to WooCommerce. In this post, we’ll take you through the process of adding products to your WooCommerce store and configuring every product detail.
Boost your WooCommerce store’s revenue by up to 85% using our email marketing plugin.
The process of adding products to WooCommerce is straightforward. WordPress simplifies the process to make it easy for anyone to add WooCommerce products and start selling to customers.
After installing WooCommerce, here’s how to add products to WooCommerce:
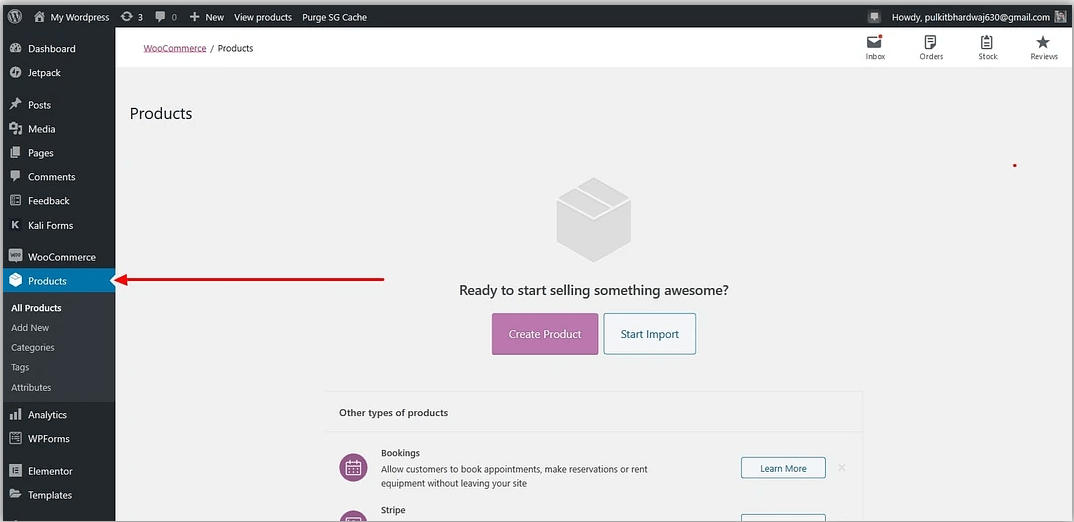
Go to WooCommerce > Products
Select Create product
This will launch a WordPress editor that allows you to modify your WooCommerce product listing.
Add the product title and description
This is a step for adding products to WooCommerce that most business owners forget, yet one of the most important ones for ecommerce success. Good product name and description are crucial for SEO and driving organic traffic to your ecommerce store.
Additionally, without a good name and an appropriate description, customers will not get all the information they need to make a purchase decision and that will harm sales.
Write the name of the product in the title section. Make the title as descriptive as possible so customers know what they are about to buy at a glance. Next, write a brief product description, highlighting the key product features, benefits, and use cases.
The image below shows the sections for writing the product title and short description.
Select product type
The next thing you need to do as you figure out how to add products to WooCommerce is to select the product type. WooCommerce has many product types you can choose from for your WooCommerce product listings, such as:
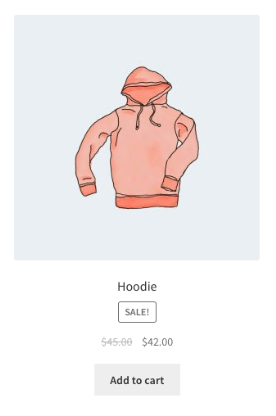
Simple product
This is the default WooCommerce product type that covers the majority of the products sold online. Most ecommerce store owners list their products as simple products, for example, a book.
The image below shows a simple WooCommerce product—a hoodie.
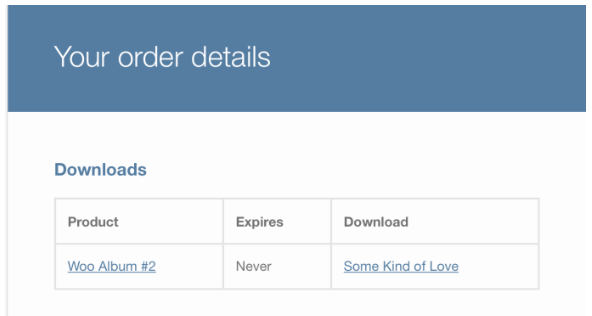
Downloadable product
You can choose this WooCommerce product type if the product has a downloadable file associated with it.
When customers buy your downloadable product, they receive a link they can use to download the file. Suitable examples of downloadable products you can sell on WooCommerce include eBooks, digital albums, and photos.
The image below shows an example where a shopper receives their order confirmation with a link to download a digital album they purchased from a WooCommerce store.
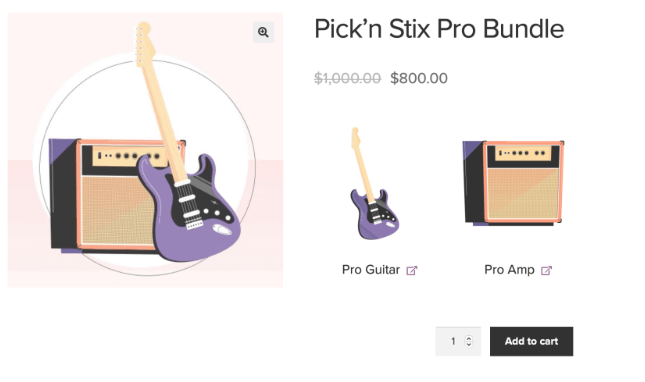
Grouped products
This is a collection of related products that are sold together as one.
Most of the time, the grouped product bundle is made of simple products that ecommerce store owners combine together to boost sales. An example of a grouped product on WooCommerce is a pack of t-shirts.
The image below shows a bundle that combines a guitar and an amplifier.
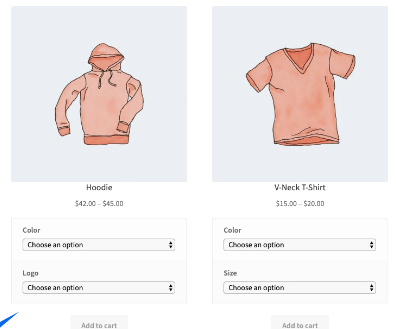
Variable product
As the name suggests, a variable product is a product with variations such as size and color.
Each of the product variations may have a different price, SKU, and stock option. For example, an ecommerce store owner may stock a t-shirt that’s available in different sizes such as “Small”, “Medium“, and “Large.”
The image below shows two variable products. The hoodie allows customers to choose a specific color and logo while the t-shirt comes in different colors and sizes.
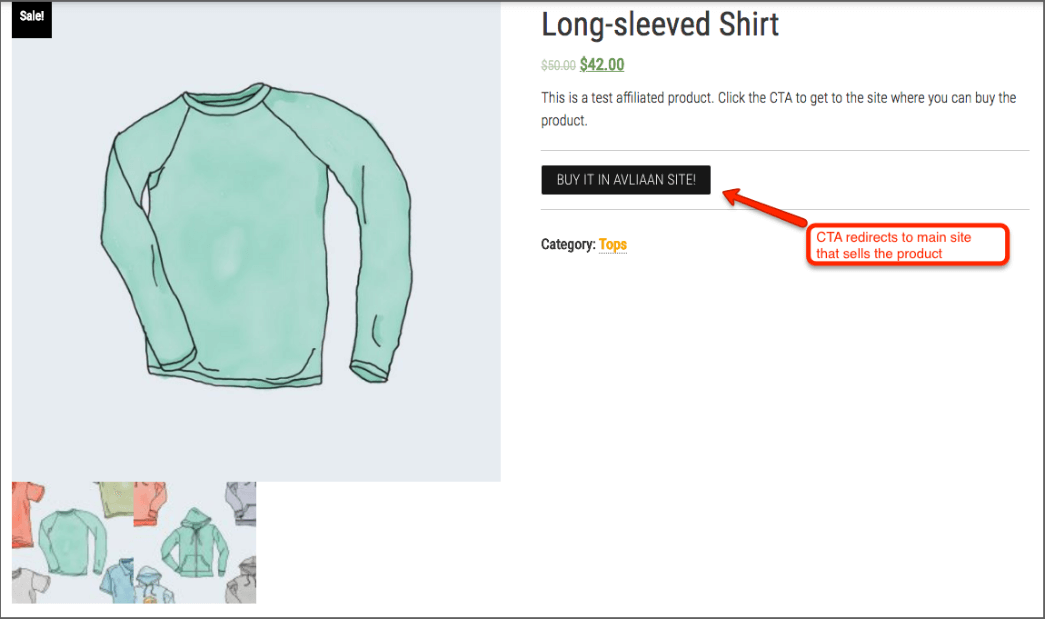
External/affiliate product
These are WooCommerce products that you list on your ecommerce store but are sold elsewhere.
For example, if you have an affiliate business, you can choose this option to add an “Add to Cart” button that directs customers to the original store.
The image below shows a product posted on WooCommerce. However, the CTA mentions the original site that sells the product.
Fill out the product data tab
After choosing your product type, the next thing you need to do as you learn how to add products to WooCommerce is to fill in the product data.
Use the tabs on the left of the WooCommerce dashboard to fill out all the necessary product data.
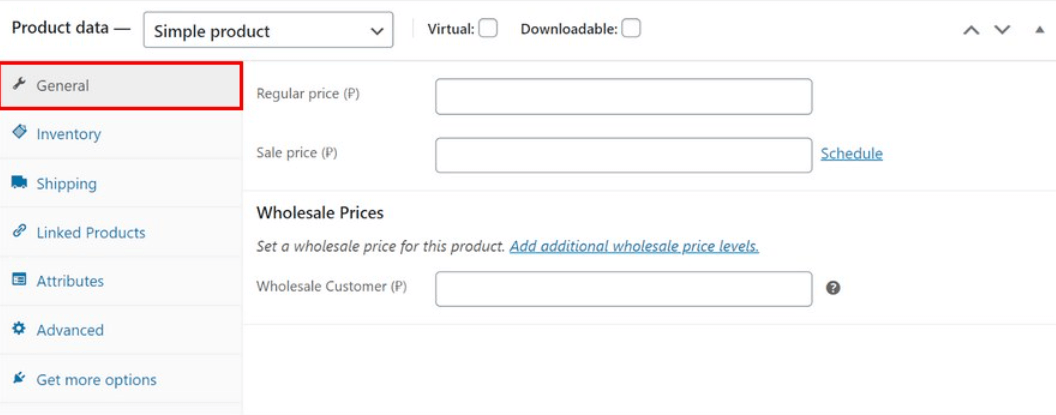
1. Fill out the general tab
The general tab is where you enter the different prices of the product as shown in the image below.
Regular price –This is the item’s default or regular price without any discounts or offers.
Sale price – This is the product’s discounted price that you can schedule for a certain time period.
Wholesale customer price – This is the discounted price for customers who buy products in bulk.
2. Enter the inventory data
The inventory tab allows ecommerce store owners to manage the stock of the products they sell and decide if they allow back orders or not.
The tab also helps with inventory planning since you will know how many products you have available for sale.
The image below shows a typical inventory data page.
SKU – The Stock Keeping Unit is a unique identifier that’s assigned to a product to track inventory. The SKU field accepts up to 255 characters, which can be letters, digits, and some special characters. You can assign the SKU manually or use a WooCommerce plugin to create unique SKUs.
Stock status – It indicates if the product is available or out of stock.
Sold individually – Ecommerce store owners tick the “sold individually” box to limit purchases to one item per order.
Generate up to $6.30 per email with our WooCommerce email marketing plugin
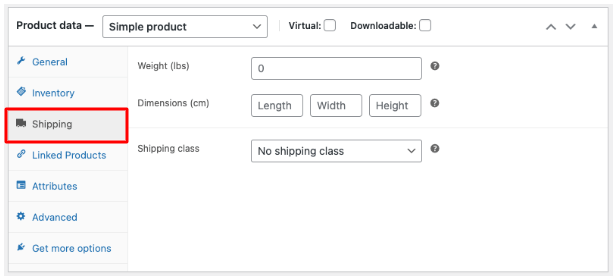
The shipping tab allows you to organize a physical product for shipping. By declaring the weight and dimensions of a product, you can find the best way to ship it to the customer.
Within the shipping tab, there’s a section called shipping class. The shipping rate of a product varies based on its weight. Shipping class groups products according to pre-determined weight limits.
For example, you can group products that weigh less than 10 ounces together into one shipping class and assign them to a particular fulfillment service. Heavier products can be grouped into another shipping class and assigned another shipment service.
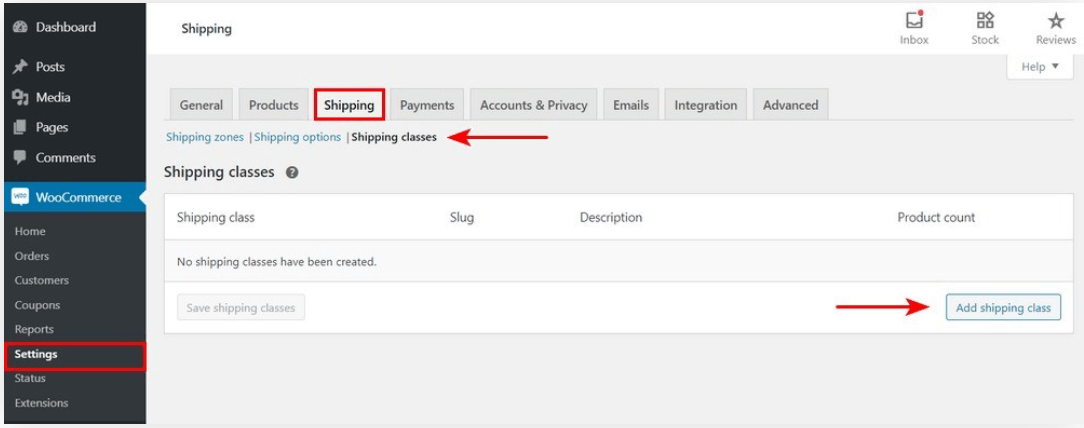
However, bear in mind that you need to enable the shipping class feature before using it. The procedure for enabling it is as follows.
Go to WooCommerce > Settings > Shipping > Shipping classes
Then click Add shipping class as in the image below
4. Linked products
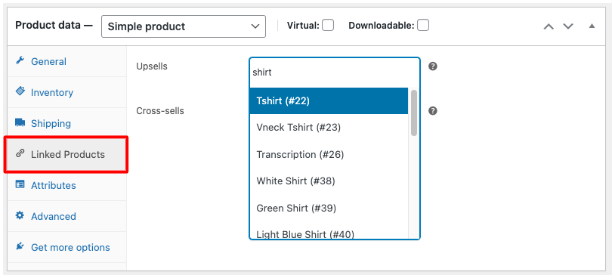
The linked products tab allows you to add appropriate product recommendations to your store.
When a customer gets to the ecommerce checkout page of your WooCommerce store, you want to give them relevant product recommendations to encourage them to spend more.
As you can see in the image below, there are two ways to recommend products in your ecommerce store, through cross-sells or upsells.
Cross-sells are products that are closely related to the product a customer has added to their cart. For example, when someone buys shoes on your ecommerce store, you can recommend a matching pair of socks.
Upsells are products you may wish a customer to upgrade to, based on what they are currently viewing on your ecommerce store or what they’ve added to their carts. For example, if a shopper is viewing coffee on your ecommerce store, you may want to display a coffee maker on the same page.
5. Attributes
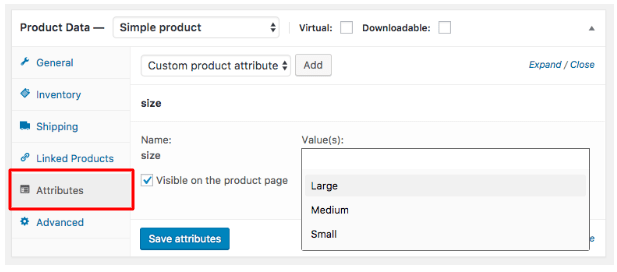
The attributes tab allows you to add specific product details, such as sizes, color options, and more.
When you set the attributes of a product, you give buyers the chance to select the features they want when making a purchase, such as their preferred size and color.
To add attributes to a product, select an attribute from the box and click add. Add the terms of that attribute and save.
The image below shows the attribute page on the WooCommerce dashboard.
6. Advanced tab
The other thing you need to pay attention to as you learn how to add products to WooCommerce is how to configure the advanced tab.
This section allows you to add specific operations on your ecommerce store, such as adding a thank you note that’s sent to a customer after they complete a purchase. You can also use it to enable or disable reviews for a product.
Write an engaging and compelling description
After filling out the product data, scroll down the dashboard to the product description box. Customers want to know more about the product and you can use this section to explain important product features and advantages.
The short product description we mentioned earlier in this post on how to add products to WooCommerce will appear adjacent to the product image in the WooCommerce product listing.
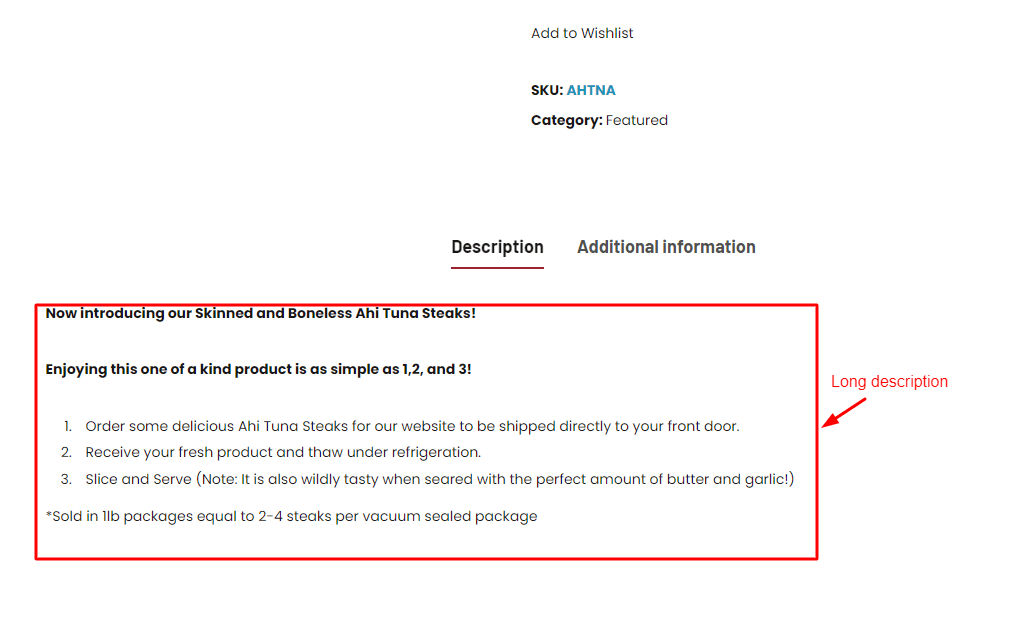
The longer, more detailed description will appear further down on the page like in the image below.
Source: customseafoods.com
Here are some best practices for writing the description paragraph:
The description paragraph should not be more than three sentences that are written concisely because the longer it is, the more difficult it becomes for search engines to index the description.
You can also use bullet points to improve readability like in the example above.
Add final touches
At this point, your product page is almost ready. What’s left is to add a few final touches. Voila! You have now mastered how to add products to WooCommerce.
Before you hit publish, add the following elements to the product page of your WooCommerce product listing.
Product categories and tags
Categories and tags are useful for organizing the various product options for WooCommerce. Customers can also use the product categories in your store to find the products they need.
So, try to make your product categories and tags logical to make it easy for customers to shop from your store.
Product image
With your product categories and tags set, the next thing you need to do is add the main product image. The product image will be larger than any other images on the product page. It will also appear on the catalog page.
Product gallery
You can also add extra images that will be displayed in the gallery of a product page.
Publish
Before you hit the publish button, go through all the product details to ensure everything is okay. You don’t want customers to come across misleading information that would cause them to leave your store without making a purchase.
That’s why it’s important to double-check everything to ensure all details are correct. Otherwise, your WooCommerce cart abandonment rates would be high and your store will struggle to be profitable.
Once you are sure everything is as it should be, you can hit the Publish button to make your product page live.
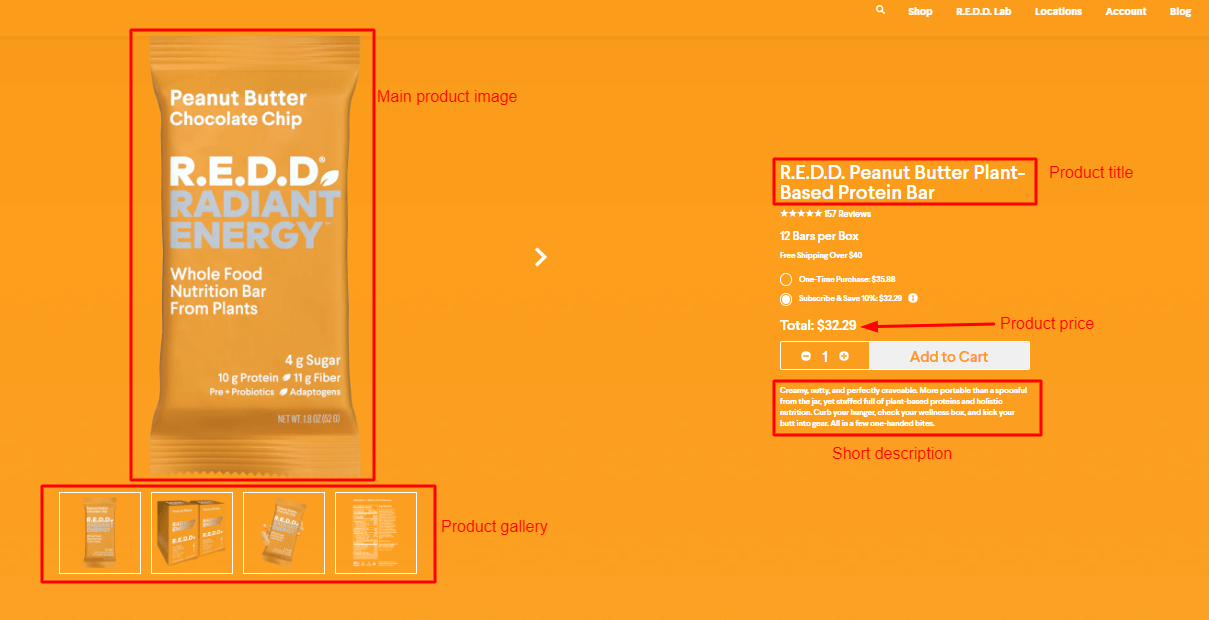
Below, is an example of what your product page may look like when it goes live on the internet.
Source: reddbar.com
The product title, price, short description, main image, and product gallery are visible when you load the page. However, you will have to scroll down to read the detailed product description.
Wrapping up
Running an ecommerce store has become very profitable, and WooCommerce provides one of the easiest ways to set one up. That said, you cannot run an online store without adding products to it.
This guide on how to add products to WooCommerce explains what you need to do to get your online store running. Follow the steps to configure your product pages before launching your WooCommerce store.
Generate up to $6.30 per email with our WooCommerce email marketing plugin
Want to boost your WooCommerce product page conversions? Get started with Omnisend for free today—it integrates seamlessly with WooCommerce.
Article by
Bernard Meyer
Bernard is the Sr. Director of Communications & Creative at Omnisend, with a passion for good research, helping ecommerce businesses with their marketing automation needs, and beating absolutely everyone in Mario Kart 64.
quick links
related features
These are the Omnisend features that can help you get the results mentioned in the article.